Manage Exchanges in Medusa Admin
In this guide, you’ll learn how to manage order exchanges.
Order Exchange Overview#
After items have been delivered to the customer, you can create an exchange where the customer returns the items and you send them a new one. Order exchanges are useful if the customer received an incorrect item or they changed their mind about the item they purchased, and you want to offer them a replacement.

Create an Order Exchange#
You can create an order exchange after the order's items have been delivered.
To create an order exchange:
- Go to an order’s details page.
- In the Summary section, click on the icon in the section's header.
- Choose "Create Exchange" from the dropdown.
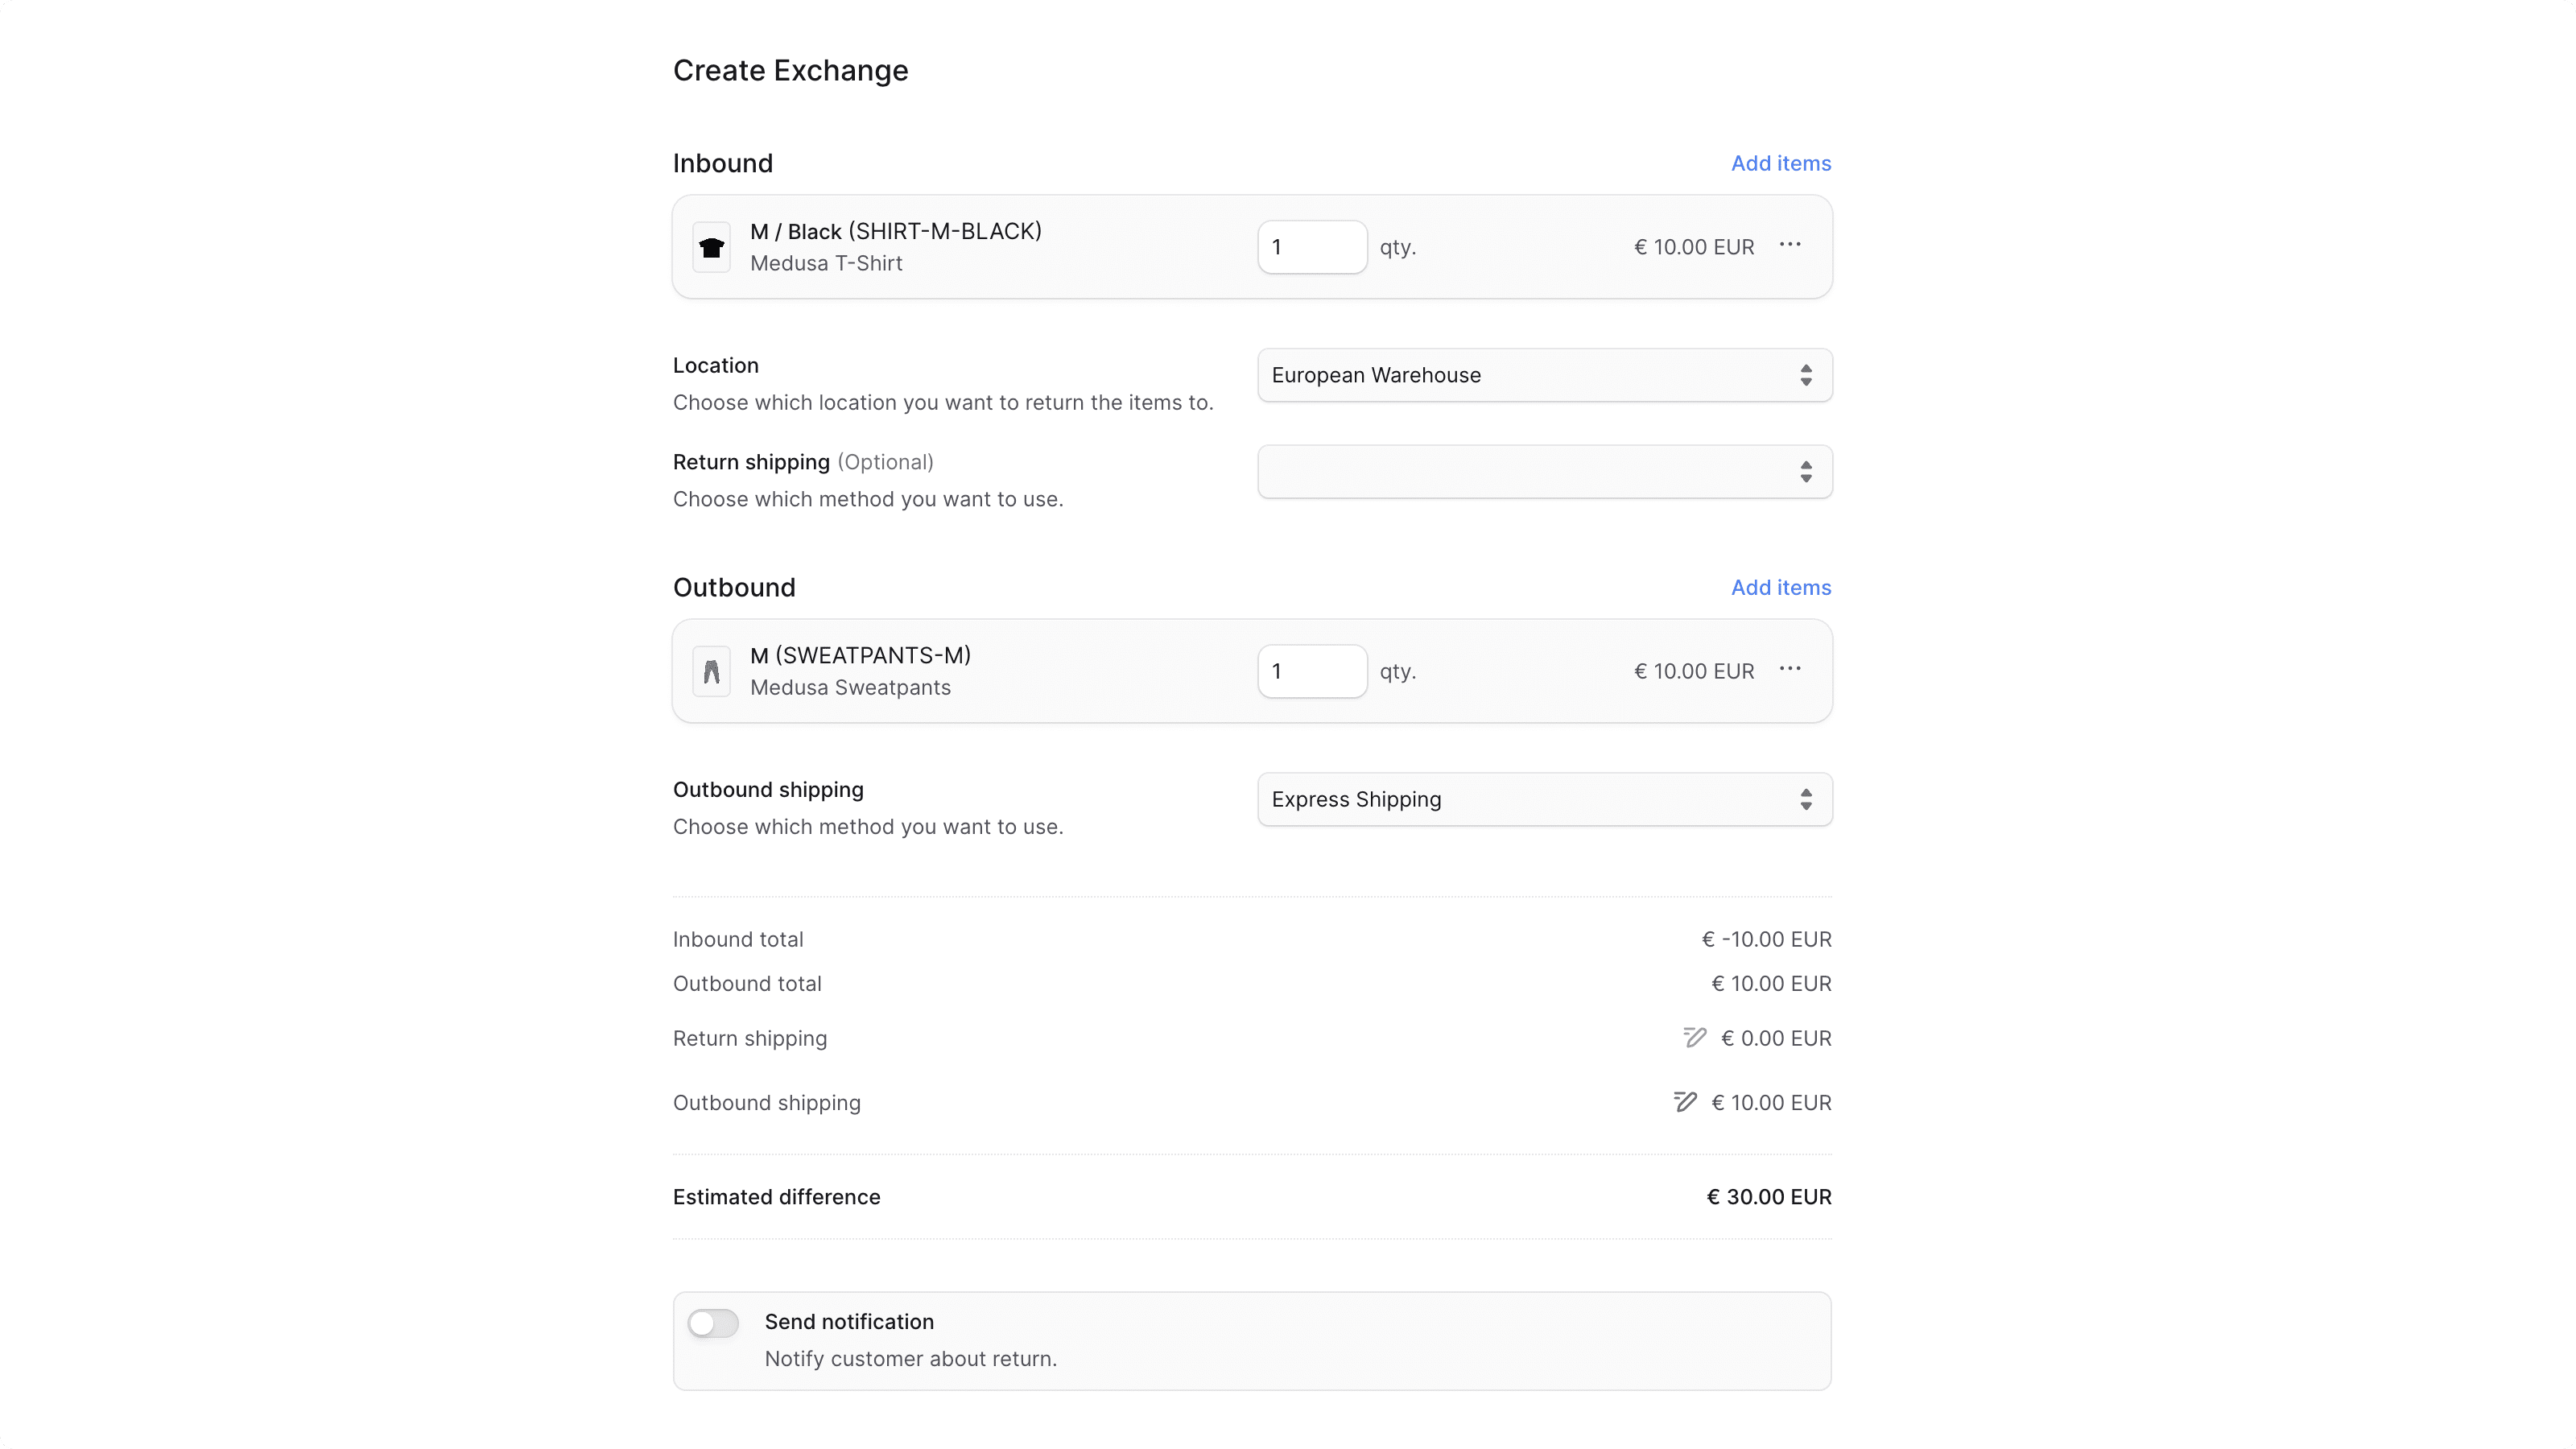
- In the form that opens:
- To add items to be returned:
- Click on the "Add items" button in the "Inbound" section.
- In the list that opens, click on the checkbox next to the items you want the customer to return.
- Once done, click on the "Save" button.
- You can then change the quantity to return or manage the item's details by clicking the icon next to it.
- For the inbound items:
- For the Location field, choose the location to return the items to.
- For the Return Shipping field, you can optionally choose the shipping method to return the items with.
- Choosing a return shipping method adds its cost to the exchange total. You can modify the cost by clicking the icon next to the Return Shipping total, then entering the new cost.
- To add an item to be sent to the customer:
- Click on the "Add items" button in the "Outbound" section.
- In the list that opens, click on the checkbox next to the items you want to send to the customer.
- Once done, click on the "Save" button.
- You can then change the quantity to send or remove the item by clicking the icon next to it and choosing "Remove" from the dropdown.
- For outbound items, choose the shipping method used to send the items in the Outbound Shipping field.
- The shipping method's cost is added to the exchange total. To edit its cost:
- Click the icon next to the Outbound Shipping total.
- Enter the new cost in the input shown.
- The shipping method's cost is added to the exchange total. To edit its cost:
- If the order has promotions, you can enable the "Carry over promotions" toggle to apply the same promotions to the exchange's items.
- You can only carry over fixed promotions with
EACHallocation type, or percentage promotions ofEACHorACROSSallocation types. Promotions are carried over to outbound items only.
- You can only carry over fixed promotions with
- If you want the customer to receive a notification that an exchange has been created, check the “Send notifications” toggle.
- To add items to be returned:
- Once done, click on the "Confirm Exchange" button, then confirm the action by clicking the "Continue" button in the pop-up.

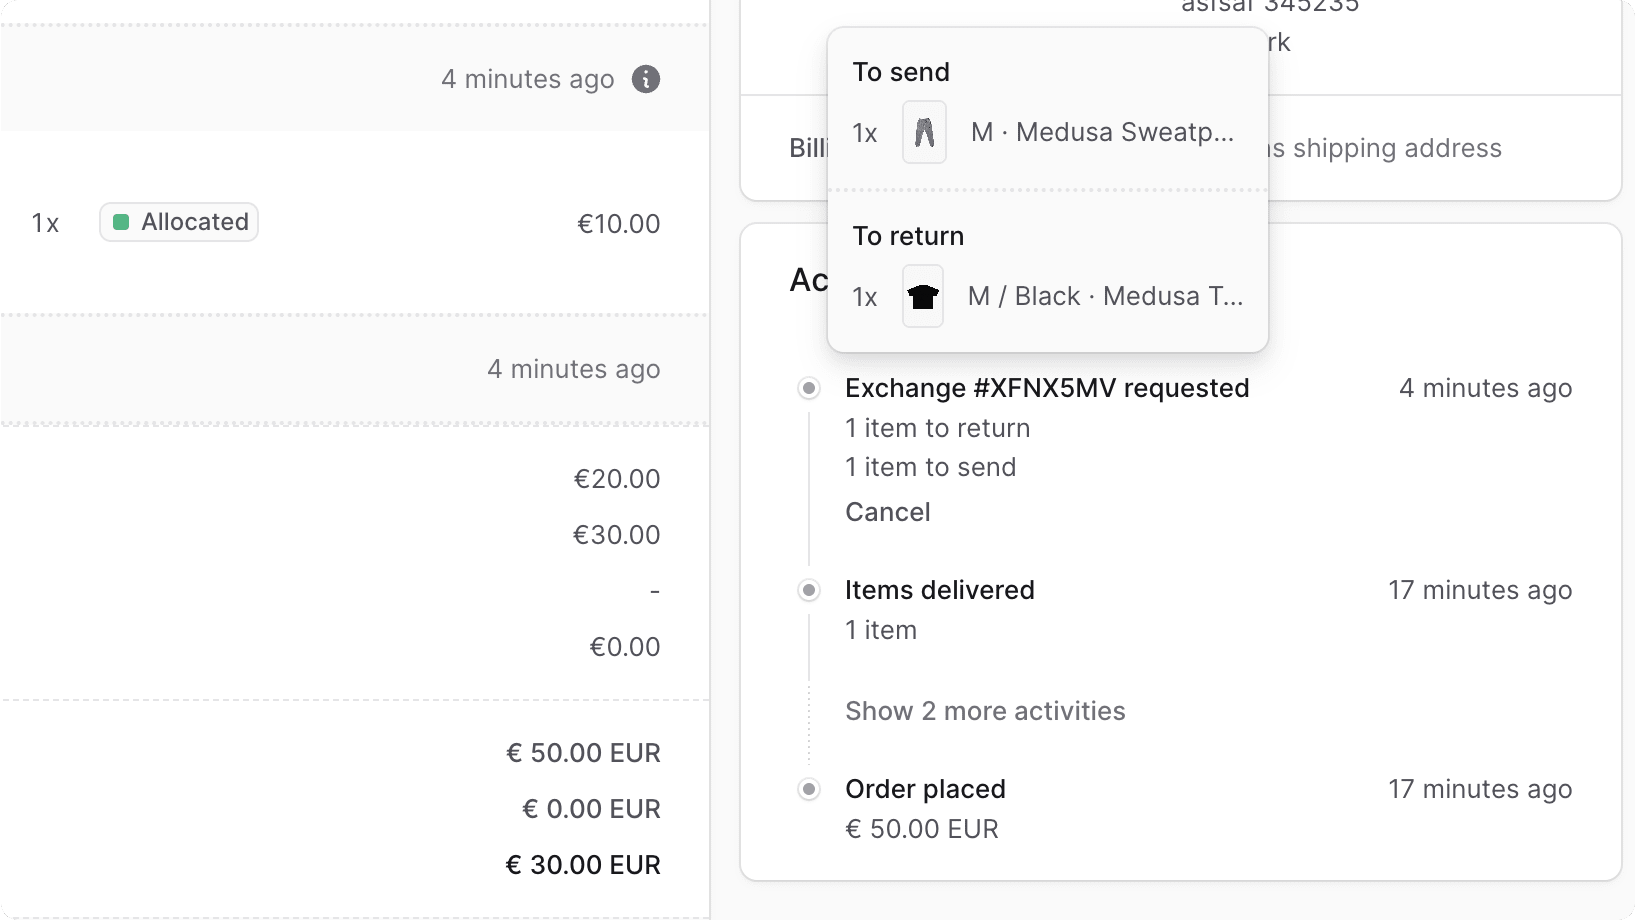
You can then see the exchange in the Activity section. The outbound items to be sent to the customer will also be added to the "Unfulfilled Items" section.
Handle Outstanding Payment of an Exchange#
After creating an exchange, you can check if there are any outstanding amounts (to be captured from the customer or returned) in the Summary section.
To handle outstanding amounts by refunding or capturing the payment, refer to the Payments guide.
Managing Returned Items in an Exchange#
The items to be returned from the customer as part of the exchange can be managed similarly to a return. Once you receive the items from the customer, you can mark them as received as explained in the Returns guide.
Fulfill Outbound Items in an Exchange#
As mentioned earlier, the outbound items of an exchange are added into the "Unfulfilled Items" section. To fulfill and deliver these items to the customer, refer to the Fulfillment guide.
Cancel an Exchange#
To cancel an exchange:
- Go to an order’s details page.
- In the Activity section, click Cancel next to the exchange.
- Confirm the cancellation by clicking the "Confirm" button in the pop-up.
The exchange will be canceled, and outbound items added by the exchange will be removed from the Summary and Unfulfilled Items sections.