Manage Product Categories in Medusa Admin
In this guide, you’ll learn how to create and manage product categories.
Product Categories to Organize Products#
A product category is a group of products that belong to a similar type or theme. For example, a "Shoes" category can include products like sneakers, boots, and sandals. Categories help customers find products that are relevant to them and make it easier to browse your store.
Categories can be nested within other categories to create a hierarchy. For example, you can have a "Shoes" category nested within a "Women's" category.
A product can be in multiple categories. You can learn how to set the categories of a product in this guide.
Product Categories List#
To view all product categories, go to the Product → Categories page. From here, you can see a list, filter, and search through all categories.

Create a Product Category#
To create a product category:
- Go to the Product → Categories page.
- Click on the "Create" button in the main section's header.
- In the form that opens, there are two steps:
- Details Step:
- Enter the category's name in the Title field. This is the only required field.
- The value of the Handle field is used in the category's URL on the storefront. It allows you to create a human-readable URL for the category. The handle must be unique across all categories, and it must contain lowercase letters, numbers, and hyphens (
-). If not specified, Medusa will generate a handle from the title. - Optionally set the category's description in the Description field.
- In the Status field, you can change the status to "Inactive" if you don't want the category to be shown on the storefront.
- In the Visibility field, you can change the visibility to "Private" if you’re creating an internal category that shouldn’t be shown to the customer.
- Once you're done, click the "Continue" button.
- In the second step, you can organize the category's ranking among other categories:
- To move the category around, use the icon to drag categories to their correct position.
- To nest the category, drag it under another category and move it slightly to the side.
- Once you’re done, click the Save button.

View Product Category Details#
To view a category's details:
- Go to the Product → Categories page.
- From the list, choose the category you want to view.

Product Category Status and Visibility#
In the first section's header, you'll find two badges:
- The first badge shows the category's status:
- Active: The category is active and shown on the storefront.
- Inactive: The category is inactive and not shown on the storefront.
- The second badge shows the category's visibility:
- Public: The category is visible to customers on the storefront.
- Private: The category is not visible to customers on the storefront. It's only used by admin users.
Edit Product Category's Details#
To edit a product category:
- Go to the Product → Categories page.
- Click on the category to edit. If the category is nested in another, you may need to expand the parent category by clicking the icon.
- Click the icon in the first section of the category page.
- Choose Edit from the dropdown.
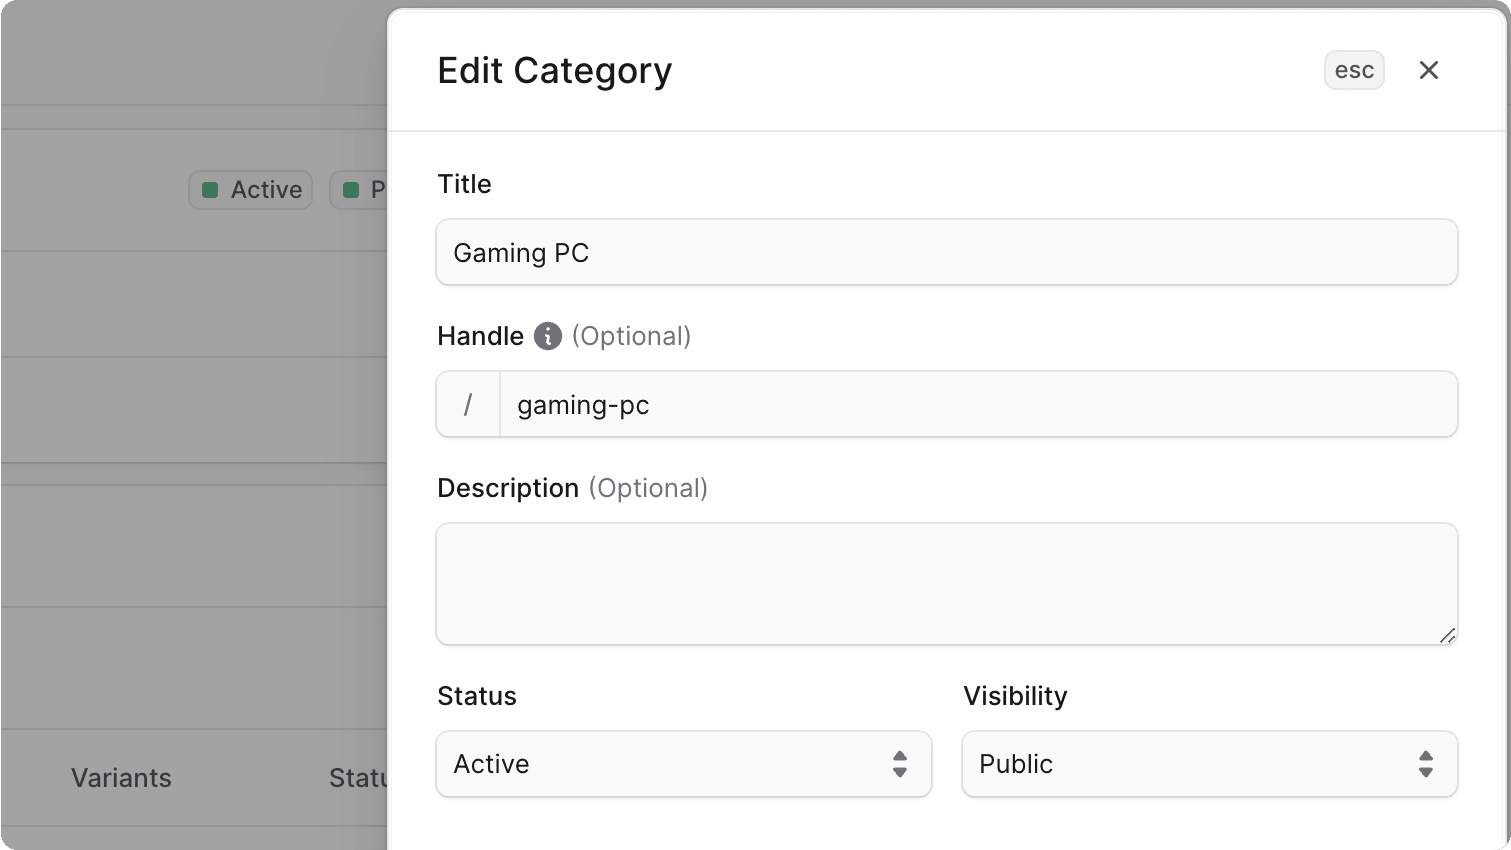
- In the side window that opens, you can edit the category's title, handle, description, status, and visibility.
- Once you’re done, click the Save button.
Manage Product Category's Translations#
Product categories can be translated to locales (languages) supported by your store. You can either manage translations in bulk, or manage translations for an individual product category from its details page.
To manage translations for the product category:
- Click on the icon in the first section's header.
- Choose "Manage translations" from the dropdown.
- In the bulk editor that opens, you can view and edit translations for the product category's title and description in each locale supported by your store.
- To edit text with multi-line support, double click the respective cell to open a larger text area.
- Once you're done editing, click the Save button to apply the changes.
Edit Product Category Metadata#
Metadata is custom data that can be associated with the product category in key-value pairs. This is usually used by developers for custom integrations or to store additional information about the product category.
To edit the product category's metadata:
- Go to the product category's details page.
- Click the icon in the "Metadata" section.
- In the side window that opens:
- Manage the key-value pairs in the table.
- To add a new row of key-value pairs before or after a row:
- Hover over the row and click the icon at its end.
- Choose "Insert row above" or "Insert row below" from the dropdown.
- To delete a row of key-value pairs:
- Hover over the row and click the icon at its end.
- Choose "Delete row" from the dropdown.
- Once you're done, click the Save button.
Manage Category's Products#
From the product category's details page, you can manage the products in the category.
Add Products to a Category#
To add products to a category:
- Go to the category's details page.
- In the Products section, click the icon.
- Choose "Add" from the dropdown.
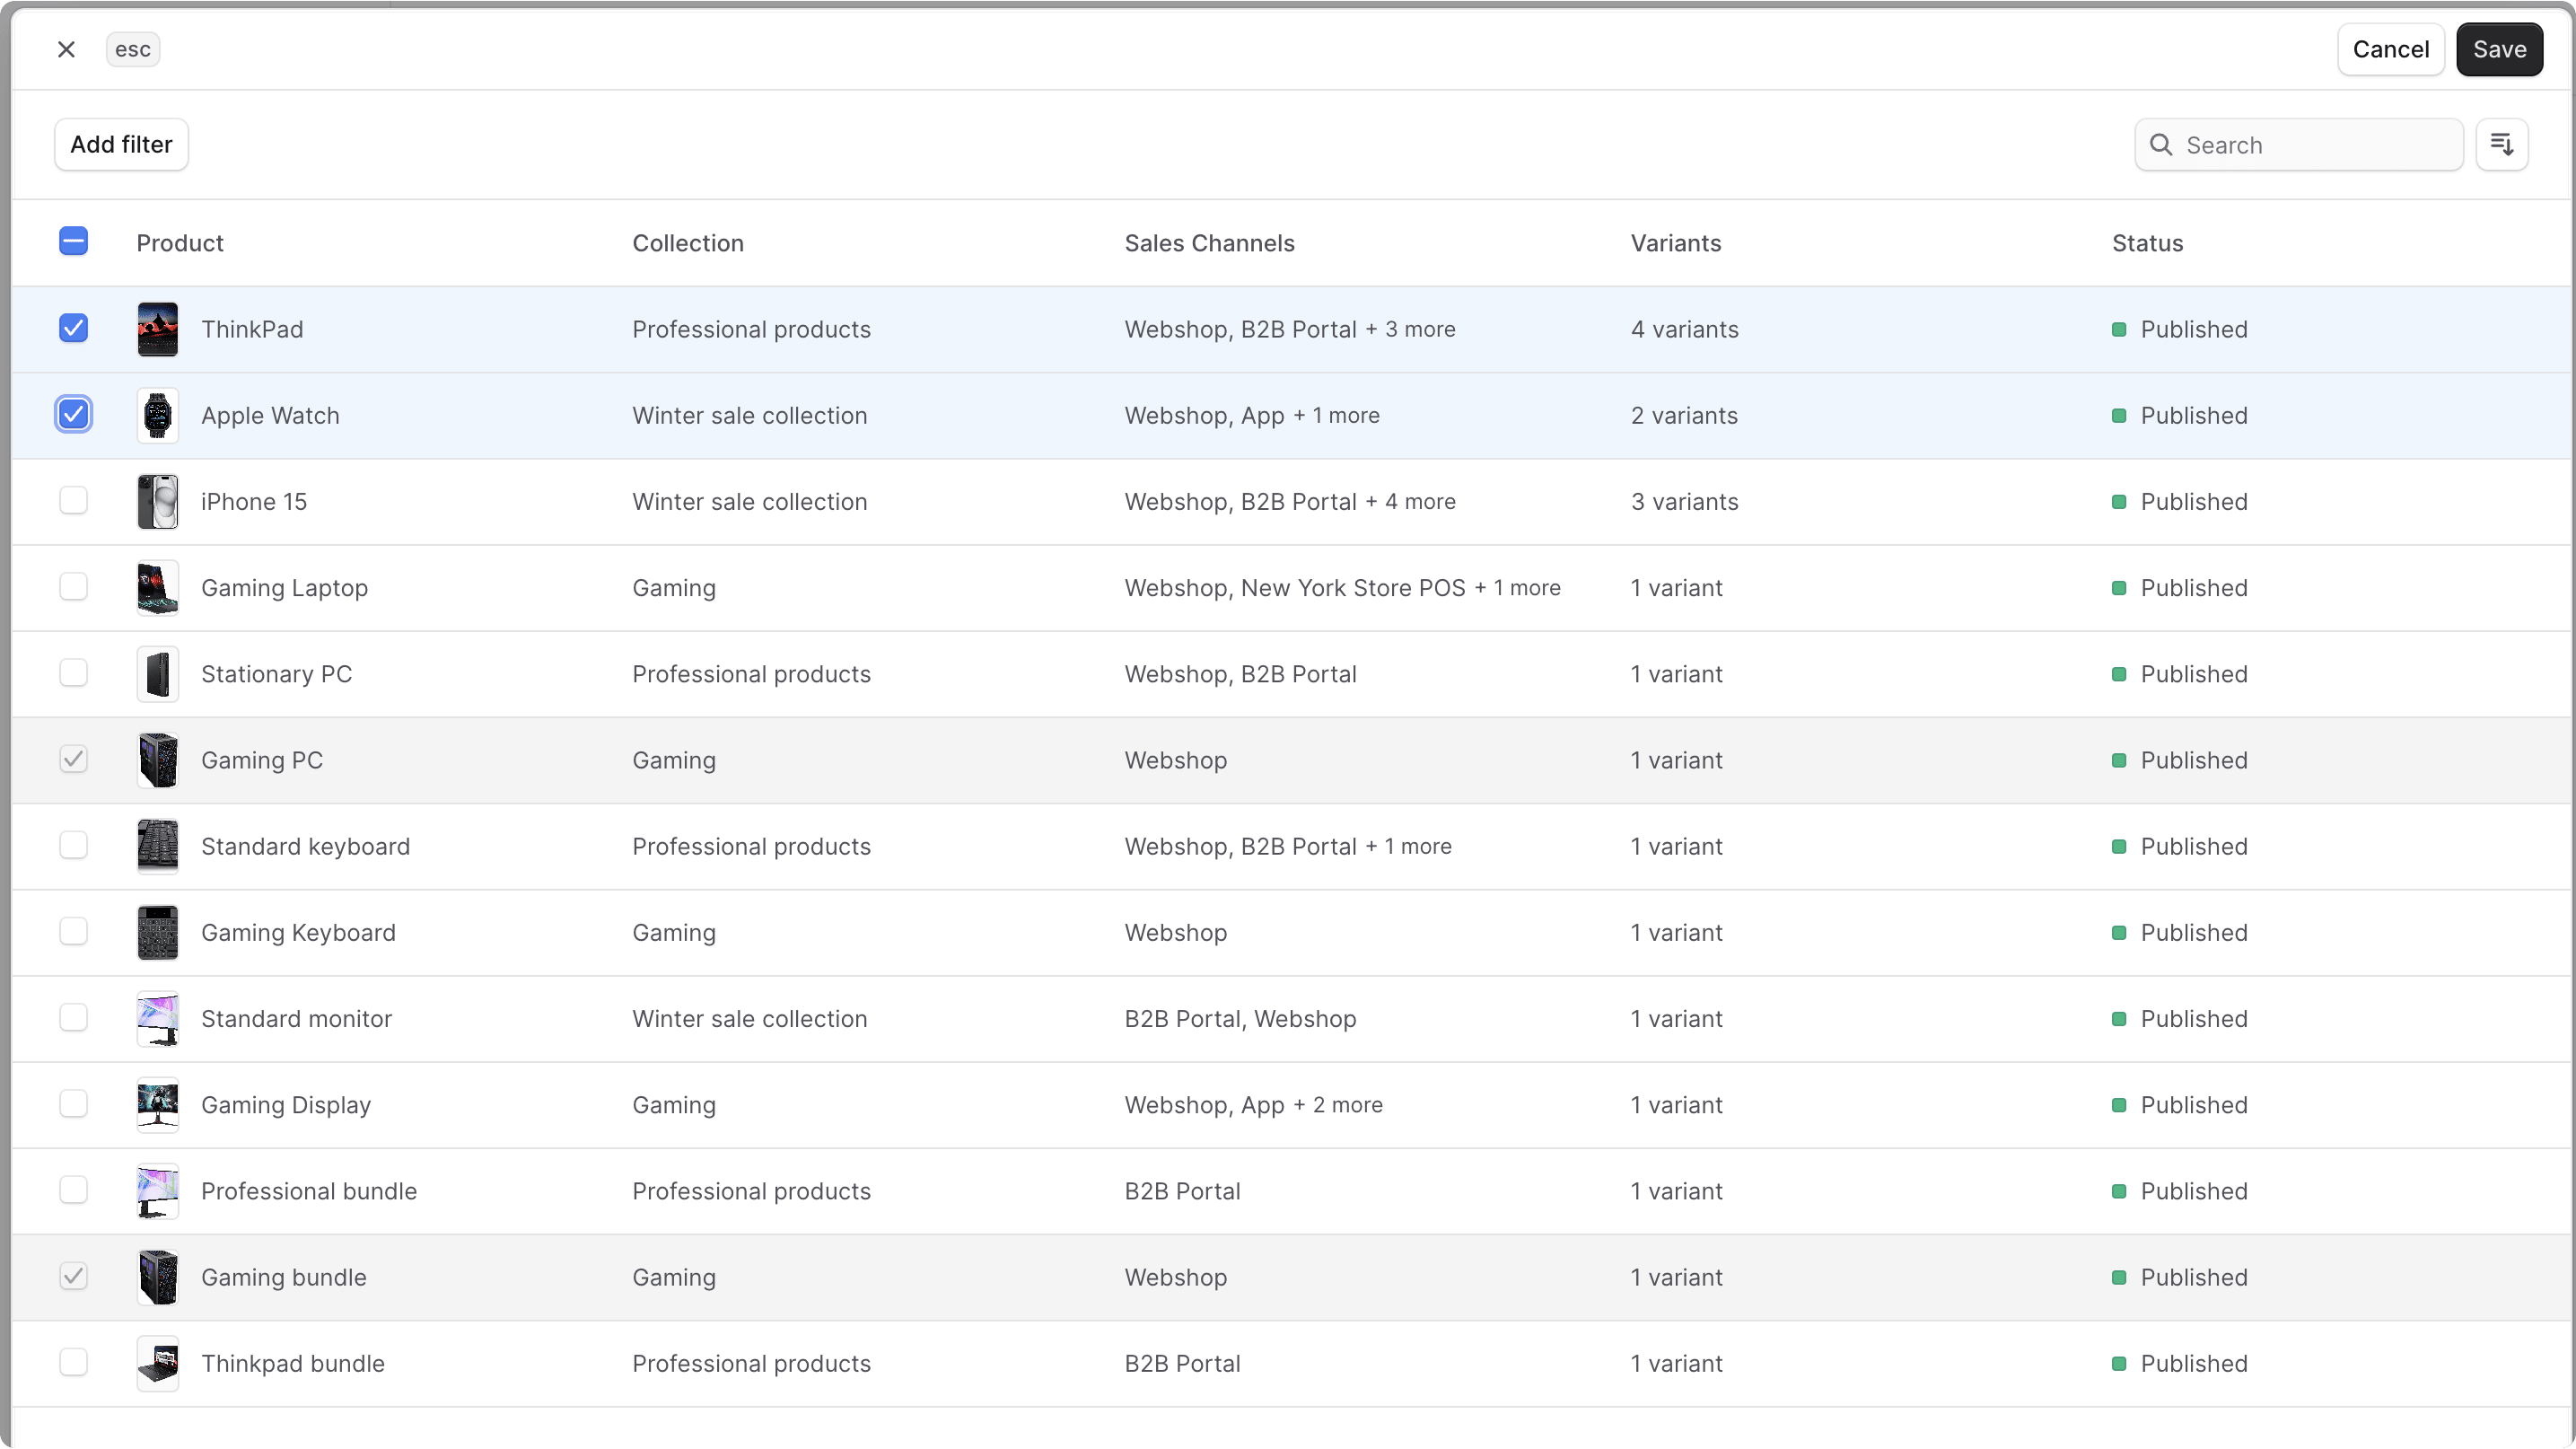
- In the list that opens, check the products you want to add to the category.
- Once you’re done, click the Save button.
Remove Products from a Category#
To remove products from a category:
- Go to the category's details page.
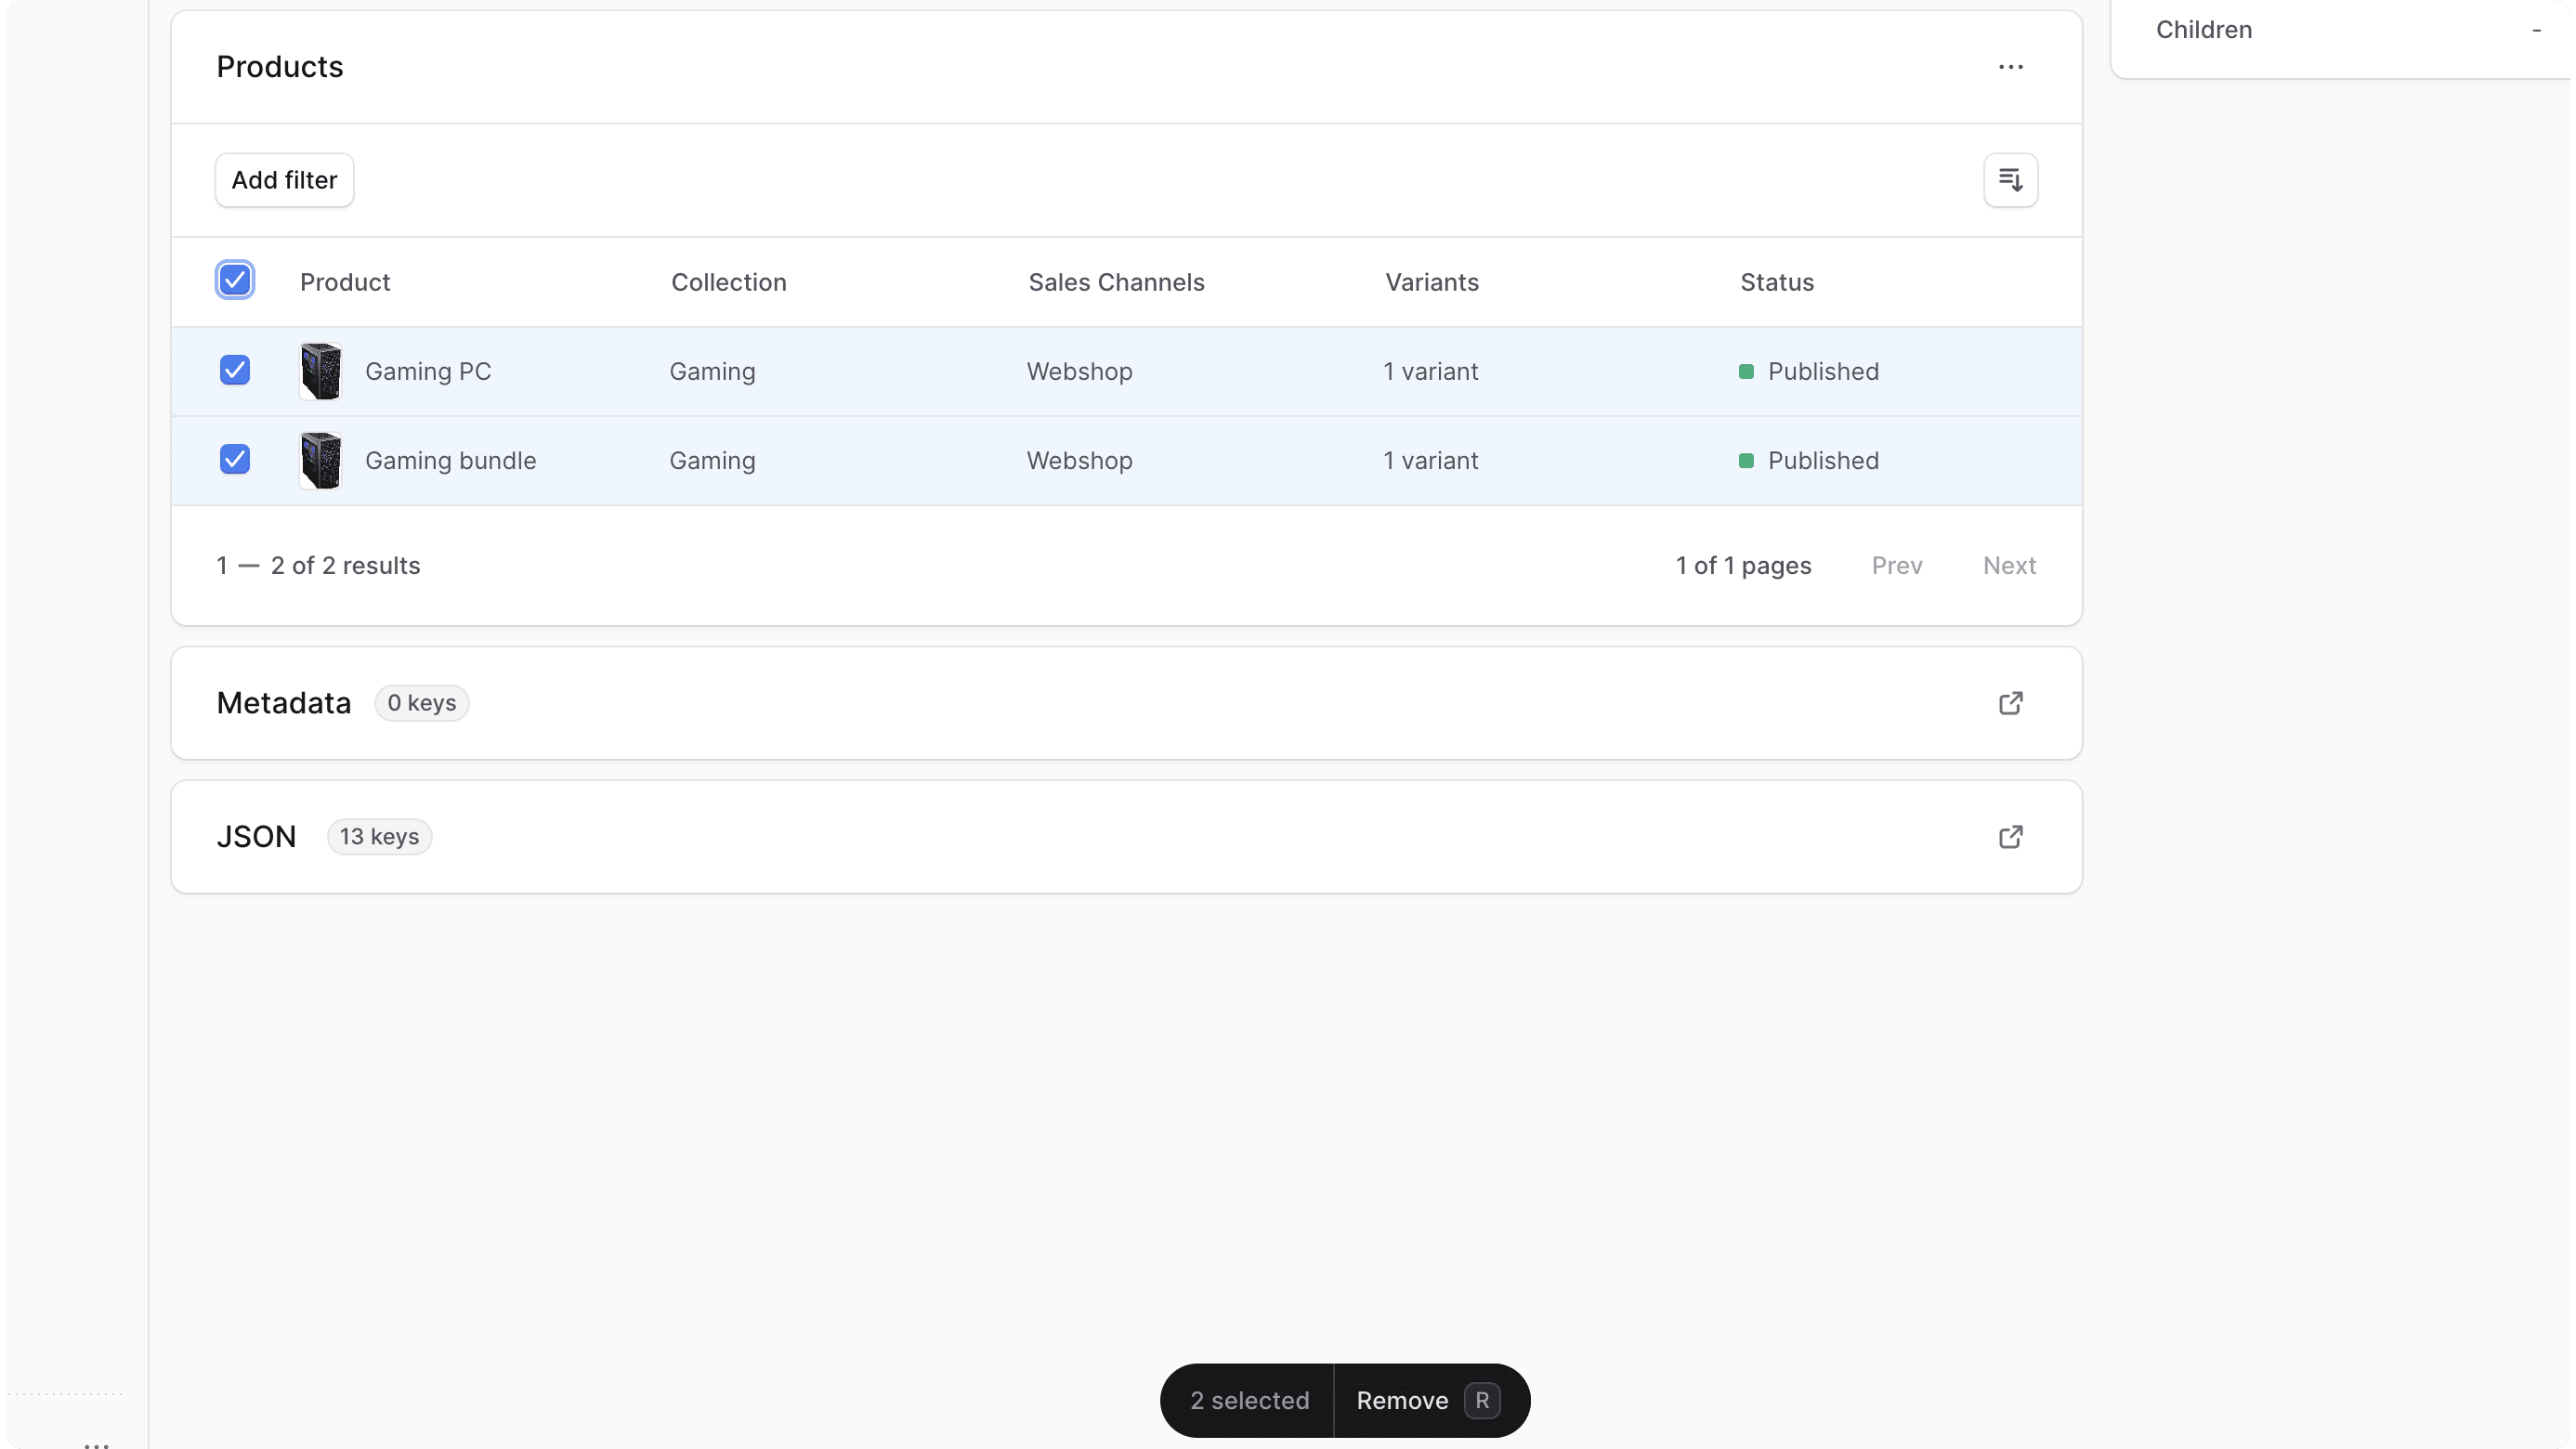
- In the Products section, check the products you want to remove from the category.
- Once you're done, either press R or click "Remove" at the bottom center of the page.
- Confirm removing the products by clicking the "Remove" button in the pop-up.
Edit Categories Ranking#
To change the categories' ranking and hierarchy:
- Go to the Product → Categories page.
- Click on the "Edit ranking" button.
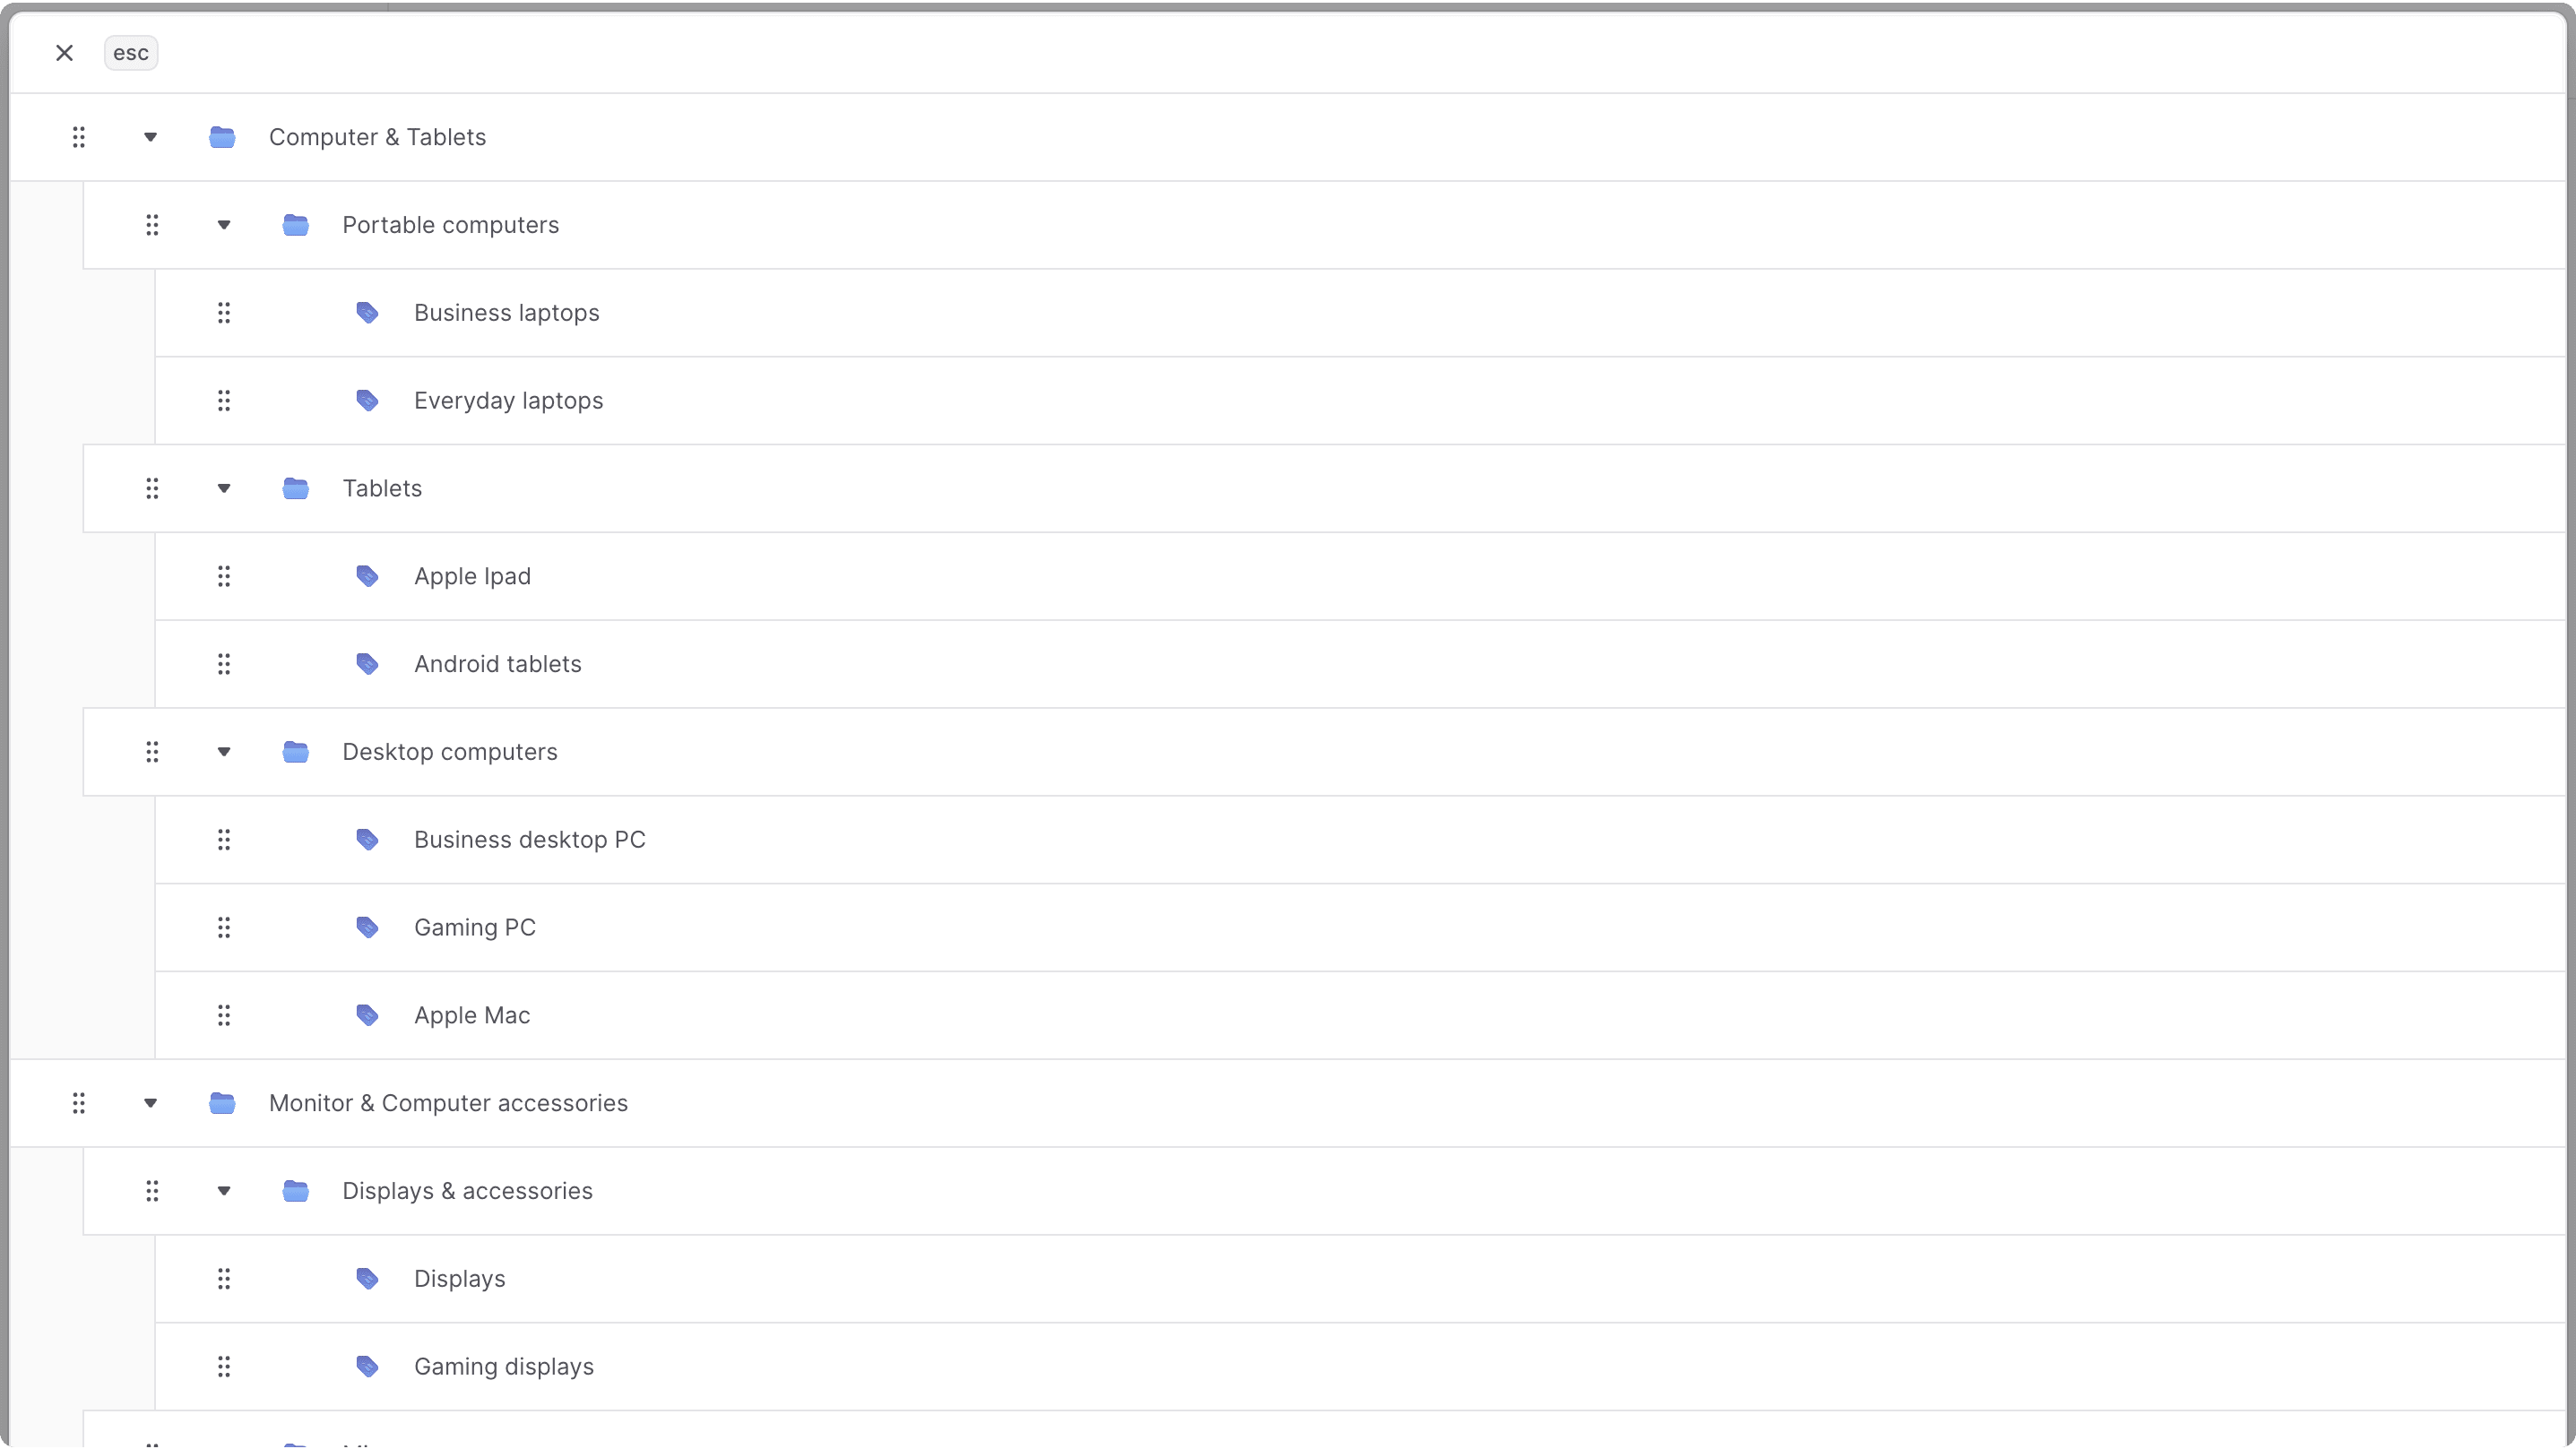
- In the form that opens, you can change the ranking and hierarchy of the categories:
- Changes are saved every time you move a category.
- To move categories around, use the icon to drag categories to their new position.
- To nest a category in another, drag it under the other category and move it slightly to the side.
- Once done, you can close the form as the changes have been saved.
Delete a Category#
- Go to the Product → Categories page.
- Click the icon in the category's row.
- Choose Delete from the dropdown.
- Confirm deleting the category by clicking the "Delete" button in the pop-up.