Medusa Emails
In this chapter, you'll learn about Medusa Emails and how to send emails in your Cloud projects.
What is Medusa Emails?#
Medusa Emails is a built-in email sending service for Cloud organizations and projects.
Medusa Emails allows you to send transactional and marketing emails like order confirmations directly from your Medusa application without needing to set up and manage your own email infrastructure.
Medusa Emails is available for all Cloud plans, with different sending limits based on your plan. You can use it out-of-the-box without manual configuration.
Through your organization's dashboard, you can also monitor email sending statistics and manage your email sender domain.
Set Up Medusa Emails in Cloud Projects#
Medusa Emails is enabled by default for all Cloud projects and organizations with zero configuration.
Remove Other Email Notification Module Providers#
Medusa enables Medusa Emails by default for all Cloud projects if you haven't configured a Notification Module Provider for the email channel in your Medusa application.
So, if you have a notification provider like the SendGrid Notification Module Provider, remove it from your Medusa application to use Medusa Emails.
Local Development Email Setup
Since Medusa Emails isn't available for local development, you can set up the Local Notification Module Provider to test email sending functionality in your local environment. This provider will log the email details to the console instead of sending them.
For example, you can add the following configuration to medusa-config.ts:
1module.exports = defineConfig({2 // ...3 modules: [4 {5 resolve: "@medusajs/medusa/notification",6 options: {7 providers: [8 // ...9 {10 resolve: "@medusajs/medusa/notification-local",11 id: "local",12 options: {13 channels: [14 process.env.NODE_ENV === "development"15 ? "email"16 : "feed",17 ],18 },19 },20 ],21 },22 },23 ],24})
In this setup, the Local Notification Module Provider is used for the email channel only in the development environment. In other environments, it uses the feed channel.
(Optional) Verify Your Email Sender Domain#
By default, Medusa Emails sends emails using a randomly generated email address at the domain medusajsemails.com.
If you don't verify an email sender domain, you can only send emails to addresses of users in your Cloud organization.
To send emails to external email addresses, verify your email sender domain.
Send Emails on Cloud#
To send emails using Medusa Emails in your Cloud project, create a notification that's sent through the email channel in your project's code.
For example:
When this code is executed in your Cloud project, Medusa sends the email using Medusa Emails. You can track whether the email was delivered on the Email Activity page.
Writing Email Templates#
To write email templates for Medusa Emails, use packages like react-email. React Email lets you create email templates using React components with preview and testing capabilities.
Refer to the Set Up React Email Templates guide to learn how to set up React Email templates in your Cloud project with examples.
Verify Email Sender Domain on Cloud#
To send emails to external email addresses using Medusa Emails, you need to verify your email sender domain in your Cloud organization. You can verify multiple sender domains if needed.
To verify your email sender domain:
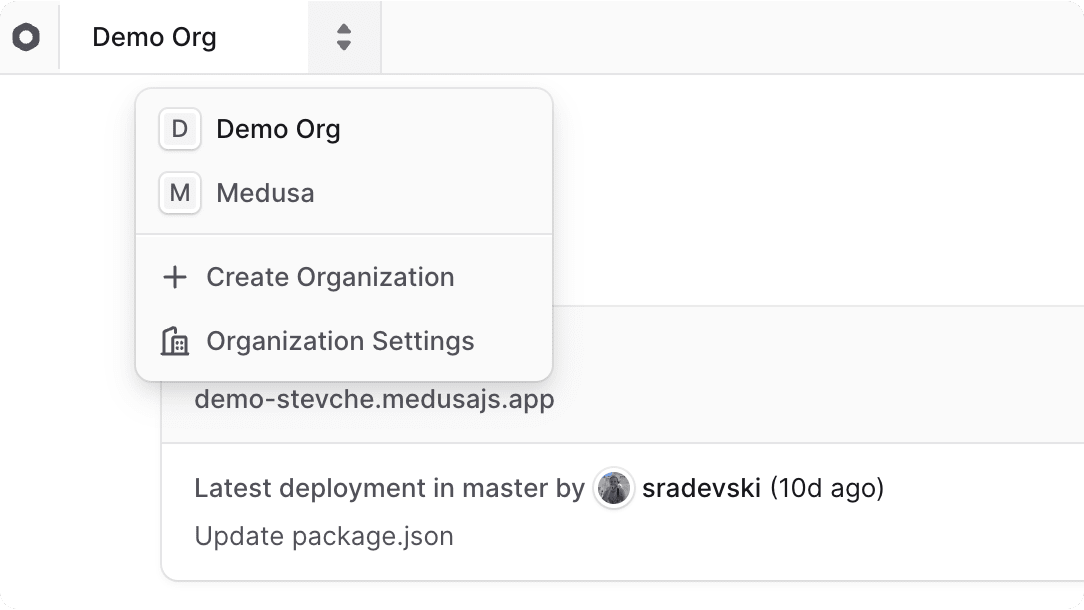
- Make sure you're viewing the correct organization's dashboard in Cloud.
- Click on the icon in the organization switcher at the top left of the Cloud dashboard.
- Choose "Organization Settings" from the dropdown.

- Click Emails -> Sender Domains from the sidebar.
- Click the "Add sender domain" button.
- In the form that opens, perform these two steps:
- Domain: Enter the domain you want to verify (for example,
yourdomain.com). - DNS Records: Add the provided DNS records to your domain's DNS settings. These records are necessary for verifying domain ownership and setting up email authentication.
- If you're unsure how to add DNS records, refer to your domain registrar's documentation or support.
- Domain: Enter the domain you want to verify (for example,
- Once you're done, click the "I've added the records" button.
The domain will then be added, and the system will periodically check the DNS records to verify it. This process may take a few minutes to several hours, depending on your DNS provider.

Specify From Email#
After verifying your email sender domain, specify a from property in the notification to set the sender email address.
For example:
The email will be sent from the no-reply@yourdomain.com address, assuming it belongs to your verified sender domain.
Monitor Email Sending Activity on Cloud#
You can monitor email sending activity like sent emails, delivery rates, open rates, and click rates for your Cloud organization using the Email Activity page in your Cloud dashboard.
To view email sending activity:
- Make sure you're viewing the correct organization's dashboard in Cloud.
- Click on the icon in the organization switcher at the top left of the Cloud dashboard.
- Choose "Organization Settings" from the dropdown.
- Click Emails -> Activity from the sidebar.
At the top of the Email Activity page, you'll see email sending statistics for your organization across all projects, including:
- Sent: Total number of sent emails in the specified time range.
- Deliverability Rate: Percentage of sent emails that were successfully delivered to recipients.
- Open Rate: Percentage of delivered emails that were opened by recipients.
- Click Rate: Percentage of opened emails where recipients clicked on links within the email.
- Bounce Rate: Percentage of sent emails that were not delivered due to permanent delivery failures.
- Complaint Rate: Percentage of sent emails that recipients marked as spam or junk.
Below the statistics, you'll find a detailed list of sent emails.

Change Email Activity Time Range#
To change the time range for email activity statistics and the list of sent emails, click the time range dropdown at the top right of the page. You can choose custom ranges or predefined ranges like "Last 7 days" or "Last 30 days".

Filter Emails by Project#
By default, the Email Activity page shows emails from all projects in your Cloud organization.
To filter emails by a specific project, click the "All projects" dropdown at the top right of the page and select the desired project.
This updates the email sending statistics and list to show only emails from the selected project.

View Email Details#
To view an email's details, click the email entry in the list on the Email Activity page.
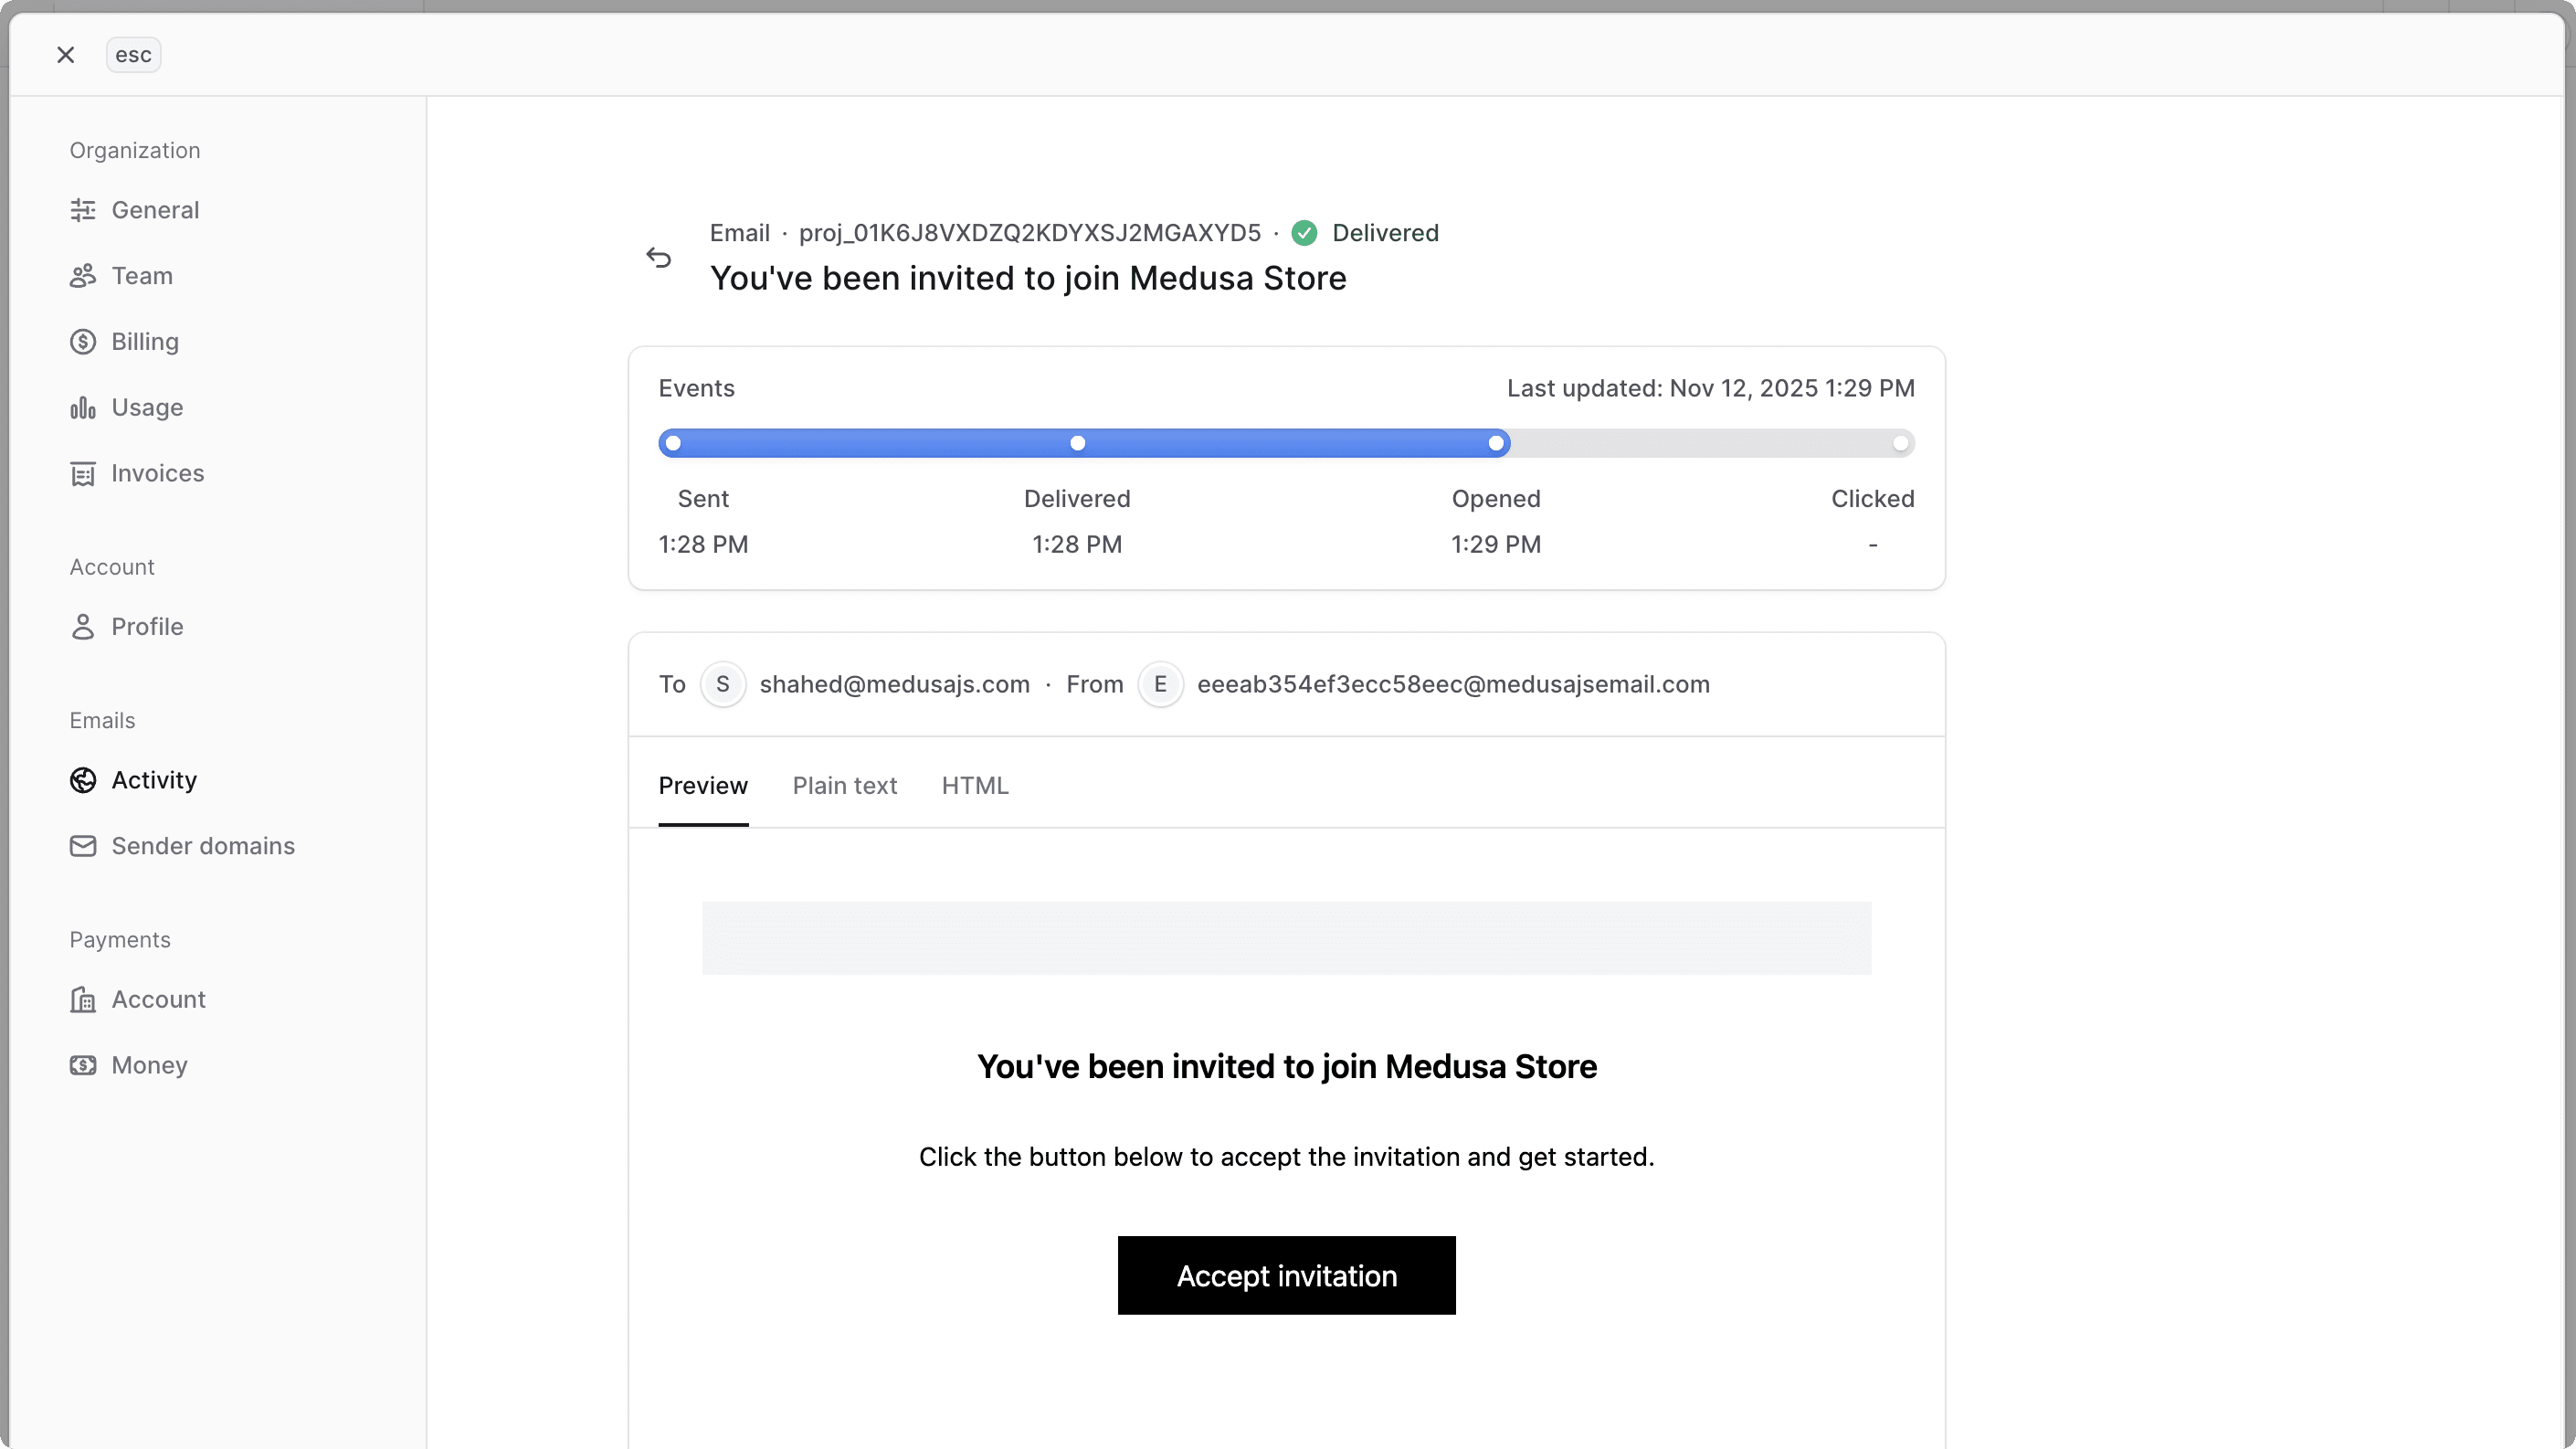
At the top of the Email Details page, you'll see an overview of the email's event history, including when it was sent, delivered, opened, and when its links were clicked.
Below that, you'll see a preview of the email content as it was sent to the recipient, with support for both HTML and plain text views.

Troubleshoot Email Delivery Issues on Cloud#
If you try to send an email using Medusa Emails in your Cloud project and it's not delivered, consider these troubleshooting steps:
- Check Email Activity: Go to the Email Activity page in your Cloud organization's dashboard to see if the email appears in the list. If it does, check its status and event history for delivery issues.
- Verify Sender Domain: If you're sending emails to external addresses, ensure you've verified your email sender domain in your Cloud organization. Without a verified sender domain, you can only send emails to addresses in your Cloud organization.
- Check Logs: Review your project's logs for errors or warnings related to email sending. Look for issues that might indicate why the email wasn't sent or delivered.
- Check Spam/Junk Folder: Ask the recipient to check their spam or junk email folder. Sometimes emails may be incorrectly marked as spam by email providers.
- Contact Support: If you've tried the above steps and are still experiencing issues, contact support for assistance.