3.1. Build Custom Features
In the upcoming chapters, you'll follow step-by-step guides to build custom features in Medusa. These guides gradually introduce Medusa's concepts to help you understand what they are and how to use them.
Interactive Learning with Claude Code#
If you use Claude Code, you can learn the same concepts explained in the upcoming chapters through an interactive learning experience.
Install the learn-medusa plugin to use the interactive learning experience:
Then, start the learning experience with this prompt:
/learn-medusa:learning-medusa command in Claude Code.This starts the interactive learning experience where you'll learn Medusa concepts step-by-step by building a brands feature, similar to the next chapters. You will:
- Create a Brand Module with API routes to manage brands.
- Link brands to products to associate products with brands.
- Customize the Medusa Admin dashboard to allow admin users to manage brands.
By the end, you'll have a solid understanding of Medusa's architecture and how to build custom features.
Tutorial Summary#
By following the guides in the upcoming chapters, you'll add brands to the Medusa application and associate them with products.
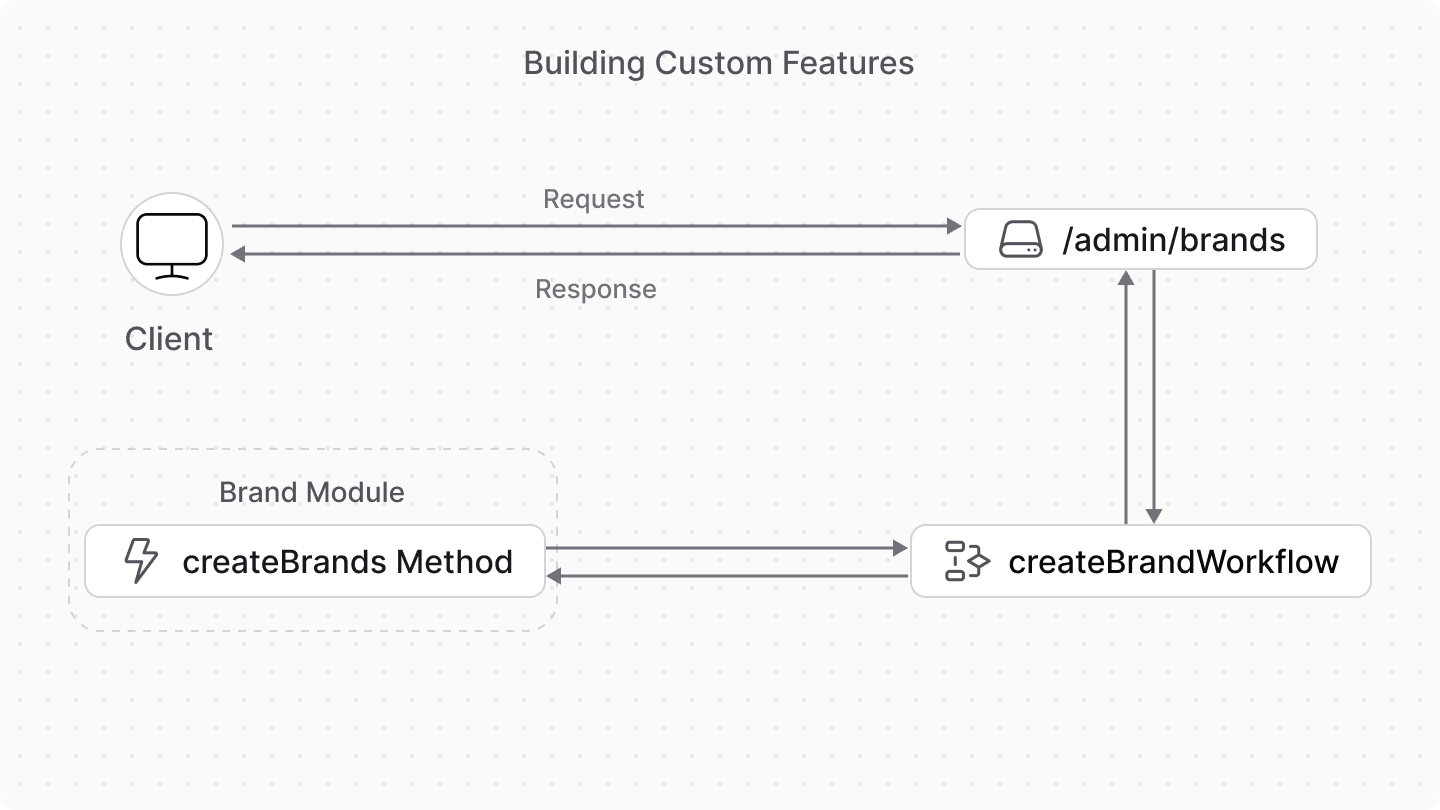
To build a custom feature in Medusa, you need three main Framework tools:
- Module: a package with commerce logic for a single domain. It defines new tables to add to the database, and a class of methods to manage these tables.
- Workflow: a tool to perform an operation comprising multiple steps with built-in rollback and retry mechanisms.
- API route: a REST endpoint that exposes commerce features to clients, such as the admin dashboard or a storefront. The API route executes a workflow that implements the commerce feature using modules.
Next Chapters: Brand Module Example#
The next chapters will guide you to:
- Build a Brand Module that creates a
Branddata model and provides data-management features. - Add a workflow to create a brand.
- Expose an API route that allows admin users to create a brand using the workflow.