2.3.1. Guide: Add Product's Brand Widget in Admin
In this chapter, you'll customize the product details page of the Medusa Admin dashboard to show the product's brand. You'll create a widget that is injected into a pre-defined zone in the page, and in the widget you'll retrieve the product's brand from the server and display it.
1. Initialize JS SDK#
In your custom widget, you'll retrieve the product's brand by sending a request to the Medusa server. Medusa has a JS SDK that simplifies sending requests to the server's API routes.
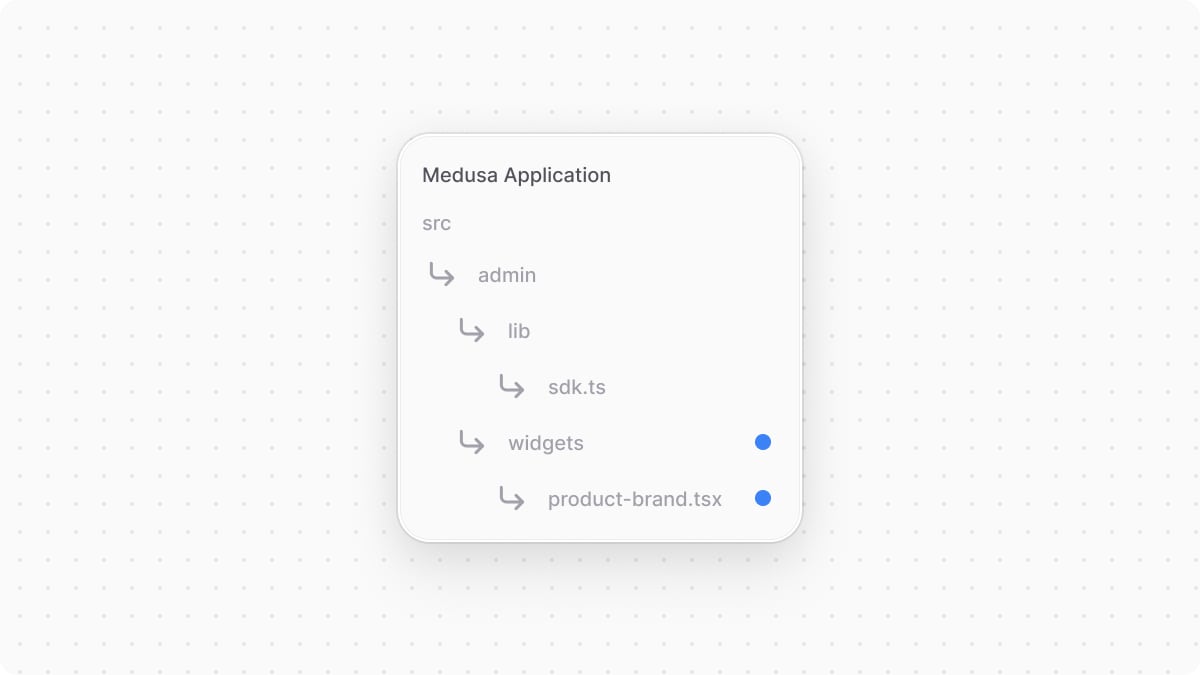
So, you'll start by configuring the JS SDK. Create the file src/admin/lib/sdk.ts with the following content:

You initialize the SDK passing it the following options:
baseUrl: The URL to the Medusa server.debug: Whether to enable logging debug messages. This should only be enabled in development.auth.type: The authentication method used in the client application, which issessionin the Medusa Admin dashboard.
Notice that you use import.meta.env to access environment variables in your customizations because the Medusa Admin is built on top of Vite. Learn more in the Admin Environment Variables chapter.
You can now use the SDK to send requests to the Medusa server.
2. Add Widget to Product Details Page#
You'll now add a widget to the product-details page. A widget is a React component that's injected into pre-defined zones in the Medusa Admin dashboard. It's created in a .tsx file under the src/admin/widgets directory.
To create a widget that shows a product's brand in its details page, create the file src/admin/widgets/product-brand.tsx with the following content:

1import { defineWidgetConfig } from "@medusajs/admin-sdk"2import { DetailWidgetProps, AdminProduct } from "@medusajs/framework/types"3import { clx, Container, Heading, Text } from "@medusajs/ui"4import { useQuery } from "@tanstack/react-query"5import { sdk } from "../lib/sdk"6 7type AdminProductBrand = AdminProduct & {8 brand?: {9 id: string10 name: string11 }12}13 14const ProductBrandWidget = ({ 15 data: product,16}: DetailWidgetProps<AdminProduct>) => {17 const { data: queryResult } = useQuery({18 queryFn: () => sdk.admin.product.retrieve(product.id, {19 fields: "+brand.*",20 }),21 queryKey: [["product", product.id]],22 })23 const brandName = (queryResult?.product as AdminProductBrand)?.brand?.name24 25 return (26 <Container className="divide-y p-0">27 <div className="flex items-center justify-between px-6 py-4">28 <div>29 <Heading level="h2">Brand</Heading>30 </div>31 </div>32 <div33 className={clx(34 `text-ui-fg-subtle grid grid-cols-2 items-center px-6 py-4`35 )}36 >37 <Text size="small" weight="plus" leading="compact">38 Name39 </Text>40 41 <Text42 size="small"43 leading="compact"44 className="whitespace-pre-line text-pretty"45 >46 {brandName || "-"}47 </Text>48 </div>49 </Container>50 )51}52 53export const config = defineWidgetConfig({54 zone: "product.details.before",55})56 57export default ProductBrandWidget
A widget's file must export:
- A React component to be rendered in the specified injection zone. The component must be the file's default export.
- A configuration object created with
defineWidgetConfigfrom the Admin Extension SDK. The function receives an object as a parameter that has azoneproperty, whose value is the zone to inject the widget to.
Since the widget is injected at the top of the product details page, the widget receives the product's details as a parameter.
In the widget, you use Tanstack (React) Query to query the Medusa server. Tanstack Query provides features like asynchronous state management and optimized caching. In the queryFn function that executes the query, you use the JS SDK to send a request to the Get Product API Route, passing +brand.* in the fields query parameter to retrieve the product's brand.
v5.64.2 as a development dependency.You then render a section that shows the brand's name. In admin customizations, use components from the Medusa UI package to maintain a consistent user interface and design in the dashboard.
Test it Out#
To test out your widget, start the Medusa application:
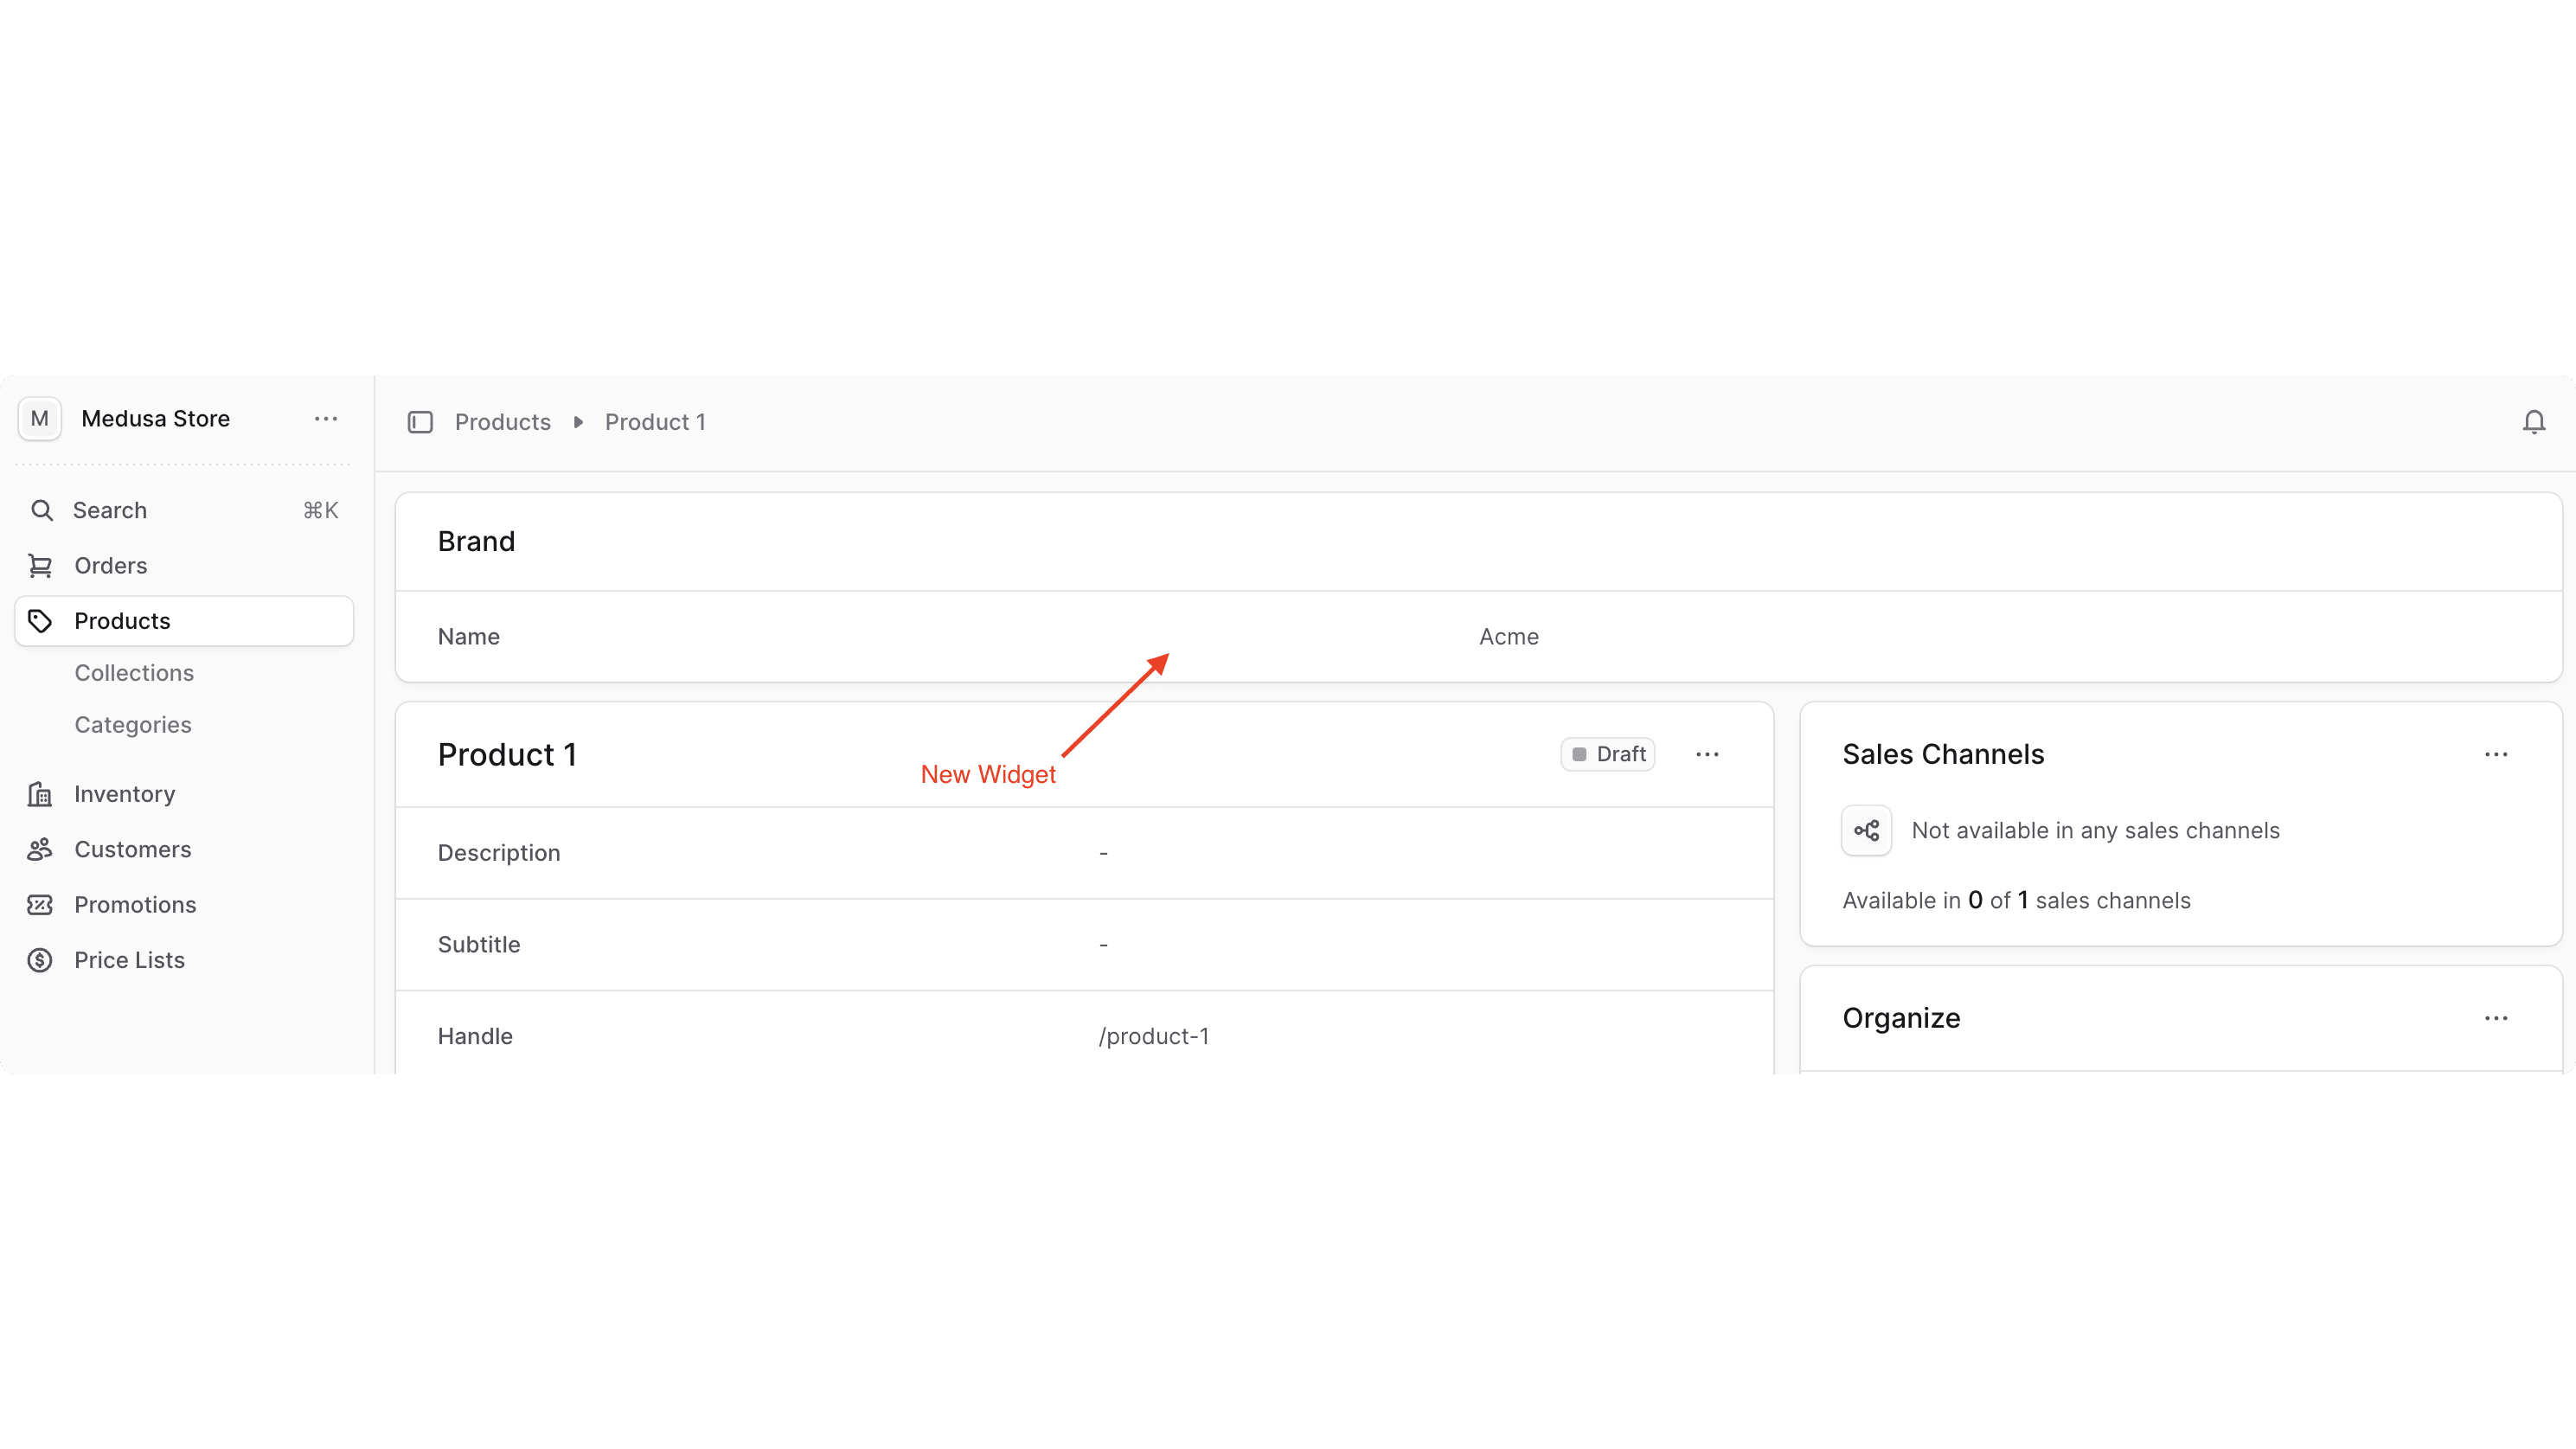
Then, open the admin dashboard at http://localhost:9000/app. After you log in, open the page of a product that has a brand. You'll see a new section at the top showing the brand's name.

Admin Components Guides#
When building your widget, you may need more complicated components. For example, you may add a form to the above widget to set the product's brand.
The Admin Components guides show you how to build and use common components in the Medusa Admin, such as forms, tables, JSON data viewer, and more. The components in the guides also follow the Medusa Admin's design convention.
Next Chapter: Add UI Route for Brands#
In the next chapter, you'll add a UI route that displays the list of brands in your application and allows admin users.