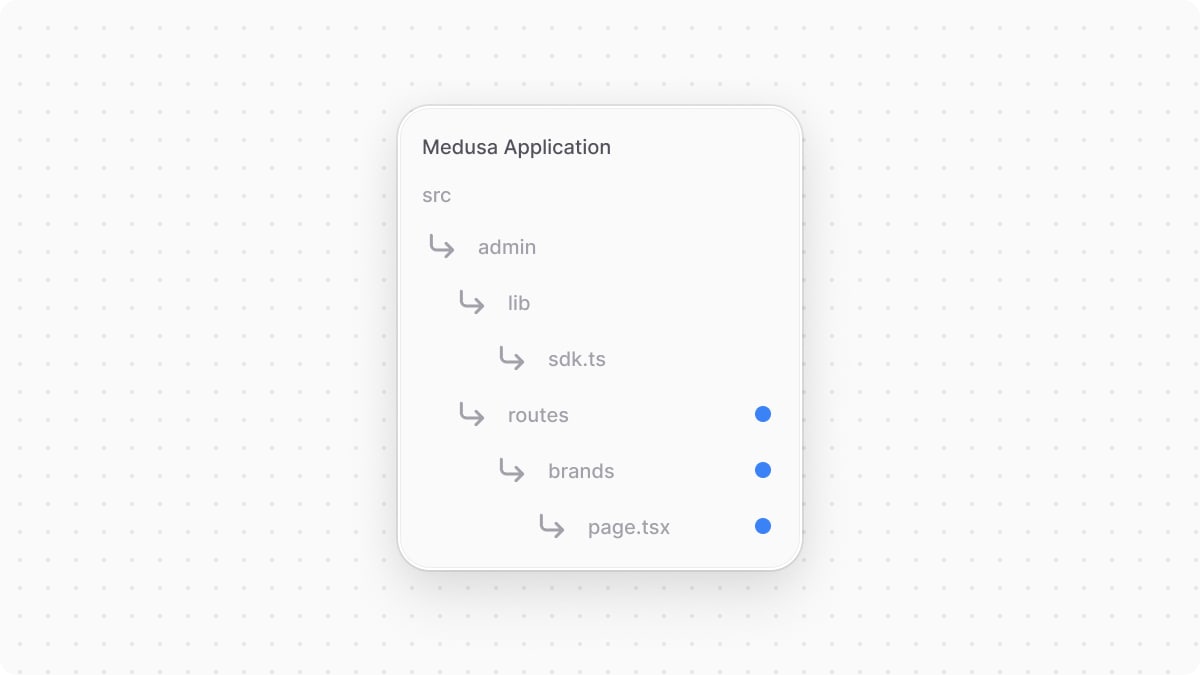
2.3.2. Create Brands UI Route in Admin
In this chapter, you'll add a UI route to the admin dashboard that shows all brands in a new page. You'll retrieve the brands from the server and display them in a table with pagination.
1. Get Brands API Route#
In a previous chapter, you learned how to add an API route that retrieves brands and their products using Query. You'll expand that API route to support pagination, so that on the admin dashboard you can show the brands in a paginated table.
Replace or create the GET API route at src/api/admin/brands/route.ts with the following:
1// other imports...2import {3 MedusaRequest,4 MedusaResponse,5} from "@medusajs/framework/http"6 7export const GET = async (8 req: MedusaRequest,9 res: MedusaResponse10) => {11 const query = req.scope.resolve("query")12 13 const { 14 data: brands, 15 metadata: { count, take, skip } = {},16 } = await query.graph({17 entity: "brand",18 ...req.queryConfig,19 })20 21 res.json({ 22 brands,23 count,24 limit: take,25 offset: skip,26 })27}
In the API route, you use Query's graph method to retrieve the brands. In the method's object parameter, you spread the queryConfig property of the request object. This property holds configurations for pagination and retrieved fields.
The query configurations are combined from default configurations, which you'll add next, and the request's query parameters:
fields: The fields to retrieve in the brands.limit: The maximum number of items to retrieve.offset: The number of items to skip before retrieving the returned items.
When you pass pagination configurations to the graph method, the returned object has the pagination's details in a metadata property, whose value is an object having the following properties:
count: The total count of items.take: The maximum number of items returned in thedataarray.skip: The number of items skipped before retrieving the returned items.
You return in the response the retrieved brands and the pagination configurations.
2. Add Default Query Configurations#
Next, you'll set the default query configurations of the above API route and allow passing query parameters to change the configurations.
Medusa provides a validateAndTransformQuery middleware that validates the accepted query parameters for a request and sets the default Query configuration. So, in src/api/middlewares.ts, add a new middleware configuration object:
1import { 2 defineMiddlewares,3 validateAndTransformQuery,4} from "@medusajs/framework/http"5import { createFindParams } from "@medusajs/medusa/api/utils/validators"6// other imports...7 8export const GetBrandsSchema = createFindParams()9 10export default defineMiddlewares({11 routes: [12 // ...13 {14 matcher: "/admin/brands",15 method: "GET",16 middlewares: [17 validateAndTransformQuery(18 GetBrandsSchema,19 {20 defaults: [21 "id",22 "name",23 "products.*",24 ],25 isList: true,26 }27 ),28 ],29 },30 31 ],32})
You apply the validateAndTransformQuery middleware on the GET /admin/brands API route. The middleware accepts two parameters:
- A Zod schema that a request's query parameters must satisfy. Medusa provides
createFindParamsthat generates a Zod schema with the following properties:fields: A comma-separated string indicating the fields to retrieve.limit: The maximum number of items to retrieve.offset: The number of items to skip before retrieving the returned items.order: The name of the field to sort the items by. Learn more about sorting in the API reference
- An object of Query configurations having the following properties:
defaults: An array of default fields and relations to retrieve.isList: Whether the API route returns a list of items.
By applying the above middleware, you can pass pagination configurations to GET /admin/brands, which will return a paginated list of brands. You'll see how it works when you create the UI route.
validateAndTransformQuery middleware to configure Query in this chapter.3. Initialize JS SDK#
In your custom UI route, you'll retrieve the brands by sending a request to the Medusa server. Medusa has a JS SDK that simplifies sending requests to the core API route.
If you didn't follow the previous chapter, create the file src/admin/lib/sdk.ts with the following content:

You initialize the SDK passing it the following options:
baseUrl: The URL to the Medusa server.debug: Whether to enable logging debug messages. This should only be enabled in development.auth.type: The authentication method used in the client application, which issessionin the Medusa Admin dashboard.
Notice that you use import.meta.env to access environment variables in your customizations because the Medusa Admin is built on top of Vite. Learn more in this chapter.
You can now use the SDK to send requests to the Medusa server.
4. Add a UI Route to Show Brands#
You'll now add the UI route that shows the paginated list of brands. A UI route is a React component created in a page.tsx file under a sub-directory of src/admin/routes. The file's path relative to src/admin/routes determines its path in the dashboard.
So, to add the UI route at the localhost:9000/app/brands path, create the file src/admin/routes/brands/page.tsx with the following content:
1import { defineRouteConfig } from "@medusajs/admin-sdk"2import { TagSolid } from "@medusajs/icons"3import { 4 Container,5} from "@medusajs/ui"6import { useQuery } from "@tanstack/react-query"7import { sdk } from "../../lib/sdk"8import { useMemo, useState } from "react"9 10const BrandsPage = () => {11 // TODO retrieve brands12 13 return (14 <Container className="divide-y p-0">15 {/* TODO show brands */}16 </Container>17 )18}19 20export const config = defineRouteConfig({21 label: "Brands",22 icon: TagSolid,23})24 25export default BrandsPage
A route's file must export the React component that will be rendered in the new page. It must be the default export of the file. You can also export configurations that add a link in the sidebar for the UI route. You create these configurations using defineRouteConfig from the Admin Extension SDK.
So far, you only show a container. In admin customizations, use components from the Medusa UI package to maintain a consistent user interface and design in the dashboard.
Retrieve Brands From API Route#
You'll now update the UI route to retrieve the brands from the API route you added earlier.
First, add the following type in src/admin/routes/brands/page.tsx:
You define the type for a brand, and the type of expected response from the GET /admin/brands API route.
To display the brands, you'll use Medusa UI's DataTable component. So, add the following imports in src/admin/routes/brands/page.tsx:
You import the DataTable component and the following utilities:
createDataTableColumnHelper: A utility to create columns for the data table.DataTablePaginationState: A type that holds the pagination state of the data table.useDataTable: A hook to initialize and configure the data table.
You also import the Heading component to show a heading above the data table.
Next, you'll define the table's columns. Add the following before the BrandsPage component:
You use the createDataTableColumnHelper utility to create columns for the data table. You define two columns for the ID and name of the brands.
Then, replace the // TODO retrieve brands in the component with the following:
1const limit = 152const [pagination, setPagination] = useState<DataTablePaginationState>({3 pageSize: limit,4 pageIndex: 0,5})6const offset = useMemo(() => {7 return pagination.pageIndex * limit8}, [pagination])9 10const { data, isLoading } = useQuery<BrandsResponse>({11 queryFn: () => sdk.client.fetch(`/admin/brands`, {12 query: {13 limit,14 offset,15 },16 }),17 queryKey: [["brands", limit, offset]],18})19 20// TODO configure data table
To enable pagination in the DataTable component, you need to define a state variable of type DataTablePaginationState. It's an object having the following properties:
pageSize: The maximum number of items per page. You set it to15.pageIndex: A zero-based index of the current page of items.
You also define a memoized offset value that indicates the number of items to skip before retrieving the current page's items.
Then, you use useQuery from Tanstack (React) Query to query the Medusa server. Tanstack Query provides features like asynchronous state management and optimized caching.
v5.64.2 as a development dependency.In the queryFn function that executes the query, you use the JS SDK's client.fetch method to send a request to your custom API route. The first parameter is the route's path, and the second is an object of request configuration and data. You pass the query parameters in the query property.
This sends a request to the Get Brands API route, passing the pagination query parameters. Whenever currentPage is updated, the offset is also updated, which will send a new request to retrieve the brands for the current page.
Display Brands Table#
Finally, you'll display the brands in a data table. Replace the // TODO configure data table in the component with the following:
You use the useDataTable hook to initialize and configure the data table. It accepts an object with the following properties:
columns: The columns of the data table. You created them using thecreateDataTableColumnHelperutility.data: The brands to display in the table.getRowId: A function that returns a unique identifier for a row.rowCount: The total count of items. This is used to determine the number of pages.isLoading: A boolean indicating whether the data is loading.pagination: An object to configure pagination. It accepts the following properties:state: The pagination state of the data table.onPaginationChange: A function to update the pagination state.
Then, replace the {/* TODO show brands */} in the return statement with the following:
This renders the data table that shows the brands with pagination. The DataTable component accepts the instance prop, which is the object returned by the useDataTable hook.
Test it Out#
To test out the UI route, start the Medusa application:
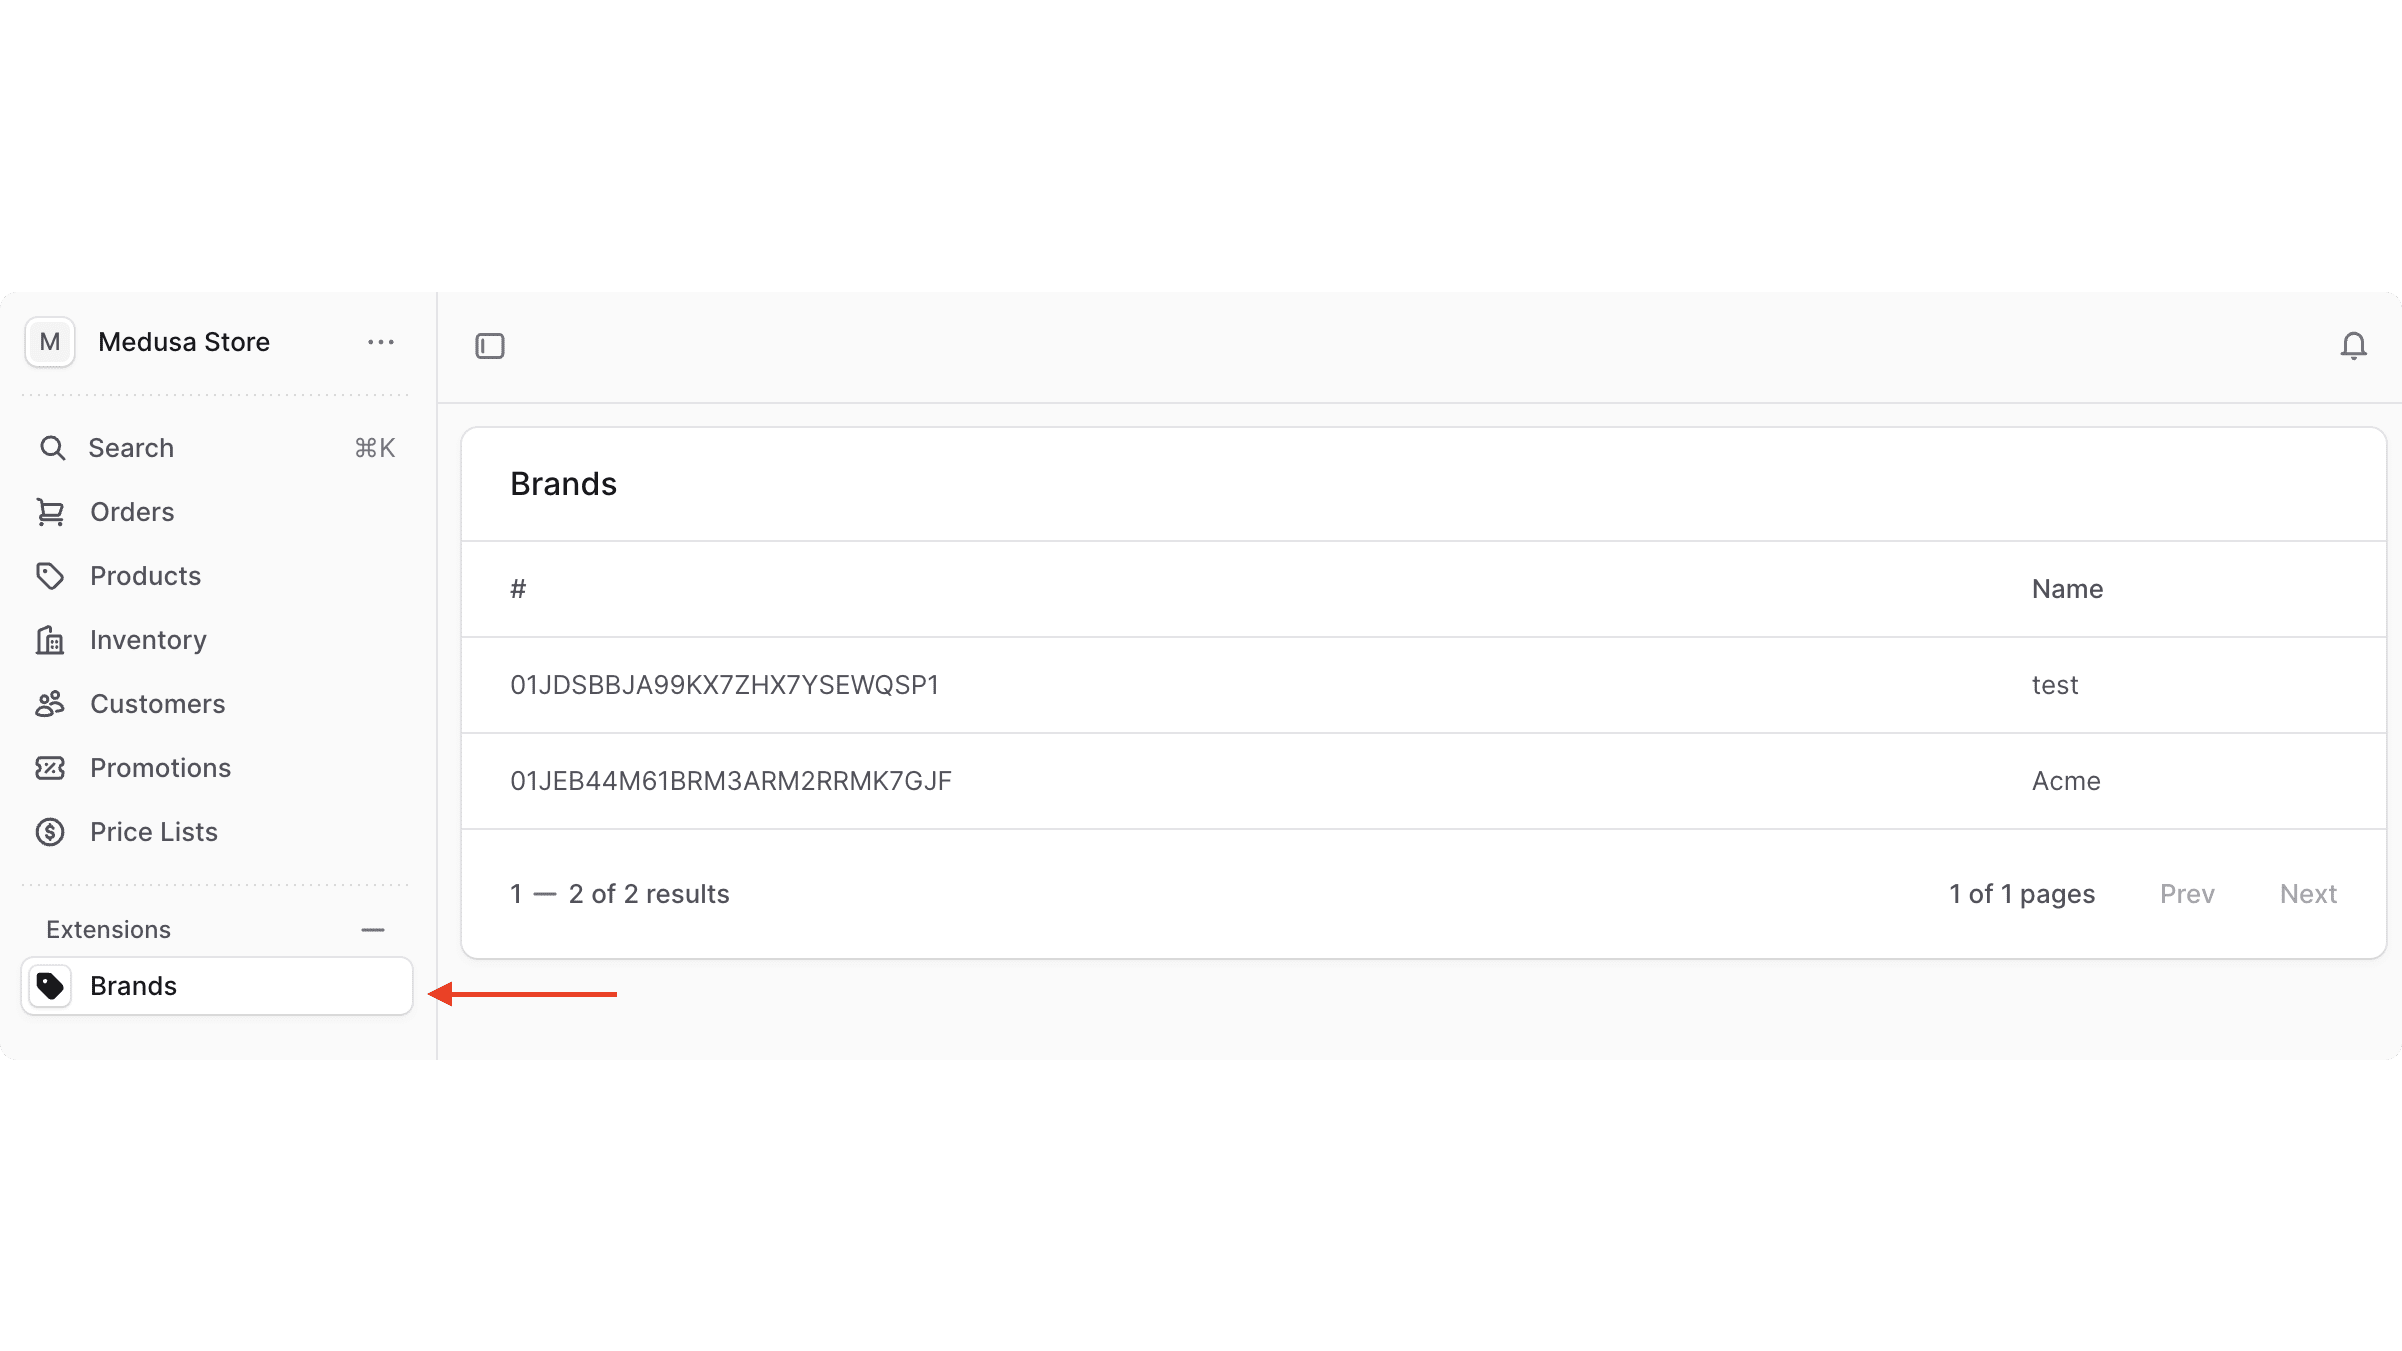
Then, open the admin dashboard at http://localhost:9000/app. After you log in, you'll find a new "Brands" sidebar item. Click on it to see the brands in your store. You can also go to http://localhost:9000/app/brands to see the page.
Summary#
By following the previous chapters, you:
- Injected a widget into the product details page to show the product's brand.
- Created a UI route in the Medusa Admin that shows the list of brands.
Next Steps: Integrate Third-Party Systems#
Your customizations often span across systems, where you need to retrieve data or perform operations in a third-party system.
In the next chapters, you'll learn about the concepts that facilitate integrating third-party systems in your application. You'll integrate a dummy third-party system and sync the brands between it and the Medusa application.