1.2. Install Medusa
In this chapter, you'll learn how to install and run a Medusa application.
Get Started with Cloud#
Cloud is Medusa's PaaS platform that allows you to deploy and manage production-ready Medusa applications with ease. Benefit from features like zero-configuration deployments, automatic scaling, storefront hosting, and GitHub integration to streamline your development workflow.
Sign up with Cloud and create your first Medusa project in minutes.
Create Medusa Application Locally#
A Medusa application is made up of a Node.js server and a Vite admin dashboard. You can optionally install the Next.js Starter Storefront separately either while installing the Medusa application or at a later point.
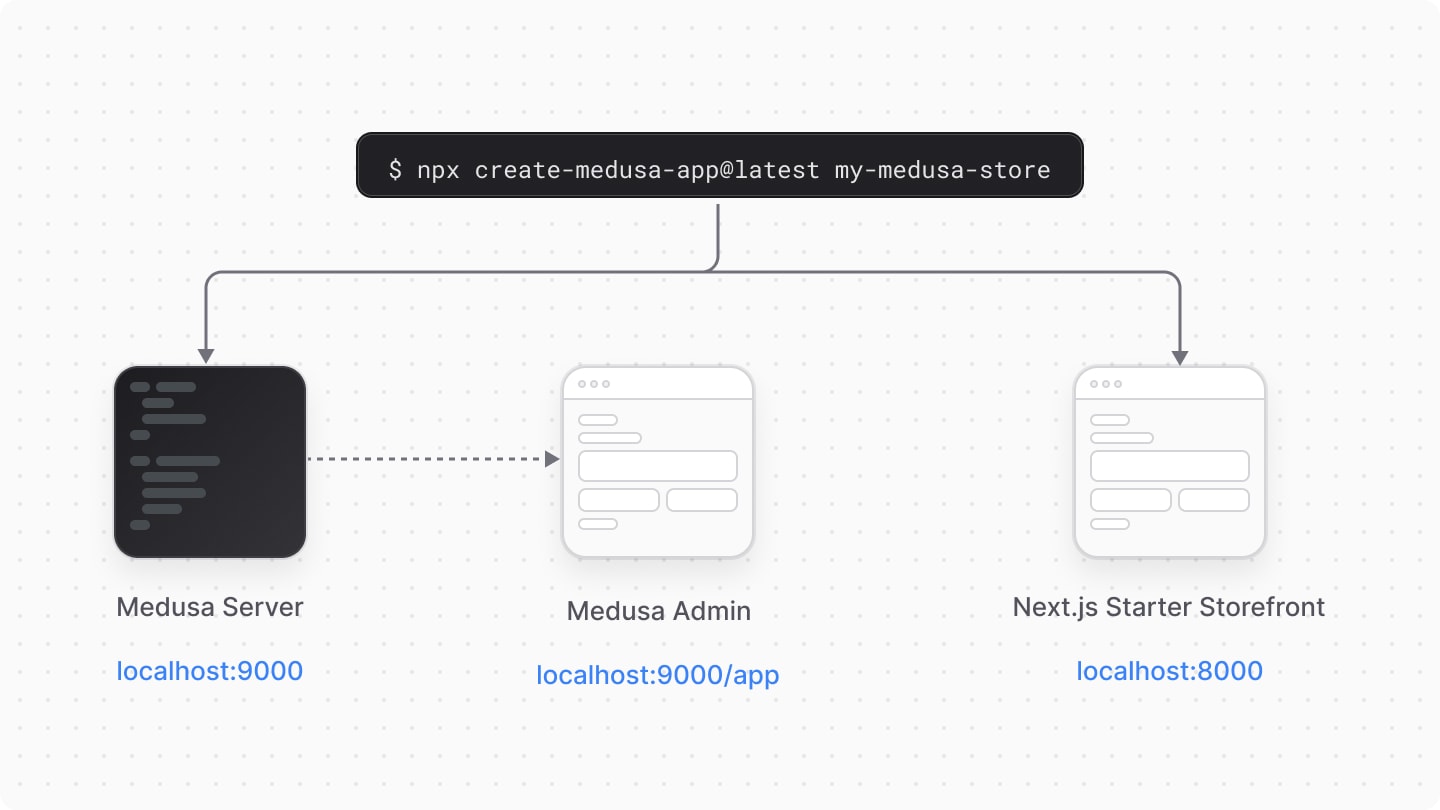
To create a Medusa application, use the create-medusa-app command:
yarn or pnpm as your package manager for quicker installations and better performance. npm installations are generally slower.Where my-medusa-store is the name of the project's directory and PostgreSQL database created for the project. When you run the command, you'll be asked whether you want to install the Next.js Starter Storefront.
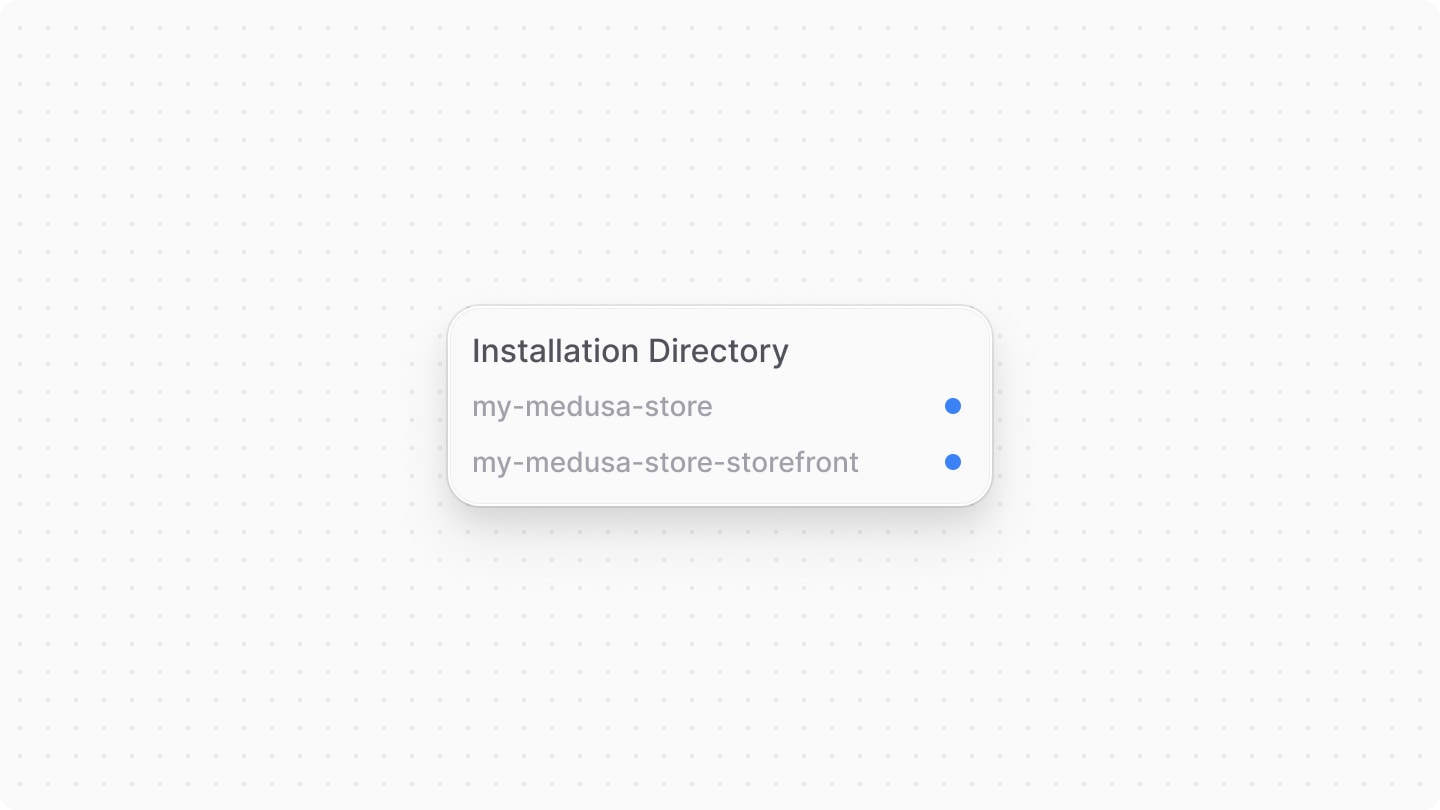
After answering the prompts, the command installs the Medusa application in a directory with your project name, and sets up a PostgreSQL database that the application connects to.
If you chose to install the storefront with the Medusa application, the storefront is installed in a separate directory named {project-name}-storefront.
Successful Installation Result#
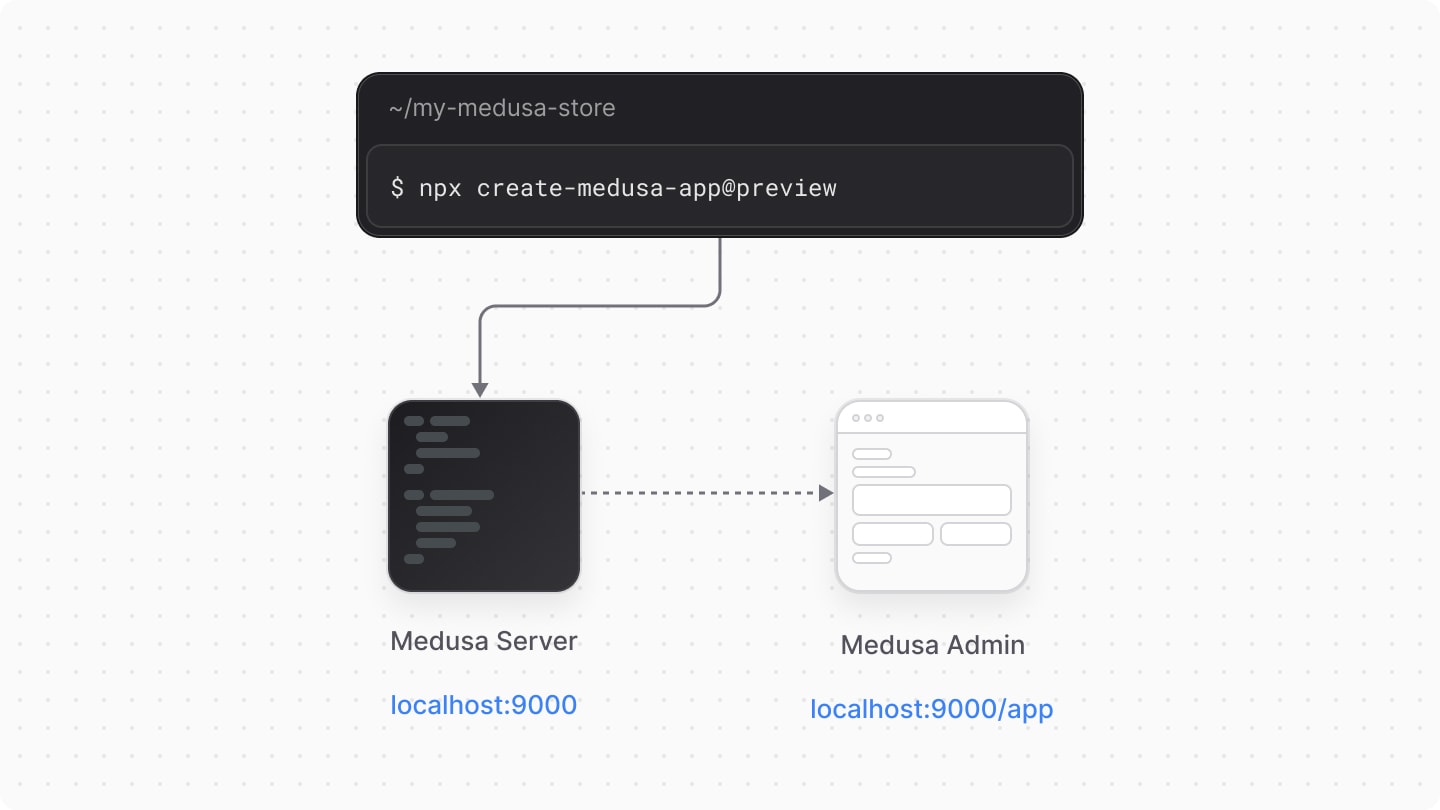
Once the installation finishes successfully, the Medusa application will run at http://localhost:9000.
The Medusa Admin dashboard also runs at http://localhost:9000/app. The installation process opens the Medusa Admin dashboard in your default browser to create a user. You can later log in with that user.
If you also installed the Next.js Starter Storefront, it'll be running at http://localhost:8000.
You can stop the servers for the Medusa application and Next.js Starter Storefront by exiting the installation command. To run the server for the Medusa application again, refer to this section.
Troubleshooting Installation Errors#
If you ran into an error during your installation, refer to the following troubleshooting guides for help:
- create-medusa-app troubleshooting guides.
- CORS errors.
- Errors with pnpm.
- All troubleshooting guides.
If you can't find your error reported anywhere, please open a GitHub issue.
Run Medusa Application in Development#
To run the Medusa application in development, change to your application's directory and run the following command:
This runs your Medusa server at http://localhost:9000, and the Medusa Admin dashboard http://localhost:9000/app.
The application will restart if you make any changes to code under the src directory, except for admin customizations which are hot reloaded, providing you with a seamless developer experience without having to refresh your browser to see the changes.
Start Building with Claude Code#
Medusa provides Claude Code plugins to assist you in learning and building with Medusa. You can also use the skills in these plugins with other AI agents by copying the skills.
This section covers key plugins as you get started with Medusa development using Claude Code. Refer to the Build with AI Assistants and LLMs chapter for more details on using Medusa with AI tools.
Interactive Learning#
If you're a Medusa beginner and use Claude Code, install the learn-medusa plugin:
Then, start the learning experience with this prompt:
/learn-medusa:learning-medusa command in Claude Code.This starts the interactive learning experience where you'll learn Medusa concepts step-by-step by building a brands feature, similar to the Brands tutorial. You will:
- Create a Brand Module with API routes to manage brands.
- Link brands to products to associate products with brands.
- Customize the Medusa Admin dashboard to allow admin users to manage brands.
By the end, you'll have a solid understanding of Medusa's architecture and how to build custom features.
Medusa Development Assistance#
If you want assistance in your Medusa development, install the medusa-dev plugin:
Then, you can ask Claude Code to build Medusa features, fix bugs, and more. Claude Code will use the skills in the plugin to provide you with accurate and relevant Medusa code.
Examples of prompts you can use:
❯Implement a product reviews feature. Authenticated customers can add reviews. Admin users can view and approve or reject reviews from the dashboard❯Create a wishlist feature where customers can save products. I need API routes for adding/removing items and retrieving the wishlist.❯Add a widget to the product detail page in the admin that allows managing related products. Admin users should be able to select which products are related using a searchable table.❯Help me integrate the custom reviews API into my Next.js storefront. Show product reviews on the product detail page with pagination.
Create Medusa Admin User#
Aside from creating an admin user in the admin dashboard, you can create a user with Medusa's CLI tool.
Run the following command in your Medusa application's directory to create a new admin user:
Replace admin@medusajs.com and supersecret with the user's email and password respectively.
You can then use the user's credentials to log into the Medusa Admin application.
Project Files#
Your Medusa application's project will have the following files and directories:
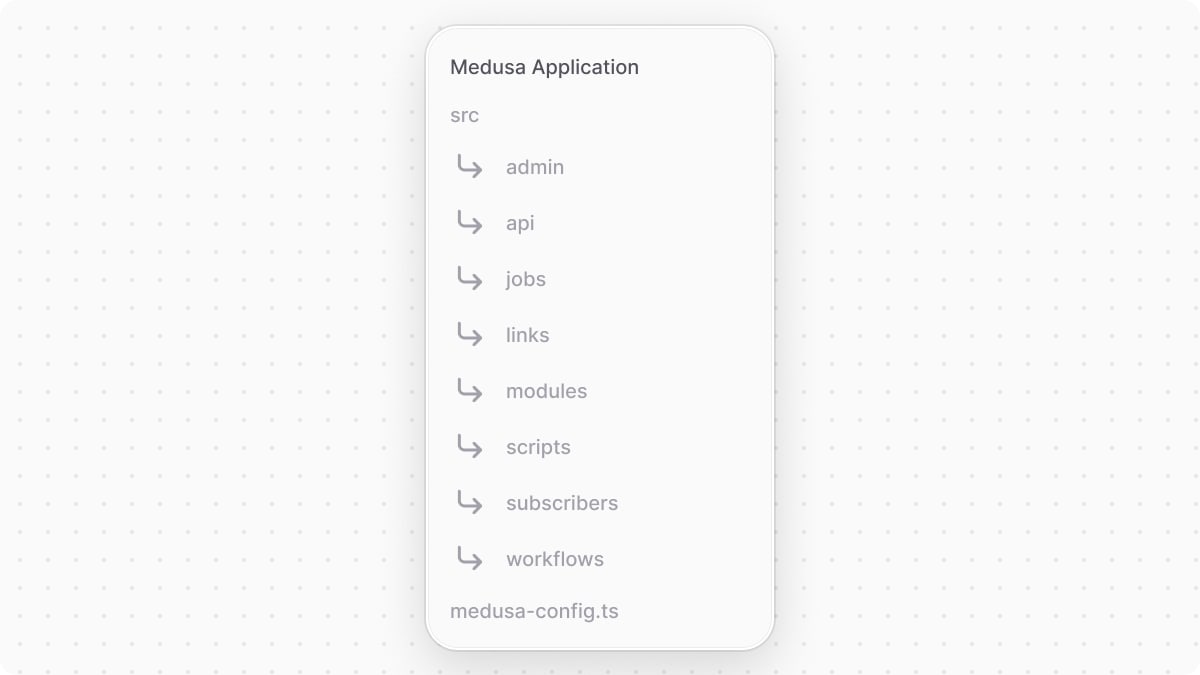
src#
This directory is the central place for your custom development. It includes the following sub-directories:
admin: Holds your admin dashboard's custom widgets and UI routes.api: Holds your custom API routes that are added as endpoints in your Medusa application.jobs: Holds your scheduled jobs that run at a specified interval during your Medusa application's runtime.links: Holds your module links that build associations between data models of different modules.modules: Holds your custom modules that implement custom business logic.scripts: Holds your custom scripts to be executed using Medusa's CLI tool.subscribers: Holds your event listeners that are executed asynchronously whenever an event is emitted.workflows: Holds your custom flows that can be executed from anywhere in your application.
medusa-config.ts#
This file holds your Medusa configurations, such as your PostgreSQL database configurations.
.medusa#
The .medusa directory holds types and other files that are generated by Medusa when you run the build command. Don't modify any files or commit them to your repository.
Configure Medusa Application#
By default, your Medusa application is equipped with the basic configuration to start your development.
If you run into issues with configurations, such as CORS configurations, or need to make changes to the default configuration, refer to this guide on all available configurations.
Update Medusa Application#
Refer to this documentation to learn how to update your Medusa project.
Next Steps#
In the next chapters, you'll learn about the architecture of your Medusa application, then learn how to customize your application to build custom features.