Segment
In this document, you’ll learn about the Segment plugin, what it does, and how to install and use it.
Overview
Segment is a powerful Customer Data Platform that allows users to collect, transform, send and archive their customer data.
Segment allows users to manage different tracking and marketing tools using one API and interface, making it very simple to try out and integrate with different services in your ecommerce stack.
Common integration use cases that can be implemented with Segment include:
- Google Analytics
- Mailchimp
- Zendesk
- Data warehousing for advanced data analytics and segmentation through services like Snowflake
The Segment plugin in Medusa allows you to track ecommerce events and record them in Segment. Then, you can push these events to other destinations using Segment.
Events That the Segment Plugin Tracks
By default, the Segment plugin tracks the following events:
order.placed: Triggered when an order is placed.order.shipment_created: Triggered when a shipment is created for an order.claim.created: Triggered when a new claim is created.order.items_returned: Triggered when an item in an order is returned.order.canceled: Triggered when an order is canceled.swap.created: Triggered when a swap is created.swap.shipment_created: Triggered when a shipment is created for a swap.swap.payment_completed: Triggered when payment for a swap is completed.
Check out the Event Reference to learn about all available events in Medusa.
Prerequisites
Medusa Backend
It is assumed you already have a Medusa backend installed. If not, please follow the Quickstart guide to get started in minutes. The Medusa backend must also have an event bus module installed, which is available when using the default Medusa starter.
Segment Account
You need to create a Segment account to follow along with the tutorial. Segment offers a free plan to get started quickly.
Create a Segment Source
On your Segment dashboard, choose Catalog from the sidebar under Connections.

Then, in the catalog list find the Backend category and choose Node.js from the list.
This opens a new side menu. In the side menu, click on Add Source.

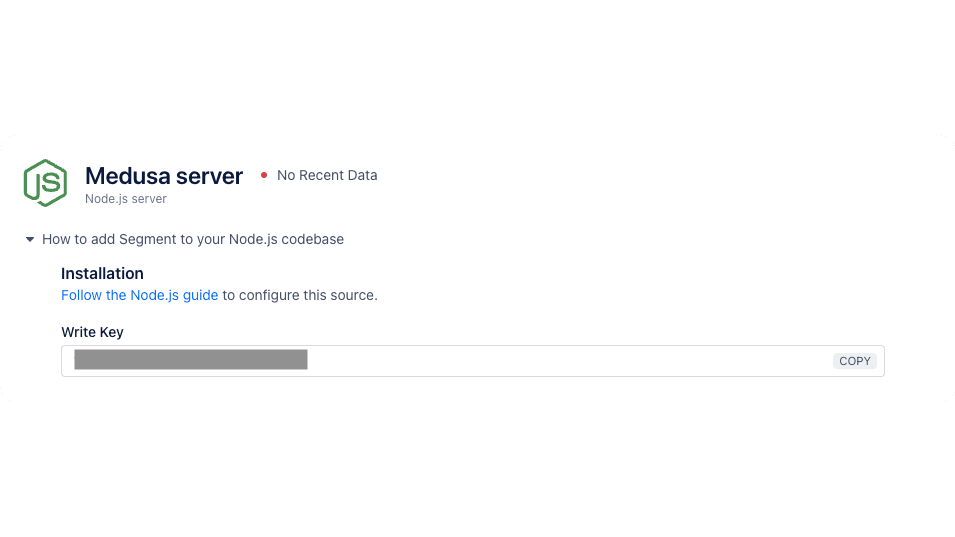
This opens a new page to create a Node.js source. Enter the name of the source then click Add Source.

On the new source dashboard, you should find a Write Key. You’ll use this key in the next section after you install the Segment plugin on your Medusa backend.
Optional: Add Destination
After you create the Segment source, you can add destinations. This is where the data is sent when you send them to Segment. You can add more than one destination.
To add a destination, on the same Segment source page, click on Add Destination in the Destinations section.

You can then choose from a list of destinations such as Google Universal Analytics or Facebook Pixel.

The process of integrating each destination is different, so you must follow the steps detailed in Segment for each destination you choose.
Install the Segment Plugin
In the directory of your Medusa backend, run the following command to install the Segment plugin:
Then, add the following environment variable:
Where <YOUR_SEGMENT_WRITE_KEY> is the Write Key shown on the page of the Segment source you created in the previous section.
Finally, in medusa-config.js, add the following new item to the plugins array:
Test the Plugin
Run your backend with the following command:
Then, try triggering one of the mentioned events earlier in this document. For example, you can place an order either using the REST APIs or using the Next.js Starter Template.
After you place an order, on the Segment source that you created, click on the Debugger tab. You should see at least one event triggered for each order you place. If you click on the event, you can see the order details are passed to the event.

If you added a destination, you can also check your destination to make sure the data is reflected there.
If the data is not appearing on the destination, the issue is related to your configuration between the Segment source and destination and not related to the Segment plugin. Go over the steps that Segment showed you when you added the destination to figure out the issue.
Add Custom Tracking
In some cases, you might want to track more events or custom events. You can do that using the SegmentService provided by the Segment Plugin.
For example, you can add the following subscriber to listen to the customer.created event and add tracking for every customer created:
import {
  type SubscriberConfig,
  type SubscriberArgs,
  CustomerService,
} from "@medusajs/medusa"

export default async function handleCustomerCreated({
  data, eventName, container, pluginOptions,
}: SubscriberArgs<Record<string, string>>) {
  const segmentService = container.resolve("segmentService")

  const customerData = data
  delete customerData["password_hash"]

  this.segmentService.track({
    event: "Customer Created",
    userId: data.id,
    properties: customerData,
  })
}

export const config: SubscriberConfig = {
  event: CustomerService.Events.CREATED,
  context: {
    subscriberId: "customer-created-handler",
  },
}
In the handler function, you resolve the SegmentService using the container of type MedusaContainer. Then, you use the track method of the SegmentService to send tracking data to Segment.
The track method accepts an object of data, where the keys event and userId are required. Instead of userId, you can use anonymousId to pass an anonymous user ID.
If you want to pass additional data to Segment, pass them under the properties object key.
The SegmentService also provides the method identify to tie a user to their actions or specific traits.
Test Custom Tracking
After adding the above subscriber, run your backend again if it isn’t running and create a customer using the REST APIs or one of the Medusa storefronts. If you check the Debugger in your Segment source, you should see a new event “Customer Created” tracked. If you click on it, you’ll see the data you passed to the track method.