Generate Invoices for Orders in Medusa
In this tutorial, you will learn how to generate invoices for orders in your Medusa application.
When you install a Medusa application, you get a fully-fledged commerce platform with a Framework for customization. The Medusa application's commerce features are built around Commerce Modules, which are available out-of-the-box. These features include order management capabilities.
You can extend the Medusa application to automatically generate invoices (or sales orders), manage invoice configurations through the admin dashboard, and provide customers with easy access to their invoices through the storefront.
Summary#
By following this tutorial, you will learn how to:
- Install and set up Medusa.
- Store default invoice configurations and manage them from the Medusa Admin dashboard.
- Generate PDF invoices for orders, and allow admin users and customers to download them.
- Send PDF invoices as attachments in order confirmation emails.
- Mark previously generated invoices as stale when orders are updated.
You can follow this tutorial whether you're new to Medusa or an advanced Medusa developer.
Step 1: Install a Medusa Application#
Start by installing the Medusa application on your machine with the following command:
You'll first be asked for the project's name. Then, when asked whether you want to install the Next.js Starter Storefront, choose Yes.
Afterward, the installation process will start, which will install the Medusa application as a monorepository in a directory with your project's name. The backend is installed in the apps/backend directory, and the Next.js Starter Storefront is installed in the apps/storefront directory.
Once the installation finishes successfully, the Medusa Admin dashboard will open with a form to create a new user. Enter the user's credentials and submit the form. Afterward, you can log in with the new user and explore the dashboard.
apps/backend directory of your Medusa project.Step 2: Create Invoice Generator Module#
In Medusa, you can build custom features in a module. A module is a reusable package with the data models and functionalities related to a single feature or domain. Medusa integrates the module into your application without implications or side effects on your setup.
In this step, you'll build an Invoice Generator Module that defines the data models and logic to manage invoices. Later, you'll build commerce flows related to invoices around the module.
a. Create Module Directory#
Create the directory src/modules/invoice-generator that will hold the Invoice Generator Module's code.
b. Create Data Models#
A data model represents a table in the database. You create data models using Medusa's Data Model Language (DML). It simplifies defining a table's columns, relations, and indexes with straightforward methods and configurations.
For the Invoice Generator Module, you'll create a data model to store default invoice configurations and another to store generated invoices.
InvoiceConfig Data Model
To create the first data model, create the file src/modules/invoice-generator/models/invoice-config.ts with the following content:
1import { model } from "@medusajs/framework/utils"2 3export const InvoiceConfig = model.define("invoice_config", {4 id: model.id().primaryKey(),5 company_name: model.text(),6 company_address: model.text(),7 company_phone: model.text(),8 company_email: model.text(),9 company_logo: model.text().nullable(),10 notes: model.text().nullable(),11})
The InvoiceConfig data model has the following properties:
id: The primary key of the table.company_name: The name of the company issuing the invoice.company_address: The address of the company.company_phone: The phone number of the company.company_email: The email address of the company.company_logo: The URL of the company logo image.notes: Additional notes to include in the invoice.
You can also add other fields as needed, such as tax information or payment terms.
Invoice Data Model
Next, you'll create the Invoice data model that represents a generated invoice.
Create the file src/modules/invoice-generator/models/invoice.ts with the following content:
1import { model } from "@medusajs/framework/utils"2 3export enum InvoiceStatus {4 LATEST = "latest",5 STALE = "stale",6}7 8export const Invoice = model.define("invoice", {9 id: model.id().primaryKey(),10 display_id: model.autoincrement(),11 order_id: model.text(),12 status: model.enum(InvoiceStatus).default(InvoiceStatus.LATEST),13 pdfContent: model.json(),14})
The Invoice data model has the following properties:
id: The primary key of the table.display_id: An auto-incrementing identifier for the invoice, which will be used to display the invoice number.order_id: The ID of the order that the invoice belongs to.status: The current status of the invoice.latestindicates the invoice is the most recent version for the order.staleindicates a previous invoice for the order that became stale after order updates.
pdfContent: The content of the invoice in object format that works withpdfmake. You'll use this later to generate the invoice PDF.
c. Create Module's Service#
You can manage your module's data models in a service.
A service is a TypeScript class that the module exports. In the service's methods, you can connect to the database, allowing you to manage your data models, or connect to a third-party service, which is useful if you're integrating with external services.
To create the Invoice Generator Module's service, create the file src/modules/invoice-generator/service.ts with the following content:
1import { MedusaService } from "@medusajs/framework/utils"2import { InvoiceConfig } from "./models/invoice-config"3import { Invoice } from "./models/invoice"4 5class InvoiceGeneratorService extends MedusaService({6 InvoiceConfig,7 Invoice,8}) { }9 10export default InvoiceGeneratorService
The InvoiceGeneratorService extends MedusaService, which generates a class with data-management methods for your module's data models. This saves you time on implementing Create, Read, Update, and Delete (CRUD) methods.
So, the InvoiceGeneratorService class now has methods like createInvoices and retrieveInvoice.
d. Export Module Definition#
The final piece to a module is its definition, which you export in an index.ts file at its root directory. This definition tells Medusa the name of the module and its service.
So, create the file src/modules/invoice-generator/index.ts with the following content:
You use the Module function to create the module's definition. It accepts two parameters:
- The module's unique name.
- An object whose
serviceproperty is the module's service class.
e. Register the Module#
Once you finish building the module, add it to Medusa's configurations to start using it.
In medusa-config.ts, add a modules property and pass an array with your custom module:
Each object in the modules array has a resolve property, whose value is either a path to the module's directory, or an npm package’s name.
f. Generate and Run Migrations#
Since data models represent tables in the database, you define how they're created in the database with migrations. A migration is a TypeScript class that defines database changes made by a module.
Medusa's CLI tool can generate the migrations for you. To generate a migration for the Invoice Generator Module, run the following command in the apps/backend directory:
The db:generate command of the Medusa CLI accepts the name of the module to generate the migration for. You'll now have a migrations directory under src/modules/invoice-generator that holds the generated migration.
Then, to reflect these migrations on the database, run the following command:
The tables for the InvoiceConfig and Invoice data models are now created in the database.
Step 3: Create Default Invoice Configurations#
In this step, you'll create default invoice configurations that admins can later manage through the Medusa Admin dashboard.
Since you need to create the default configurations when the Medusa application starts, you'll use a loader. A loader is a script in your module that Medusa runs on application startup.
a. Create Loader#
To create the loader, create the file src/modules/invoice-generator/loaders/create-default-config.ts with the following content:
1import {2 LoaderOptions,3 IMedusaInternalService,4} from "@medusajs/framework/types"5import { InvoiceConfig } from "../models/invoice-config"6 7export default async function createDefaultConfigLoader({8 container,9}: LoaderOptions) {10 const service: IMedusaInternalService<11 typeof InvoiceConfig12 > = container.resolve("invoiceConfigService")13 14 const [_, count] = await service.listAndCount()15 16 if (count > 0) {17 return18 }19 20 await service.create({21 company_name: "Acme",22 company_address: "123 Acme St, Springfield, USA",23 company_phone: "+1 234 567 8900",24 company_email: "admin@example.com",25 })26}
The loader function accepts an object having the module's container as a parameter. You can use this container to resolve Framework tools and the module's resources.
In the loader, you resolve a service that Medusa generates for the InvoiceConfig data model. You use that service to create default configurations if none exist.
b. Register the Loader#
Next, to register the loader in the module's definition, update the Module function usage in src/modules/invoice-generator/index.ts:
You pass a loaders property to the Module function, whose value is an array of loader functions.
c. Run the Loader#
To run the loader, start the Medusa application:
The Medusa application will run your loader to create the default invoice configurations in the database. You'll verify that it worked in the next step after adding the admin settings page.
Step 4: Allow Admins to Manage Invoice Configurations#
In this step, you'll customize the Medusa application to allow admin users to manage the default invoice configurations through the Medusa Admin dashboard.
To build this feature, you need to create:
- A workflow with the business logic to manage invoice configurations.
- An API route that exposes the invoice configuration management functionality to clients.
- A settings page in the Medusa Admin dashboard that allows admin users to manage the invoice configurations.
a. Invoice Configuration Management Workflow#
A workflow is a series of queries and actions, called steps, that complete a task. A workflow is similar to a function, but it allows you to track its executions' progress, define roll-back logic, and configure other advanced features.
The workflow that manages invoice configurations will have a single step that updates the invoice configuration.
Update Invoice Configuration Step
To create a step, create the file src/workflows/steps/update-invoice-config.ts with the following content:
npm run dev or yarn dev command to generate the necessary type definitions, as explained in the Automatically Generated Types guide.1import { createStep, StepResponse } from "@medusajs/framework/workflows-sdk"2import { INVOICE_MODULE } from "../../modules/invoice-generator"3 4type StepInput = {5 id?: string6 company_name?: string7 company_address?: string8 company_phone?: string9 company_email?: string10 company_logo?: string11 notes?: string12}13 14export const updateInvoiceConfigStep = createStep(15 "update-invoice-config",16 async ({ id, ...updateData }: StepInput, { container }) => {17 const invoiceGeneratorService = container.resolve(INVOICE_MODULE)18 19 const prevData = id ? 20 await invoiceGeneratorService.retrieveInvoiceConfig(id) : 21 (await invoiceGeneratorService.listInvoiceConfigs())[0]22 23 const updatedData = await invoiceGeneratorService.updateInvoiceConfigs({24 id: prevData.id,25 ...updateData,26 })27 28 return new StepResponse(updatedData, prevData)29 },30 async (prevInvoiceConfig, { container }) => {31 if (!prevInvoiceConfig) {32 return33 }34 35 const invoiceGeneratorService = container.resolve(INVOICE_MODULE)36 37 await invoiceGeneratorService.updateInvoiceConfigs({38 id: prevInvoiceConfig.id,39 company_name: prevInvoiceConfig.company_name,40 company_address: prevInvoiceConfig.company_address,41 company_phone: prevInvoiceConfig.company_phone,42 company_email: prevInvoiceConfig.company_email,43 company_logo: prevInvoiceConfig.company_logo,44 })45 }46)
You create a step with the createStep function. It accepts three parameters:
- The step's unique name.
- An async function that receives two parameters:
- The step's input, which is an object having the data to update in the invoice configuration.
- An object that has properties including the Medusa container, which is a registry of Framework and commerce tools that you can access in the step.
- An async compensation function that undoes the actions performed by the step function. This function is only executed if an error occurs during the workflow's execution.
In the step function, you resolve the Invoice Generator Module's service from the Medusa container. Then, you either retrieve the invoice configuration by its ID, or list all invoice configurations and use the first one.
Next, you update the invoice configuration with the data passed to the step function.
Finally, a step function must return a StepResponse instance. The StepResponse constructor accepts two parameters:
- The step's output, which is the updated invoice configuration.
- Data to pass to the step's compensation function.
In the compensation function, you undo the invoice configuration updates if an error occurs during the workflow's execution.
Update Invoice Configuration Workflow
Next, you'll create a workflow that uses the updateInvoiceConfigStep step to update the invoice configuration.
Create the file src/workflows/update-invoice-config.ts with the following content:
1import { createWorkflow, WorkflowResponse } from "@medusajs/framework/workflows-sdk"2import { updateInvoiceConfigStep } from "./steps/update-invoice-config"3 4type WorkflowInput = {5 id?: string6 company_name?: string7 company_address?: string8 company_phone?: string9 company_email?: string10 company_logo?: string11 notes?: string12}13 14export const updateInvoiceConfigWorkflow = createWorkflow(15 "update-invoice-config",16 (input: WorkflowInput) => {17 const invoiceConfig = updateInvoiceConfigStep(input)18 19 return new WorkflowResponse({20 invoice_config: invoiceConfig,21 })22 }23)
You create a workflow using the createWorkflow function. It accepts the workflow's unique name as a first parameter.
It accepts a second parameter: a constructor function that holds the workflow's implementation. The function accepts an input object with the invoice configuration data to update.
In the workflow, you update the invoice configuration using the updateInvoiceConfigStep step.
A workflow must return an instance of WorkflowResponse that accepts the data to return to the workflow's executor.
b. Invoice Configuration API Routes#
Next, you'll create two API routes:
- An API route to retrieve the default invoice configurations. This is useful to display the current configurations on the settings page.
- An API route to update the default invoice configurations. This is useful to allow admin users to update the configurations from the settings page.
Retrieve Invoice Configurations API Route
An API route is created in a route.ts file under a sub-directory of the src/api directory. The path of the API route is the file's path relative to src/api.
Create the file src/api/admin/invoice-config/route.ts with the following content:
1import { MedusaRequest, MedusaResponse } from "@medusajs/framework/http"2 3export async function GET(4 req: MedusaRequest,5 res: MedusaResponse6) {7 const query = req.scope.resolve("query")8 9 const { data: [invoiceConfig] } = await query.graph({10 entity: "invoice_config",11 fields: ["*"],12 })13 14 res.json({15 invoice_config: invoiceConfig,16 })17}
Since you export a GET route handler function, you expose a GET API route at /admin/invoice-config.
In the route handler, you resolve Query from the Medusa container. It allows you to retrieve data across modules.
You retrieve the default invoice configuration and return it in the response.
Update Invoice Configurations API Route
Next, you'll add the API route to update the invoice configurations.
In the same file, add the following imports at the top of the file:
Then, add the following at the end of the file:
1export const PostInvoiceConfigSchema = z.object({2 company_name: z.string().optional(),3 company_address: z.string().optional(),4 company_phone: z.string().optional(),5 company_email: z.string().optional(),6 company_logo: z.string().optional(),7 notes: z.string().optional(),8})9 10type PostInvoiceConfig = z.infer<typeof PostInvoiceConfigSchema>11 12export async function POST(13 req: MedusaRequest<PostInvoiceConfig>,14 res: MedusaResponse15) {16 const { result: { invoice_config } } = await updateInvoiceConfigWorkflow(17 req.scope18 ).run({19 input: req.validatedBody,20 })21 22 res.json({23 invoice_config,24 })25}
You define a validation schema with Zod to validate incoming request bodies. The schema defines the fields that can be updated in the invoice configuration.
Next, since you export a POST route handler function, you expose a POST API route at /admin/invoice-config.
In the route handler, you execute the updateInvoiceConfigWorkflow by invoking it, passing it the Medusa container, then executing its run method.
You return the updated invoice configuration in the response.
Add Validation Middleware
To validate the body parameters of requests sent to the API route, you need to apply a middleware.
To apply a middleware to a route, create the file src/api/middlewares.ts with the following content:
1import { defineMiddlewares, validateAndTransformBody } from "@medusajs/framework/http"2import { PostInvoiceConfigSchema } from "./admin/invoice-config/route"3 4export default defineMiddlewares({5 routes: [6 {7 matcher: "/admin/invoice-config",8 methods: ["POST"],9 middlewares: [10 validateAndTransformBody(PostInvoiceConfigSchema),11 ],12 },13 ],14})
You apply Medusa's validateAndTransformBody middleware to POST requests sent to the /admin/invoice-config API route.
The middleware function accepts a Zod schema, which you created in the API route's file.
c. Create Settings Page#
Next, you'll create a settings page in the Medusa Admin dashboard that allows admin users to manage the invoice configurations.
Initialize JS SDK
To send requests to the Medusa server, you'll use the JS SDK. It's already installed in your Medusa project, but you need to initialize it before using it in your customizations.
Create the file src/admin/lib/sdk.ts with the following content:
Learn more about the initialization options in the JS SDK reference.
Create Settings Page Component
Settings pages are UI routes created under the /src/admin/routes/settings directory. Medusa will then add the settings page under the Settings section of the Medusa Admin dashboard.
Create the file src/admin/routes/settings/invoice-config/page.tsx with the following content:
1import { defineRouteConfig } from "@medusajs/admin-sdk"2import { Container, Heading, Button, Input, Label, Textarea, toast } from "@medusajs/ui"3import { useMutation, useQuery } from "@tanstack/react-query"4import { sdk } from "../../../lib/sdk"5import { useForm } from "react-hook-form"6import * as zod from "zod"7import { 8 FormProvider,9 Controller,10} from "react-hook-form"11import { useCallback, useEffect } from "react"12 13type InvoiceConfig = {14 id: string;15 company_name: string;16 company_address: string;17 company_phone: string;18 company_email: string;19 company_logo?: string;20 notes?: string;21}22 23const schema = zod.object({24 company_name: zod.string().optional(),25 company_address: zod.string().optional(),26 company_phone: zod.string().optional(),27 company_email: zod.string().email().optional(),28 company_logo: zod.string().url().optional(),29 notes: zod.string().optional(),30})31 32const InvoiceConfigPage = () => {33 // TODO add implementation34}35 36export const config = defineRouteConfig({37 label: "Default Invoice Config",38})39 40export default InvoiceConfigPage
A settings page file must export:
- A React component that renders the page. This is the file's default export.
- A configuration object created with the
defineRouteConfigfunction. It accepts an object with properties that define the page's configuration, such as its sidebar label.
So far, the React component doesn't have any implementation. You also define a Zod schema that you'll use to validate the form data.
Change the implementation of the InvoiceConfigPage component to the following:
1const InvoiceConfigPage = () => {2 const { data, isLoading, refetch } = useQuery<{3 invoice_config: InvoiceConfig4 }>({5 queryFn: () => sdk.client.fetch("/admin/invoice-config"),6 queryKey: ["invoice-config"],7 })8 const { mutateAsync, isPending } = useMutation({9 mutationFn: (payload: zod.infer<typeof schema>) => 10 sdk.client.fetch("/admin/invoice-config", {11 method: "POST",12 body: payload,13 }),14 onSuccess: () => {15 refetch()16 toast.success("Invoice config updated successfully")17 },18 })19 20 const getFormDefaultValues = useCallback(() => {21 return {22 company_name: data?.invoice_config.company_name || "",23 company_address: data?.invoice_config.company_address || "",24 company_phone: data?.invoice_config.company_phone || "",25 company_email: data?.invoice_config.company_email || "",26 company_logo: data?.invoice_config.company_logo || "",27 notes: data?.invoice_config.notes || "",28 }29 }, [data])30 31 const form = useForm<zod.infer<typeof schema>>({32 defaultValues: getFormDefaultValues(),33 })34 35 const handleSubmit = form.handleSubmit((formData) => mutateAsync(formData))36 37 const uploadLogo = async (event: React.ChangeEvent<HTMLInputElement>) => {38 const file = event.target.files?.[0]39 if (!file) {40 return41 }42 43 const { files } = await sdk.admin.upload.create({44 files: [file],45 })46 47 form.setValue("company_logo", files[0].url)48 }49 50 useEffect(() => {51 form.reset(getFormDefaultValues())52 }, [getFormDefaultValues])53 54 55 // TODO render form56}
In the component, you:
- Fetch the current invoice configuration using the
useQueryhook from Tanstack Query and the JS SDK. - Define a mutation using the
useMutationhook to update the invoice configuration when the form is submitted. - Define a function that returns the current invoice configuration data, which is useful to create the form.
- Define a
forminstance withuseFormfromreact-hook-form. You pass it the Zod validation schema as a type argument, and the default values using thegetFormDefaultValuesfunction. - Define a
handleSubmitfunction that updates the invoice configuration using the mutation. - Define an
uploadLogofunction that uploads a logo using Medusa's Upload API route. - Reset the form's default values when the
datachanges, ensuring the form reflects the latest invoice configuration.
Finally, replace the TODO comment with the following return statement:
1return (2 <Container className="divide-y p-0">3 <div className="flex items-center justify-between px-6 py-4">4 <Heading level="h1">Invoice Config</Heading>5 </div>6 <FormProvider {...form}>7 <form 8 onSubmit={handleSubmit}9 className="flex h-full flex-col overflow-hidden p-2 gap-2"10 >11 <Controller12 control={form.control}13 name="company_name"14 render={({ field }) => {15 return (16 <div className="flex flex-col space-y-2">17 <div className="flex items-center gap-x-1">18 <Label size="small" weight="plus">19 Company Name20 </Label>21 </div>22 <Input {...field} onChange={field.onChange} value={field.value} />23 </div>24 )25 }}26 />27 <Controller28 control={form.control}29 name="company_address"30 render={({ field }) => {31 return (32 <div className="flex flex-col space-y-2">33 <div className="flex items-center gap-x-1">34 <Label size="small" weight="plus">35 Company Address36 </Label>37 </div>38 <Textarea {...field} />39 </div>40 )41 }}42 />43 <Controller44 control={form.control}45 name="company_phone"46 render={({ field }) => {47 return (48 <div className="flex flex-col space-y-2">49 <div className="flex items-center gap-x-1">50 <Label size="small" weight="plus">51 Company Phone52 </Label>53 </div>54 <Input {...field} />55 </div>56 )57 }}58 />59 <Controller60 control={form.control}61 name="company_email"62 render={({ field }) => {63 return (64 <div className="flex flex-col space-y-2">65 <div className="flex items-center gap-x-1">66 <Label size="small" weight="plus">67 Company Email68 </Label>69 </div>70 <Input {...field} />71 </div>72 )73 }}74 />75 <Controller76 control={form.control}77 name="notes"78 render={({ field }) => {79 return (80 <div className="flex flex-col space-y-2">81 <div className="flex items-center gap-x-1">82 <Label size="small" weight="plus">83 Notes84 </Label>85 </div>86 <Textarea {...field} />87 </div>88 )89 }}90 />91 <Controller92 control={form.control}93 name="company_logo"94 render={({ field }) => {95 return (96 <div className="flex flex-col space-y-2">97 <div className="flex items-center gap-x-1">98 <Label size="small" weight="plus">99 Company Logo100 </Label>101 </div>102 <Input type="file" onChange={uploadLogo} className="py-1" />103 {field.value && (104 <img105 src={field.value}106 alt="Company Logo"107 className="mt-2 h-24 w-24"108 />109 )}110 </div>111 )112 }}113 />114 <Button type="submit" disabled={isLoading || isPending}>115 Save116 </Button>117 </form>118 </FormProvider>119 </Container>120)
You render the form and its fields. When the form is submitted, you execute the handleSubmit function to update the invoice configuration.
Test Update Invoice Configurations#
You'll now test out the invoice configuration management feature.
First, start the Medusa application with the following command:
Then:
- Open the Medusa Admin dashboard in your browser at
http://localhost:9000/adminand log in. - Go to Settings -> Default Invoice Config.
You can edit any of the configurations and upload a company logo. When you click the Save button, it will update the configurations and display a success message.

Step 5: Implement Invoice Generation#
In this step, you'll implement the logic to generate an invoice PDF. Later, you'll execute this logic in a workflow, then expose the functionality in an API route.
You'll implement the invoice generation logic within the Invoice Generator Module's service.
First, install the dependencies needed for PDF generation:
Where:
pdfmakeis a library for generating PDF documents in JavaScript.@types/pdfmakeprovides TypeScript type definitions forpdfmake, allowing you to use it with TypeScript without type errors.
After that, add the following imports at the top of src/modules/invoice-generator/service.ts:
axios is available in your Medusa project by default, so you don't need to install it.Next, add the following before the service declaration:
1const fonts = {2 Helvetica: {3 normal: "Helvetica",4 bold: "Helvetica-Bold",5 italics: "Helvetica-Oblique",6 bolditalics: "Helvetica-BoldOblique",7 },8}9 10const printer = new PdfPrinter(fonts)11 12type GeneratePdfParams = {13 order: OrderDTO14 items: OrderLineItemDTO[]15}
You define the fonts to use in the PDF document. You can choose other fonts, as described in the pdfmake documentation.
Next, you initialize the PDF printer that will be used to generate the invoice PDF. You also define a type with the parameters necessary to generate an invoice.
In the service, you'll first add helper functions that are useful for generating the invoice.
Add the following methods to the InvoiceGeneratorService class:
1class InvoiceGeneratorService extends MedusaService({2 InvoiceConfig,3 Invoice,4}) {5 private async formatAmount(amount: number, currency: string): Promise<string> {6 return new Intl.NumberFormat("en-US", {7 style: "currency",8 currency: currency,9 }).format(amount)10 }11 12 private async imageUrlToBase64(url: string): Promise<string> {13 const response = await axios.get(url, { responseType: "arraybuffer" })14 const base64 = Buffer.from(response.data).toString("base64")15 const mimeType = response.headers["content-type"] || "image/png"16 return `data:${mimeType};base64,${base64}`17 }18}
You add two methods:
formatAmount: Formats an amount into a string with its currency, which is useful for displaying amounts in the PDF.imageUrlToBase64: Converts an image URL to a base64 string. This is necessary becausepdfmakecan't render images from URLs.
Next, you'll add the method that returns the PDF content as expected by pdfmake.
Add the following method to the InvoiceGeneratorService class:
1class InvoiceGeneratorService extends MedusaService({2 InvoiceConfig,3 Invoice,4}) {5 // ...6 private async createInvoiceContent(7 params: GeneratePdfParams, 8 invoice: InferTypeOf<typeof Invoice>9 ): Promise<Record<string, any>> {10 // Get invoice configuration11 const invoiceConfigs = await this.listInvoiceConfigs()12 const config = invoiceConfigs[0] || {}13 14 // Create table for order items15 const itemsTable = [16 [17 { text: "Item", style: "tableHeader" },18 { text: "Quantity", style: "tableHeader" },19 { text: "Unit Price", style: "tableHeader" },20 { text: "Total", style: "tableHeader" },21 ],22 ...(await Promise.all(params.items.map(async (item) => [23 { text: item.title || "Unknown Item", style: "tableRow" },24 { text: item.quantity.toString(), style: "tableRow" },25 { text: await this.formatAmount(26 item.unit_price, 27 params.order.currency_code28 ), style: "tableRow" },29 { text: await this.formatAmount(30 Number(item.total), 31 params.order.currency_code32 ), style: "tableRow" },33 ]))),34 ]35 36 const invoiceId = `INV-${invoice.display_id.toString().padStart(6, "0")}`37 const invoiceDate = new Date(invoice.created_at).toLocaleDateString()38 39 // return the PDF content structure40 return {41 pageSize: "A4",42 pageMargins: [40, 60, 40, 60],43 header: {44 margin: [40, 20, 40, 0],45 columns: [46 /** Company Logo */47 {48 width: "*",49 stack: [50 ...(config.company_logo ? [51 {52 image: await this.imageUrlToBase64(config.company_logo),53 width: 80,54 height: 40,55 fit: [80, 40],56 margin: [0, 0, 0, 10],57 },58 ] : []),59 {60 text: config.company_name || "Your Company Name",61 style: "companyName",62 margin: [0, 0, 0, 0],63 },64 ],65 },66 /** Invoice Title */67 {
This method returns a pdfmake document definition object that describes the structure and content of the invoice PDF.
You show in the PDF:
- Company details, including the logo, name, address, phone, and email.
- Invoice details, such as the invoice ID, date, order ID, and order date.
- Billing and shipping addresses.
- A table with the order items, including item name, quantity, unit price, and total.
- A totals section that summarizes the subtotal, tax, shipping, discount, and total amounts.
- An optional notes section for additional information.
You can customize the styles, layout, and content as needed to match your branding and requirements. Refer to the pdfmake documentation to learn about available content types.
Finally, you'll add the method that generates the PDF and returns it as a buffer.
Add the following method to the InvoiceGeneratorService class:
1class InvoiceGeneratorService extends MedusaService({2 InvoiceConfig,3 Invoice,4}) {5 // ...6 async generatePdf(params: GeneratePdfParams & {7 invoice_id: string8 }): Promise<Buffer> {9 const invoice = await this.retrieveInvoice(params.invoice_id)10 11 // Generate new content12 const pdfContent = Object.keys(invoice.pdfContent).length ? 13 invoice.pdfContent : 14 await this.createInvoiceContent(params, invoice)15 16 await this.updateInvoices({17 id: invoice.id,18 pdfContent,19 })20 21 // get PDF as a Buffer22 return new Promise((resolve, reject) => {23 const chunks: Buffer[] = []24 25 const pdfDoc = printer.createPdfKitDocument(pdfContent as any)26 27 pdfDoc.on("data", (chunk) => chunks.push(chunk))28 pdfDoc.on("end", () => {29 const result = Buffer.concat(chunks)30 resolve(result)31 })32 pdfDoc.on("error", (err) => reject(err))33 34 pdfDoc.end() // Finalize PDF stream35 })36 }37}
In this method, you receive the ID of the invoice to generate its PDF, along with the order details.
You either retrieve its existing content, or generate new content. Finally, you return the PDF invoice as a Buffer.
You'll test out this functionality in the next step.
Step 6: Generate Invoice PDF Workflow and API Routes#
In this step, you'll create a workflow that generates an invoice PDF using the InvoiceGeneratorService you implemented in the previous step. Then, you'll create API routes for admin users and customers to download the generated invoice PDF.
a. Generate Invoice PDF Workflow#
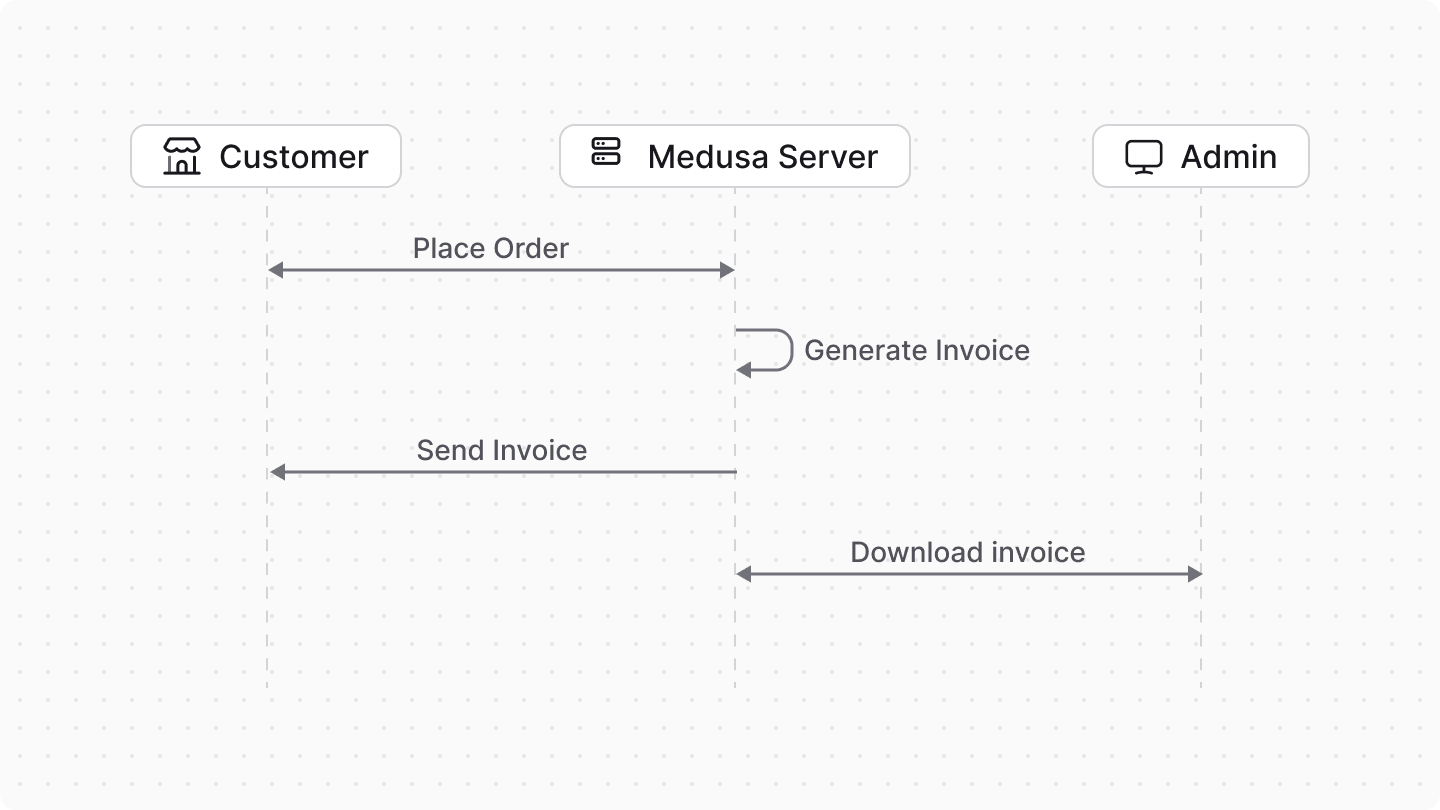
The workflow that generates the invoice PDF will have the following steps:
You only need to implement the third and fourth steps, as the other two steps are helper steps that Medusa provides.
getOrderInvoiceStep
The getOrderInvoiceStep will either retrieve an existing invoice for an order, or create a new one.
Create the file src/workflows/steps/get-order-invoice.ts with the following content:
1import { createStep, StepResponse } from "@medusajs/framework/workflows-sdk"2import { INVOICE_MODULE } from "../../modules/invoice-generator"3import { InvoiceStatus } from "../../modules/invoice-generator/models/invoice"4 5type StepInput = {6 order_id: string7}8 9export const getOrderInvoiceStep = createStep(10 "get-order-invoice",11 async ({ order_id }: StepInput, { container }) => {12 const invoiceGeneratorService = container.resolve(INVOICE_MODULE)13 let [invoice] = await invoiceGeneratorService.listInvoices({14 order_id,15 status: InvoiceStatus.LATEST,16 })17 let createdInvoice = false18 19 if (!invoice) {20 // Store new invoice in database21 invoice = await invoiceGeneratorService.createInvoices({22 order_id,23 status: InvoiceStatus.LATEST,24 pdfContent: {},25 })26 createdInvoice = true27 }28 29 return new StepResponse(invoice, {30 created_invoice: createdInvoice,31 invoice_id: invoice.id,32 })33 },34 async (data, { container }) => {35 const { created_invoice, invoice_id } = data || {}36 if (!created_invoice || !invoice_id) {37 return38 }39 const invoiceGeneratorService = container.resolve(INVOICE_MODULE)40 41 invoiceGeneratorService.deleteInvoices(invoice_id)42 }43)
In the step, you try to retrieve an existing invoice with the latest status for the given order ID. If none exist, you create a new invoice.
The step returns the invoice. In the compensation function, you delete the invoice if an error occurs during the workflow execution.
generateInvoicePdfStep
The generateInvoicePdfStep will generate and return the invoice PDF as a buffer.
Create the file src/workflows/steps/generate-invoice-pdf.ts with the following content:
1import { createStep, StepResponse } from "@medusajs/framework/workflows-sdk"2import { INVOICE_MODULE } from "../../modules/invoice-generator"3import { OrderDTO, OrderLineItemDTO } from "@medusajs/framework/types"4 5export type GenerateInvoicePdfStepInput = {6 order: OrderDTO7 items: OrderLineItemDTO[]8 invoice_id: string9}10 11export const generateInvoicePdfStep = createStep(12 "generate-invoice-pdf",13 async (input: GenerateInvoicePdfStepInput, { container }) => {14 const invoiceGeneratorService = container.resolve(INVOICE_MODULE)15 16 const previousInv = await invoiceGeneratorService.retrieveInvoice(17 input.invoice_id18 )19 20 const pdfBuffer = await invoiceGeneratorService.generatePdf({21 order: input.order,22 items: input.items,23 invoice_id: input.invoice_id,24 })25 26 return new StepResponse({27 pdf_buffer: pdfBuffer,28 }, previousInv)29 },30 async (previousInv, { container }) => {31 if (!previousInv) {32 return33 }34 35 const invoiceGeneratorService = container.resolve(INVOICE_MODULE)36 37 await invoiceGeneratorService.updateInvoices({38 id: previousInv.id,39 pdfContent: previousInv.pdfContent,40 })41 }42)
In the step, you first retrieve the invoice's data before generating the PDF. Then, you generate the PDF and return it as a buffer.
In the compensation function, you update the invoice with the previous PDF content if an error occurs during the workflow execution.
Generate Invoice Workflow
To create the workflow that generates invoices, create the file src/workflows/generate-invoice-pdf.ts with the following content:
1import { createWorkflow, transform, WorkflowResponse } from "@medusajs/framework/workflows-sdk"2import { generateInvoicePdfStep, GenerateInvoicePdfStepInput } from "./steps/generate-invoice-pdf"3import { useQueryGraphStep } from "@medusajs/medusa/core-flows"4import { getOrderInvoiceStep } from "./steps/get-order-invoice"5 6type WorkflowInput = {7 order_id: string8}9 10export const generateInvoicePdfWorkflow = createWorkflow(11 "generate-invoice-pdf",12 (input: WorkflowInput) => {13 const { data: orders } = useQueryGraphStep({14 entity: "order",15 fields: [16 "id",17 "display_id",18 "created_at",19 "currency_code",20 "total",21 "items.*",22 "items.variant.*",23 "items.variant.product.*",24 "shipping_address.*",25 "billing_address.*",26 "shipping_methods.*",27 "tax_total",28 "subtotal",29 "discount_total",30 ],31 filters: {32 id: input.order_id,33 },34 options: {35 throwIfKeyNotFound: true,36 },37 })38 const countryFilters = transform({39 orders,40 }, (data) => {41 const country_codes: string[] = []42 if (data.orders[0].billing_address?.country_code) {43 country_codes.push(data.orders[0].billing_address.country_code)44 }45 if (data.orders[0].shipping_address?.country_code) {46 country_codes.push(data.orders[0].shipping_address.country_code)47 }48 return country_codes49 })50 const { data: countries } = useQueryGraphStep({51 entity: "country",52 fields: ["display_name", "iso_2"],53 filters: {54 iso_2: countryFilters,55 },56 }).config({ name: "retrieve-countries" })57 58 const transformedOrder = transform({59 orders,60 countries,61 }, (data) => {62 const order = data.orders[0]63 64 if (order.billing_address?.country_code) {65 order.billing_address.country_code = data.countries.find(66 (country) => country.iso_2 === order.billing_address!.country_code67 )?.display_name || order.billing_address!.country_code68 }69 70 if (order.shipping_address?.country_code) {71 order.shipping_address.country_code = data.countries.find(72 (country) => country.iso_2 === order.shipping_address!.country_code73 )?.display_name || order.shipping_address!.country_code74 }75 76 return order77 })78 79 const invoice = getOrderInvoiceStep({80 order_id: transformedOrder.id,81 })82 83 const { pdf_buffer } = generateInvoicePdfStep({84 order: transformedOrder,85 items: transformedOrder.items,86 invoice_id: invoice.id,87 } as unknown as GenerateInvoicePdfStepInput)88 89 return new WorkflowResponse({90 pdf_buffer,91 })92 }93)
In the workflow, you:
- Retrieve the order details using
useQueryGraphStep. - Prepare the country codes filter from the billing and shipping addresses. You'll use this filter to retrieve the display names of the countries.
- To manipulate data in a workflow, you need to use the
transformfunction. Learn more in the Data Manipulation documentation.
- To manipulate data in a workflow, you need to use the
- Retrieve the country details, including the display names, using
useQueryGraphStep. - Transform the order to replace country codes with display names.
- Retrieve or create the invoice using the
getOrderInvoiceStep. - Generate the invoice PDF using the
generateInvoicePdfStep. - Return the PDF buffer.
b. Generate Invoice Admin API Route#
Next, you'll create an API route that allows admin users to download an order's invoice.
Create the file src/api/admin/orders/[id]/invoices/route.ts with the following content:
1import { MedusaRequest, MedusaResponse } from "@medusajs/framework"2import { generateInvoicePdfWorkflow } from "../../../../../workflows/generate-invoice-pdf"3 4export async function GET(5 req: MedusaRequest,6 res: MedusaResponse7): Promise<void> {8 const { id } = req.params9 10 const { result: {11 pdf_buffer,12 } } = await generateInvoicePdfWorkflow(req.scope)13 .run({14 input: {15 order_id: id,16 },17 })18 19 const buffer = Buffer.from(pdf_buffer)20 21 res.set({22 "Content-Type": "application/pdf",23 "Content-Disposition": `attachment; filename="invoice-${id}.pdf"`,24 "Content-Length": buffer.length,25 })26 27 res.send(buffer)28}
You export a GET route handler function, exposing a GET API route at /admin/orders/:id/invoices.
In the route handler, you execute the generateInvoicePdfWorkflow which will return the PDF buffer.
Workflows and steps serialize their output. So, you must recreate the buffer from the serialized output using Buffer.from. Learn more in the Constructor Constraints documentation.
Finally, you set the response headers to indicate that the response is a PDF file and send the buffer as the response body.
c. Generate Invoice Store API Route#
You'll also create an identical API route for the storefront, allowing customers to download their order invoices.
Create the file src/api/store/orders/[id]/invoices/route.ts with the following content:
1import { MedusaRequest, MedusaResponse } from "@medusajs/framework"2import { generateInvoicePdfWorkflow } from "../../../../../workflows/generate-invoice-pdf"3 4export async function GET(5 req: MedusaRequest,6 res: MedusaResponse7): Promise<void> {8 const { id } = req.params9 10 const { result: {11 pdf_buffer,12 } } = await generateInvoicePdfWorkflow(req.scope)13 .run({14 input: {15 order_id: id,16 },17 })18 19 const buffer = Buffer.from(pdf_buffer)20 21 res.set({22 "Content-Type": "application/pdf",23 "Content-Disposition": `attachment; filename="invoice-${id}.pdf"`,24 "Content-Length": buffer.length,25 })26 27 res.send(buffer)28}
You expose a GET API route at /store/orders/:id/invoices that allows customers to download their order invoices.
You'll test out both API routes in the next steps.
Step 7: Add Admin Widget to Download Invoices#
In this step, you'll create an admin widget that allows admin users to download invoices directly from order detail pages.
A widget is a React component that is injected into an existing admin page.
To create the widget, create the file src/admin/widgets/order-invoice.tsx with the following content:
1import { defineWidgetConfig } from "@medusajs/admin-sdk"2import { Button, Container, Heading, Text, toast } from "@medusajs/ui"3import { AdminOrder, DetailWidgetProps } from "@medusajs/framework/types"4import { sdk } from "../lib/sdk"5import { useState } from "react"6 7const OrderInvoiceWidget = ({ data: order }: DetailWidgetProps<AdminOrder>) => {8 // TODO implement widget9}10 11export const config = defineWidgetConfig({12 zone: "order.details.side.before",13})14 15export default OrderInvoiceWidget
A widget file must export:
- A React component that contains the widget UI. It's the default export of the file.
- A widget configuration object that defines where the widget should be injected in the Medusa Admin.
Next, you'll add the implementation of the widget. Replace the implementation of the OrderInvoiceWidget component with the following code:
1const OrderInvoiceWidget = ({ data: order }: DetailWidgetProps<AdminOrder>) => {2 const [isDownloading, setIsDownloading] = useState(false)3 4 const downloadInvoice = async () => {5 setIsDownloading(true)6 7 try {8 const response: Response = await sdk.client.fetch(9 `/admin/orders/${order.id}/invoices`, 10 {11 method: "GET",12 headers: {13 "accept": "application/pdf",14 },15 }16 )17 18 const blob = await response.blob()19 const url = window.URL.createObjectURL(blob)20 const a = document.createElement("a")21 a.href = url22 a.download = `invoice-${order.id}.pdf`23 document.body.appendChild(a)24 a.click()25 window.URL.revokeObjectURL(url)26 document.body.removeChild(a)27 setIsDownloading(false)28 toast.success("Invoice generated and downloaded successfully")29 } catch (error) {30 toast.error(`Failed to generate invoice: ${error}`)31 setIsDownloading(false)32 }33 }34 35 return (36 <Container className="divide-y p-0">37 <div className="flex items-center justify-between px-6 py-4">38 <div>39 <Heading level="h2">Invoice</Heading>40 <Text size="small" className="text-ui-fg-subtle">41 Generate and download invoice for this order42 </Text>43 </div>44 </div>45 46 <div className="flex items-center justify-end px-6 py-4">47 <Button48 variant="secondary"49 disabled={isDownloading}50 onClick={downloadInvoice}51 isLoading={isDownloading}52 >53 Download Invoice54 </Button>55 </div>56 </Container>57 )58}
The widget receives the order's data as a prop since it's injected into the order detail page.
In the widget, you define a downloadInvoice function that retrieves the PDF from the /admin/orders/:id/invoices API route and then triggers the download of the PDF.
You return a container with a button to download the invoice.
Test Admin Widget#
To test the admin widget, start the Medusa Admin application again.
Next, start the Next.js Starter Storefront to easily place an order:
Open the storefront at http://localhost:8000. Add a product to the cart, then place an order.
In the Medusa Admin, open the order's detail page. You'll see an "Invoice" section at the top right of the page. Click on the "Download Invoice" button to generate and download the invoice PDF.

You can view the downloaded invoice PDF to make sure all information is correct.
Tip: Making Changes to the Invoice Generator
After the first time the invoice is generated, the generatePdf method will use that same invoice content to avoid generating the content every time.
If you make changes to the createInvoiceContent method and you want to test it out, you'll have to place a new order for now. In a later step, you'll implement the functionality to mark an invoice as stale when an order is updated. This will allow you to easily test out changes to the invoice generation without placing a new order.
Step 8: Download Invoice in Storefront#
In this step, you'll customize the Next.js Starter Storefront to allow customers to download an order's invoice either from its confirmation or detail pages.
The OrderDetails component available in src/modules/order/components/order-details/index.tsx is used on both the order confirmation and detail pages. So, you only need to customize this component.
First, add the following at the top of the file:
You make the component a client component and you add the necessary imports.
Next, add the following variable and function in the OrderDetails component:
1const OrderDetails = ({ order, showStatus }: OrderDetailsProps) => {2 const [isDownloading, setIsDownloading] = useState(false)3 4 const downloadInvoice = async () => {5 setIsDownloading(true)6 7 try {8 const response: Response = await sdk.client.fetch(9 `/store/orders/${order.id}/invoices`, 10 {11 method: "GET",12 headers: {13 "accept": "application/pdf",14 },15 }16 )17 18 const blob = await response.blob()19 const url = window.URL.createObjectURL(blob)20 const a = document.createElement("a")21 a.href = url22 a.download = `invoice-${order.id}.pdf`23 document.body.appendChild(a)24 a.click()25 window.URL.revokeObjectURL(url)26 document.body.removeChild(a)27 setIsDownloading(false)28 toast.success("Invoice generated and downloaded successfully")29 } catch (error) {30 toast.error(`Failed to generate invoice: ${error}`)31 setIsDownloading(false)32 }33 }34 35 // ...36}
You define an isDownloading state variable to manage the download state and a downloadInvoice function that retrieves the PDF from the /store/orders/:id/invoices API route and triggers the download.
Finally, in the return statement, find the following lines:
And replace them with the following:
1return (2 <div>3 {/* ... */}4 <div className="flex gap-2 items-center mt-2">5 <Text className="text-ui-fg-interactive">6 Order number: <span data-testid="order-id">{order.display_id}</span>7 </Text>8 <Button 9 variant="secondary" 10 onClick={downloadInvoice} 11 disabled={isDownloading} 12 isLoading={isDownloading}13 >14 Download Invoice15 </Button>16 </div>17 {/* ... */}18 </div>19)
You show the "Download Invoice" button next to the order number. When the customer clicks the button, it triggers the downloadInvoice function to download the invoice PDF.
Test Storefront Invoice Download#
To test the storefront changes, ensure both the Medusa application and the Next.js Starter Storefront are running.
Then, place an order in the storefront. You'll see the "Download Invoice" button on the order confirmation page. You can click the button to generate and download the invoice PDF.

Step 9: Send Invoice in Email Notifications#
In this step, you'll send an order confirmation email with the invoice PDF attached when an order is placed.
You can listen to events that occur in your Medusa application, such as when an order is placed, using subscribers. A subscriber is an asynchronous function that is executed whenever its associated event is emitted.
To create a subscriber, create the file src/subscribers/order-placed.ts with the following content:
1import { SubscriberArgs, type SubscriberConfig } from "@medusajs/framework"2import { generateInvoicePdfWorkflow } from "../workflows/generate-invoice-pdf"3 4export default async function orderPlacedHandler({5 event: { data },6 container,7}: SubscriberArgs<{8 id: string9}>) {10 const query = container.resolve("query")11 const notificationModuleService = container.resolve("notification")12 13 const { data: [order] } = await query.graph({14 entity: "order",15 fields: [16 "id",17 "display_id",18 "created_at",19 "currency_code",20 "total",21 "email",22 "items.*",23 "items.variant.*",24 "items.variant.product.*",25 "shipping_address.*",26 "billing_address.*",27 "shipping_methods.*",28 "tax_total",29 "subtotal",30 "discount_total",31 // add any other fields you need for the email template...32 ],33 filters: {34 id: data.id,35 },36 })37 38 const { result: {39 pdf_buffer,40 } } = await generateInvoicePdfWorkflow(container)41 .run({42 input: {43 order_id: data.id,44 },45 })46 47 const buffer = Buffer.from(pdf_buffer)48 49 // Convert to binary string to pass as attachment50 const binaryString = [...buffer]51 .map((byte) => byte.toString(2).padStart(8, "0"))52 .join("")53 54 await notificationModuleService.createNotifications({55 to: order.email || "",56 template: "order-placed",57 channel: "email",58 data: order,59 attachments: [60 {61 content: binaryString,62 filename: `invoice-${order.id}.pdf`,63 content_type: "application/pdf",64 disposition: "attachment",65 },66 ],67 })68}69 70export const config: SubscriberConfig = {71 event: "order.placed",72}
A subscriber file must export:
- An asynchronous function, which is the subscriber function that is executed when the event is emitted.
- A configuration object that defines the event the subscriber listens to.
In the subscriber, you:
- Use Query to retrieve the order details. These details are useful to pass to the notification template.
- Generate the invoice PDF using the
generateInvoicePdfWorkflow. - Convert the PDF buffer to a binary string, which is required for the email attachment.
- Send an email using the Notification Module with the order details and the invoice PDF attached.
Notification Module Provider to Use
Since the notification's channel is email, you need a Notification Module Provider that supports sending emails, such as SendGrid or Resend.
After setting up the Notification Module provider, make sure to replace the template of the notification with the template ID from the provider:
Alternatively, for testing purposes, you can change the channel to feed. This will only log the notification to the console instead of sending an email:
Test Order Confirmation Email with Invoice#
To test the order confirmation email, make sure that the Medusa application and the Next.js Starter Storefront are running.
Then, place an order in the storefront. You'll see the following message in the Medusa application's console:
The notification will either be sent to the customer's email address, or logged to the console if you set the channel to feed.
Step 10: Mark Invoices as Stale on Order Updates#
When an order is updated, you need to mark its existing invoice as stale so that the next time an invoice is generated, it includes the updated content. This ensures that admin users and customers always have access to an up-to-date invoice.
In this step, you'll create a workflow that marks an order's existing invoices as stale. Then, you'll execute the workflow in a subscriber that runs whenever an order is updated.
a. Mark Invoices as Stale Workflow#
The workflow that marks invoices as stale will have only a single step that updates the invoice status in the database.
Update Invoices Step
To create the step that updates the status of invoices, create the file src/workflows/steps/update-invoices.ts with the following content:
1import { createStep, StepResponse } from "@medusajs/framework/workflows-sdk"2import { InvoiceStatus } from "../../modules/invoice-generator/models/invoice"3import { INVOICE_MODULE } from "../../modules/invoice-generator"4 5type StepInput = {6 selector: {7 order_id: string8 }9 data: {10 status: InvoiceStatus11 }12}13 14export const updateInvoicesStep = createStep(15 "update-invoices",16 async ({ selector, data }: StepInput, { container }) => {17 const invoiceGeneratorService = container.resolve(INVOICE_MODULE)18 19 const prevData = await invoiceGeneratorService.listInvoices(20 selector21 )22 23 const updatedInvoices = await invoiceGeneratorService.updateInvoices({24 selector,25 data,26 })27 28 return new StepResponse(updatedInvoices, prevData)29 },30 async (prevData, { container }) => {31 if (!prevData) {32 return33 }34 35 const invoiceGeneratorService = container.resolve(INVOICE_MODULE)36 37 await invoiceGeneratorService.updateInvoices(38 prevData.map((i) => ({39 id: i.id,40 status: i.status,41 }))42 )43 }44)
In the step, you retrieve the invoices that belong to an order and update their status to stale. In the compensation function, you revert the status of the invoices back to their previous state in case the workflow execution fails.
The step returns the updated invoices.
Mark Invoices Stale Workflow
Next, to create the workflow that marks invoices as stale, create the file src/workflows/mark-invoices-stale.ts with the following content:
1import { createWorkflow, WorkflowResponse } from "@medusajs/framework/workflows-sdk"2import { useQueryGraphStep } from "@medusajs/medusa/core-flows"3import { updateInvoicesStep } from "./steps/update-invoices"4import { InvoiceStatus } from "../modules/invoice-generator/models/invoice"5 6type WorkflowInput = {7 order_id: string8}9 10export const markInvoicesStaleWorkflow = createWorkflow(11 "mark-invoices-stale",12 (input: WorkflowInput) => {13 const updatedInvoices = updateInvoicesStep({14 selector: {15 order_id: input.order_id,16 },17 data: {18 status: InvoiceStatus.STALE,19 },20 })21 22 return new WorkflowResponse({23 invoices: updatedInvoices,24 })25 }26)
The workflow accepts the ID of the order whose invoices should be marked as stale.
In the workflow, you update the invoices using the updateInvoicesStep, and return the updated invoices.
b. Create Order Updated Subscriber#
Next, you'll create a subscriber that listens to order updates and marks the order's invoices as stale.
Create the subscriber src/subscribers/order-updated.ts with the following content:
1import { SubscriberArgs, type SubscriberConfig } from "@medusajs/framework"2import { markInvoicesStaleWorkflow } from "../workflows/mark-invoices-stale"3 4type EventPayload = {5 id: string6} | {7 order_id: string8}9 10export default async function orderUpdatedHandler({11 event: { data },12 container,13}: SubscriberArgs<EventPayload>) {14 const orderId = "id" in data ? data.id : data.order_id15 16 await markInvoicesStaleWorkflow(container)17 .run({18 input: {19 order_id: orderId,20 },21 })22}23 24export const config: SubscriberConfig = {25 event: [26 "order.updated", 27 "order-edit.confirmed",28 "order.exchange_created",29 "order.claim_created",30 "order.return_received",31 ],32}
The subscriber will run whenever any of the following events are emitted:
order.updated: When an order's general details, such as billing or shipping address, are updated.order-edit.confirmed: When an order edit, which may change the order's items, is confirmed.order.exchange_created: When an exchange is confirmed for an order, which may change the order's items and totals.order.claim_created: When a claim is confirmed for an order, which may change the order's items and totals.order.return_received: When a return is confirmed and received for an order, which may change the order's items and totals.
In the subscriber, you execute the markInvoicesStaleWorkflow to mark the order's invoices as stale whenever an order is updated.
Test Order Updates#
To test the order updates subscriber, start the Medusa application and go to an order's page.
On the order's page, try editing its billing or shipping address, or edit the order's items. You'll see the following message in the console:
Afterward, try clicking the "Download Invoice" button. The new invoice will contain the order's updated details.
Next Steps#
You've successfully implemented the invoice generator feature in Medusa. You can expand on this feature to:
- Customize the PDF's content and layout to match your branding or include more details.
- Show all invoices for an order in the admin and storefront, allowing users to download previous invoices.
- Trigger sending invoices to customers from the Medusa Admin dashboard.
Learn More about Medusa#
If you're new to Medusa, check out the main documentation, where you'll get a more in-depth understanding of all the concepts you've used in this guide and more.
To learn more about the commerce features that Medusa provides, check out Medusa's Commerce Modules.
Troubleshooting#
If you encounter issues during your development, check out the troubleshooting guides.
Getting Help#
If you encounter issues not covered in the troubleshooting guides:
- Visit the Medusa GitHub repository to report issues or ask questions.
- Join the Medusa Discord community for real-time support from community members.