Implement Bundled Products in Medusa
In this tutorial, you'll learn how to implement bundled products in Medusa.
When you install a Medusa application, you get a fully-fledged commerce platform with a Framework for customization. The Medusa application's commerce features are built around Commerce Modules, which are available out-of-the-box.
Medusa natively supports inventory kits, which can be used to create bundled products. However, inventory kits don't support all features of bundled products, such as fulfilling the products in the bundle separately.
In this tutorial, you'll use Medusa's customizable Framework to implement bundled products. By building the bundled products feature, you can expand on it based on what's necessary for your use case.
You can follow this tutorial whether you're new to Medusa or an advanced Medusa developer.
Summary#
By following this tutorial, you'll learn how to:
- Install and set up a Medusa application.
- Define models for bundled products.
- Link bundled products to Medusa's existing product model, allowing you to benefit from existing product features.
- Customize the add-to-cart flow to support bundled products.
- Customize the Next.js Starter Storefront to display bundled products.

Step 1: Install a Medusa Application#
Start by installing the Medusa application on your machine with the following command:
You'll first be asked for the project's name. Then, when asked whether you want to install the Next.js Starter Storefront, choose Yes.
the installation process will start, which will install the Medusa application as a monorepository in a directory with your project's name. The backend is installed in the apps/backend directory, and the Next.js Starter Storefront is installed in the apps/storefront directory.
Once the installation finishes successfully, the Medusa Admin dashboard will open with a form to create a new user. Enter the user's credentials and submit the form. Afterward, you can log in with the new user and explore the dashboard.
apps/backend directory of your Medusa project.Step 2: Create Bundled Product Module#
In Medusa, you can build custom features in a module. A module is a reusable package with functionalities related to a single feature or domain. Medusa integrates the module into your application without implications or side effects on your setup.
In the module, you define the data models necessary for a feature and the logic to manage these data models. Later, you can build commerce flows around your module.
In this step, you'll build a Bundled Product Module that defines the necessary data models to store and manage bundled products.
Create Module Directory#
Modules are created under the src/modules directory of your Medusa application. So, create the directory src/modules/bundled-product.
Create Data Models#
A data model represents a table in the database. You create data models using Medusa's Data Model Language (DML). It simplifies defining a table's columns, relations, and indexes with straightforward methods and configurations.
For the Bundled Product Module, you need to define two data models:
Bundlefor the bundle itself.BundleItemfor the items in the bundle.
To create the Bundle data model, create the file src/modules/bundled-product/models/bundle.ts with the following content:
1import { model } from "@medusajs/framework/utils"2import { BundleItem } from "./bundle-item"3 4export const Bundle = model.define("bundle", {5 id: model.id().primaryKey(),6 title: model.text(),7 items: model.hasMany(() => BundleItem, {8 mappedBy: "bundle",9 }),10})
You define the Bundle data model using the model.define method of the DML. It accepts the data model's table name as a first parameter, and the model's schema object as a second parameter.
The Bundle data model has the following properties:
id: A unique ID for the bundle.title: The bundle's title.items: A one-to-many relation to theBundleItemdata model, which you'll create next.
To create the BundleItem data model, create the file src/modules/bundled-product/models/bundle-item.ts with the following content:
1import { model } from "@medusajs/framework/utils"2import { Bundle } from "./bundle"3 4export const BundleItem = model.define("bundle_item", {5 id: model.id().primaryKey(),6 quantity: model.number().default(1),7 bundle: model.belongsTo(() => Bundle, {8 mappedBy: "items",9 }),10})
The BundleItem data model has the following properties:
id: A unique ID for the bundle item.quantity: The quantity of the item in the bundle. It defaults to1.bundle: A many-to-one relation to theBundledata model, which you defined earlier.
Create Module's Service#
You now have the necessary data models in the Bundled Product Module, but you'll need to manage their records. You do this by creating a service in the module.
A service is a TypeScript or JavaScript class that the module exports. In the service's methods, you can connect to the database, allowing you to manage your data models, or connect to a third-party service, which is useful if you're integrating with external services.
To create the Bundled Product Module's service, create the file src/modules/bundled-product/service.ts with the following content:
The BundledProductModuleService extends MedusaService from the Modules SDK which generates a class with data-management methods for your module's data models. This saves you time on implementing Create, Read, Update, and Delete (CRUD) methods.
So, the BundledProductModuleService class now has methods like createBundles and retrieveBundleItem.
Export Module Definition#
The final piece to a module is its definition, which you export in an index.ts file at its root directory. This definition tells Medusa the name of the module and its service.
So, create the file src/modules/bundled-product/index.ts with the following content:
You use the Module function from the Modules SDK to create the module's definition. It accepts two parameters:
- The module's name, which is
bundledProduct. The name can only contain alphanumeric characters and underscores. - An object with a required property
serviceindicating the module's service.
You also export the module's name as BUNDLED_PRODUCT_MODULE so you can reference it later.
Add Module to Medusa's Configurations#
Once you finish building the module, add it to Medusa's configurations to start using it.
In medusa-config.ts, add a modules property and pass an array with your custom module:
Each object in the modules array has a resolve property, whose value is either a path to the module's directory, or an npm package’s name.
Generate Migrations#
Since data models represent tables in the database, you define how they're created in the database with migrations. A migration is a TypeScript or JavaScript file that defines database changes made by a module.
Medusa's CLI tool can generate the migrations for you. To generate a migration for the Bundled Product Module, run the following command in your Medusa application's directory:
The db:generate command of the Medusa CLI accepts the name of the module to generate the migration for. You'll now have a migrations directory under src/modules/bundled-product that holds the generated migration.
Then, to reflect these migrations on the database, run the following command:
The tables for the Bundle and BundleItem data models are now created in the database.
Step 3: Link Bundles to Medusa Products#
Medusa integrates modules into your application without implications or side effects by isolating modules from one another. This means you can't directly create relationships between data models in your module and data models in other modules.
Instead, Medusa provides the mechanism to define links between data models, and retrieve and manage linked records while maintaining module isolation. Links are useful to define associations between data models in different modules, or extend a model in another module to associate custom properties with it.
In this step, you'll define a link between:
- The
Bundledata model in the Bundled Product Module and theProductdata model in the Products Module. This link will allow you to benefit from existing product features, like prices, sales channels, and more. - The
BundleItemdata model in the Bundled Product Module and theProductdata model in the Products Module. This link will allow you to associate a bundle item with an existing product, where the customer chooses from their variants when purchasing the bundle.
Bundle <> Product Link#
You can define links between data models in a TypeScript or JavaScript file under the src/links directory.
So, to define the link between a bundle and a product, create the file src/links/bundle-product.ts with the following content:
1import { defineLink } from "@medusajs/framework/utils"2import ProductModule from "@medusajs/medusa/product"3import BundledProductsModule from "../modules/bundled-product"4 5export default defineLink(6 BundledProductsModule.linkable.bundle,7 ProductModule.linkable.product8)
You define a link using the defineLink function from the Modules SDK. It accepts two parameters:
- An object indicating the first data model part of the link. A module has a special
linkableproperty that contains link configurations for its data models. So, you can pass the link configurations for theBundledata model from the Bundled Product module. - An object indicating the second data model part of the link. You pass the linkable configurations of the Product Module's
Productdata model.
You'll later learn how to query and manage the linked records.
BundleItem <> Product Link#
Next, you'll define the link between the BundleItem data model and the Product data model. Create the file src/links/bundle-item-product.ts with the following content:
1import { defineLink } from "@medusajs/framework/utils"2import ProductModule from "@medusajs/medusa/product"3import BundledProductsModule from "../modules/bundled-product"4 5export default defineLink(6 {7 linkable: BundledProductsModule.linkable.bundleItem,8 isList: true,9 },10 ProductModule.linkable.product11)
You define the link in the same way as the previous one, but you pass an object with a isList property set to true for the first parameter. This indicates that the link is a one-to-many relation, meaning that a product can be linked to multiple bundle items.
Sync Links to Database#
Medusa creates a table in the database for each link you define. So, you must run the migrations again to create the necessary tables:
This will create tables for both links in the database. The tables will later store the IDs of the linked records.
Step 4: Create Bundled Product Workflow#
You're now ready to start implementing bundled-product features. The first one you'll implement is the ability to create a bundled product.
To build custom commerce features in Medusa, you create a workflow. A workflow is a series of queries and actions, called steps, that complete a task. By using workflows, you can track their executions' progress, define roll-back logic, and configure other advanced features.
So, in this section, you'll learn how to create a workflow that creates a bundled product. Later, you'll execute this workflow in an API route.
The workflow will have the following steps:
View step details
You only need to implement the first two steps, as Medusa provides the rest in its @medusajs/medusa/core-flows package.
createBundleStep#
The first step of the workflow creates a bundle using the Bundled Product Module's service.
To create the step, create the file src/workflows/steps/create-bundle.ts with the following content:
1import { createStep, StepResponse } from "@medusajs/framework/workflows-sdk"2import BundledProductModuleService from "../../modules/bundled-product/service"3import { BUNDLED_PRODUCT_MODULE } from "../../modules/bundled-product"4 5type CreateBundleStepInput = {6 title: string7}8 9export const createBundleStep = createStep(10 "create-bundle",11 async ({ title }: CreateBundleStepInput, { container }) => {12 const bundledProductModuleService: BundledProductModuleService =13 container.resolve(BUNDLED_PRODUCT_MODULE)14 15 const bundle = await bundledProductModuleService.createBundles({16 title,17 })18 19 return new StepResponse(bundle, bundle.id)20 },21 async (bundleId, { container }) => {22 if (!bundleId) {23 return24 }25 const bundledProductModuleService: BundledProductModuleService =26 container.resolve(BUNDLED_PRODUCT_MODULE)27 28 await bundledProductModuleService.deleteBundles(bundleId)29 }30)
You create a step with createStep from the Workflows SDK. It accepts two parameters:
- The step's unique name, which is
create-bundle. - An async function that receives two parameters:
- The step's input, which is in this case an object with the bundle's properties.
- An object that has properties including the Medusa container, which is a registry of Framework and commerce tools that you can access in the step.
In the step function, you resolve the Bundled Product Module's service from the Medusa container using its resolve method, passing it the module's name as a parameter.
Then, you create the bundle using the createBundles method. As you remember, the Bundled Product Module's service extends the MedusaService which generates data-management methods for you.
A step function must return a StepResponse instance. The StepResponse constructor accepts two parameters:
- The step's output, which is the bundle created.
- Data to pass to the step's compensation function.
Compensation Function
The compensation function undoes the actions performed in a step. Then, if an error occurs during the workflow's execution, the compensation functions of executed steps are called to roll back the changes. This mechanism ensures data consistency in your application, especially as you integrate external systems.
The compensation function accepts two parameters:
- The data passed from the step in the second parameter of
StepResponse, which in this case is the ID of the created bundle. - An object that has properties including the Medusa container.
In the compensation function, you resolve the Bundled Product Module's service from the Medusa container and call the deleteBundles method to delete the bundle created in the step.
createBundleItemStep#
Next, you'll create the second step that creates the items in the bundle.
To create the step, create the file src/workflows/steps/create-bundle-items.ts with the following content:
1import { createStep, StepResponse } from "@medusajs/framework/workflows-sdk"2import { BUNDLED_PRODUCT_MODULE } from "../../modules/bundled-product"3import BundledProductModuleService from "../../modules/bundled-product/service"4 5type CreateBundleItemsStepInput = {6 bundle_id: string7 items: {8 quantity: number9 }[]10}11 12export const createBundleItemsStep = createStep(13 "create-bundle-items",14 async ({ bundle_id, items }: CreateBundleItemsStepInput, { container }) => {15 const bundledProductModuleService: BundledProductModuleService =16 container.resolve(BUNDLED_PRODUCT_MODULE)17 18 const bundleItems = await bundledProductModuleService.createBundleItems(19 items.map((item) => ({20 bundle_id,21 quantity: item.quantity,22 }))23 )24 25 return new StepResponse(bundleItems, bundleItems.map((item) => item.id))26 },27 async (itemIds, { container }) => {28 if (!itemIds?.length) {29 return30 }31 32 const bundledProductModuleService: BundledProductModuleService =33 container.resolve(BUNDLED_PRODUCT_MODULE)34 35 await bundledProductModuleService.deleteBundleItems(itemIds)36 }37)
This step accepts the bundle ID and an array of bundle items to create.
In the step, you resolve the Bundled Product Module's service to create the bundle items. Then, you return the created bundle items.
You also pass the IDs of the created bundle items to the compensation function. In the compensation function, you delete the bundle items created in the step.
Create Workflow#
Now that you have all the necessary steps, you can create the workflow.
To create the workflow, create the file src/workflows/create-bundled-product.ts with the following content:
1import { CreateProductWorkflowInputDTO } from "@medusajs/framework/types"2import { createWorkflow, transform, WorkflowResponse } from "@medusajs/framework/workflows-sdk"3import { createBundleStep } from "./steps/create-bundle"4import { createBundleItemsStep } from "./steps/create-bundle-items"5import { createProductsWorkflow, createRemoteLinkStep, useQueryGraphStep } from "@medusajs/medusa/core-flows"6import { BUNDLED_PRODUCT_MODULE } from "../modules/bundled-product"7import { Modules } from "@medusajs/framework/utils"8 9export type CreateBundledProductWorkflowInput = {10 bundle: {11 title: string12 product: CreateProductWorkflowInputDTO13 items: {14 product_id: string15 quantity: number16 }[]17 }18}19 20export const createBundledProductWorkflow = createWorkflow(21 "create-bundled-product",22 ({ bundle: bundleData }: CreateBundledProductWorkflowInput) => {23 const bundle = createBundleStep({24 title: bundleData.title,25 })26 27 const bundleItems = createBundleItemsStep({28 bundle_id: bundle.id,29 items: bundleData.items,30 })31 32 const bundleProduct = createProductsWorkflow.runAsStep({33 input: {34 products: [bundleData.product],35 },36 })37 38 createRemoteLinkStep([{39 [BUNDLED_PRODUCT_MODULE]: {40 bundle_id: bundle.id,41 },42 [Modules.PRODUCT]: {43 product_id: bundleProduct[0].id,44 },45 }])46 47 const bundleProducttemLinks = transform({48 bundleData,49 bundleItems,50 }, (data) => {51 return data.bundleItems.map((item, index) => ({52 [BUNDLED_PRODUCT_MODULE]: {53 bundle_item_id: item.id,54 },55 [Modules.PRODUCT]: {56 product_id: data.bundleData.items[index].product_id,57 },58 }))59 })60 61 createRemoteLinkStep(bundleProducttemLinks).config({62 name: "create-bundle-product-items-links",63 })64 65 // retrieve bundled product with items66 const { data } = useQueryGraphStep({67 entity: "bundle",68 fields: ["*", "items.*"],69 filters: {70 id: bundle.id,71 },72 })73 74 return new WorkflowResponse(data[0])75 }76)
You create a workflow using createWorkflow from the Workflows SDK. It accepts the workflow's unique name as a first parameter.
It accepts as a second parameter a constructor function, which is the workflow's implementation. The function can accept input, which in this case is an object holding the details of the bundle to create.
In the workflow's constructor function, you:
- Create the bundle using the
createBundleStep. - Create the bundle items using the
createBundleItemsStep. - Create the Medusa product associated with the bundle using the
createProductsWorkflow. - Create a link between the bundle and the Medusa product using the
createRemoteLinkStep.- To create a link, you pass an array of objects. The keys of each object are the module names, and the values are objects with the IDs of the records to link.
- Use
transformto prepare the data to link bundle items to products.- You must use the
transformfunction whenever you want to manipulate data in a workflow, as Medusa creates an internal representation of the workflow when the application starts, not when the workflow is executed. Learn more in the Transform Data documentation.
- You must use the
- Create a link between the bundle items and the Medusa products using the
createRemoteLinkStep. - Retrieve the bundle and its items using the
useQueryGraphStep.useQueryGraphStepuses Query, which allows you to retrieve data across modules.
A workflow must return an instance of WorkflowResponse. The WorkflowResponse constructor accepts the workflow's output as a parameter, which is the created bundle.
You'll test out this API route in a later step when you customize the Medusa Admin dashboard.
Step 5: Create Bundled Product API Route#
Now that you have the logic to create a bundled product, you need to expose it so that frontend clients, such as the Medusa Admin, can use it. You do this by creating an API route.
An API Route is an endpoint that exposes commerce features to external applications and clients, such as admin dashboards or storefronts. You'll create an API route at the path /admin/bundled-products that executes the workflow from the previous step.
Implement API Route#
An API route is created in a route.ts file under a sub-directory of the src/api directory. The path of the API route is the file's path relative to src/api.
So, to create an API route at the path /admin/bundled-products, create the file src/api/admin/bundled-products/route.ts with the following content:
/admin are protected by default. So, only authenticated admin users can access them.1import { 2 AuthenticatedMedusaRequest, 3 MedusaResponse,4} from "@medusajs/framework/http"5import { z } from "@medusajs/framework/zod"6import { 7 AdminCreateProduct,8} from "@medusajs/medusa/api/admin/products/validators"9import { 10 createBundledProductWorkflow, 11 CreateBundledProductWorkflowInput,12} from "../../../workflows/create-bundled-product"13 14export const PostBundledProductsSchema = z.object({15 title: z.string(),16 product: AdminCreateProduct(),17 items: z.array(z.object({18 product_id: z.string(),19 quantity: z.number(),20 })),21})22 23type PostBundledProductsSchema = z.infer<typeof PostBundledProductsSchema>24 25export async function POST(26 req: AuthenticatedMedusaRequest<PostBundledProductsSchema>,27 res: MedusaResponse28) {29 const { 30 result: bundledProduct,31 } = await createBundledProductWorkflow(req.scope)32 .run({33 input: {34 bundle: req.validatedBody,35 } as CreateBundledProductWorkflowInput,36 })37 38 res.json({39 bundled_product: bundledProduct,40 })41}
You first define a validation schema with Zod. You'll use this schema in a bit to enforce validation on requests sent to this API route.
Since you export a POST route handler function, you expose a POST API route at /admin/bundled-products. The route handler function accepts two parameters:
- A request object with details and context on the request, such as body parameters or authenticated customer details.
- A response object to manipulate and send the response.
AuthenticatedMedusaRequest accepts the request body's type as a type argument.In the route handler function, you execute the createBundledProductWorkflow by invoking it, passing it the Medusa container (which is available on the scope property of the request object), then calling its run method.
You pass the request body parameters as an input to the workflow.
Finally, you return the created bundle in the response.
Add Validation Middleware#
Now that you have the API route, you need to enforce validation on requests send to the route. You can do this with a middleware.
A middleware is a function executed when a request is sent to an API Route. It's executed before the route handler.
Middlewares are created in the src/api/middlewares.ts file. So create the file src/api/middlewares.ts with the following content:
1import {2 defineMiddlewares, 3 validateAndTransformBody,4} from "@medusajs/framework/http"5import { PostBundledProductsSchema } from "./admin/bundled-products/route"6 7export default defineMiddlewares({8 routes: [9 {10 matcher: "/admin/bundled-products",11 methods: ["POST"],12 middlewares: [13 validateAndTransformBody(PostBundledProductsSchema),14 ],15 },16 ],17})
To export the middlewares, you use the defineMiddlewares function. It accepts an object having a routes property, whose value is an array of middleware route objects. Each middleware route object has the following properties:
method: The HTTP methods the middleware applies to, which is in this casePOST.matcher: The path of the route the middleware applies to.middlewares: An array of middleware functions to apply to the route.- You apply the
validateAndTransformBodythat validates that the request body parameters match the Zod schema passed as a parameter.
- You apply the
The create bundled product route is now ready for use. You'll use it in an upcoming step when you customize the Medusa Admin dashboard.
Step 6: Retrieve Bundles API Route#
Before you start customizing the Medusa Admin, you need an API route that retrieves all bundles. You'll use this API route to show the bundles in a table on the Medusa Admin dashboard.
To create the API route, add the following at the end of src/api/admin/bundled-products/route.ts:
1export async function GET(2 req: AuthenticatedMedusaRequest,3 res: MedusaResponse4) {5 const query = req.scope.resolve("query")6 7 const { 8 data: bundledProducts, 9 metadata: { count, take, skip } = {}, 10 } = await query.graph({11 entity: "bundle",12 ...req.queryConfig,13 })14 15 res.json({16 bundled_products: bundledProducts,17 count: count || 0,18 limit: take || 15,19 offset: skip || 0,20 })21}
Since you export a GET route handler function, you expose a GET API route at /admin/bundled-products.
In the route handler, you resolve Query from the Medusa container. Then, you call its graph method to retrieve the bundles.
Notice that you pass to query.graph the req.queryConfig object. This object contains default query configurations related to pagination and the fields to be retrieved. You'll learn how to set the query configurations in a bit.
Finally, you return the bundles in the response with pagination parameters.
Add Query Configurations#
In the API route, you use the Query configurations to determine the fields to retrieve and pagination parameters. These can be configured in a middleware, allowing you to set the default value, but also allowing clients to modify them.
To add the query configurations, add a new middleware object in src/api/middlewares.ts:
1// other imports...2import { validateAndTransformQuery } from "@medusajs/framework/http"3import { createFindParams } from "@medusajs/medusa/api/utils/validators"4 5export default defineMiddlewares({6 routes: [7 // ...8 {9 matcher: "/admin/bundled-products",10 methods: ["GET"],11 middlewares: [12 validateAndTransformQuery(createFindParams(), {13 defaults: [14 "id", 15 "title", 16 "product.*", 17 "items.*", 18 "items.product.*",19 ],20 isList: true,21 defaultLimit: 15,22 }),23 ],24 },25 ],26})
You apply the validateAndTransformQuery middleware on GET requests to /admin/bundled-products. It accepts the following parameters:
- A Zod schema to validate query parameters. You use Medusa's
createFindParamsfunction, which creates a Zod schema containing the following query parameters:fields: The fields to retrieve in a bundle.limit: The maximum number of bundles to retrieve.offset: The number of bundles to skip before retrieving the bundles.order: The fields to sort the result by.
- An object of Query configurations that you accessed in the API route handler using
req.queryConfig. It accepts the following parameters:defaults: The default fields and relations to retrieve. You retrieve the bundle, its linked product, and its items with their linked products.isList: Whether the API route returns a list of items.defaultLimit: The default number of items to retrieve in a page.
Your API route is now ready for use. You'll test it out in the next step as you customize the Medusa Admin dashboard.
Step 7: Add Bundles Page to Medusa Admin#
Now that you have the necessary routes for admin users to manage and view bundled products, you'll customize the Medusa Admin to allow admin users to use these features.
You can add a new page to the Medusa Admin dashboard using a UI route. A UI route is a React component that specifies the content to be shown in a new page in the Medusa Admin dashboard.
You'll create a UI route to display the list of bundled products in the Medusa Admin. Later, you'll add a form to create a bundled product.
Initialize JS SDK#
Medusa provides a JS SDK that you can use to send requests to the Medusa server from any client application, including your Medusa Admin customizations.
The JS SDK is installed by default in your Medusa application. To configure it, create the file src/admin/lib/sdk.ts with the following content:
You create an instance of the JS SDK using the Medusa class from the JS SDK. You pass it an object having the following properties:
baseUrl: The base URL of the Medusa server.debug: A boolean indicating whether to log debug information into the console.auth: An object specifying the authentication type. When using the JS SDK for admin customizations, you use thesessionauthentication type.
Create UI Route#
UI routes are created under the src/admin/routes directory in a page.tsx file. The file's path, relative to src/admin/routes, is used as the page's path in the Medusa Admin dashboard.
So, to create a new page that shows the list of bundled products, create the file src/admin/routes/bundled-products/page.tsx with the following content:
1import { defineRouteConfig } from "@medusajs/admin-sdk"2import { CubeSolid } from "@medusajs/icons"3 4const BundledProductsPage = () => {5 // TODO add implementation6}7 8export const config = defineRouteConfig({9 label: "Bundled Products",10 icon: CubeSolid,11})12 13export default BundledProductsPage
In a UI route's file, you must export:
- A React component that defines the page's content. You'll add the content in a bit.
- A configuration object that indicates the title and icon used in the sidebar for the page.
Next, you'll use the DataTable component from Medusa UI to show the list of bundled products in a table.
Add the following before the BundledProductsPage component:
1import { 2 Container,3 Heading,4 DataTable,5 useDataTable,6 createDataTableColumnHelper,7 DataTablePaginationState,8} from "@medusajs/ui"9import { useQuery } from "@tanstack/react-query"10import { useMemo, useState } from "react"11import { sdk } from "../../lib/sdk"12import { Link } from "react-router-dom"13 14type BundledProduct = {15 id: string16 title: string17 product: {18 id: string19 }20 items: {21 id: string22 product: {23 id: string24 title: string25 }26 quantity: number27 }[]28 created_at: Date29 updated_at: Date30}31 32const columnHelper = createDataTableColumnHelper<BundledProduct>()33 34const columns = [35 columnHelper.accessor("id", {36 header: "ID",37 }),38 columnHelper.accessor("title", {39 header: "Title",40 }),41 columnHelper.accessor("items", {42 header: "Items",43 cell: ({ row }) => {44 return row.original.items.map((item) => (45 <div key={item.id}>46 <Link to={`/products/${item.product.id}`}>47 {item.product.title}48 </Link>{" "}49 x {item.quantity}50 </div>51 ))52 },53 }),54 columnHelper.accessor("product", {55 header: "Product",56 cell: ({ row }) => {57 return (58 <Link to={`/products/${row.original.product?.id}`}>59 View Product60 </Link>61 )62 },63 }),64]65 66const limit = 15
You define the table's columns using createDataTableColumnHelper from Medusa UI. The table has the following columns:
ID: The ID of the bundle.Title: The title of the bundle.Items: The items in the bundle. You show the title and quantity of each associated product with a link to its page.Product: A link to the Medusa product associated with the bundle.
You also define a limit constant that indicates the maximum number of bundles to retrieve in a page.
Next, replace the BundledProductsPage with the following implementation:
1const BundledProductsPage = () => {2 const [pagination, setPagination] = useState<DataTablePaginationState>({3 pageSize: limit,4 pageIndex: 0,5 })6 7 const offset = useMemo(() => {8 return pagination.pageIndex * limit9 }, [pagination])10 11 const { data, isLoading } = useQuery<{12 bundled_products: BundledProduct[]13 count: number14 }>({15 queryKey: ["bundled-products", offset, limit],16 queryFn: () => sdk.client.fetch("/admin/bundled-products", {17 method: "GET",18 query: {19 limit,20 offset,21 },22 }),23 })24 25 const table = useDataTable({26 columns,27 data: data?.bundled_products ?? [],28 isLoading,29 pagination: {30 state: pagination,31 onPaginationChange: setPagination,32 },33 rowCount: data?.count ?? 0,34 })35 36 return (37 <Container className="divide-y p-0">38 <DataTable instance={table}>39 <DataTable.Toolbar 40 className="flex items-start justify-between gap-2 md:flex-row md:items-center"41 >42 <Heading>Bundled Products</Heading>43 </DataTable.Toolbar>44 <DataTable.Table />45 <DataTable.Pagination />46 </DataTable>47 </Container>48 )49}
In the component, you define a state variable pagination to manage the pagination state of the table, and a memoized variable offset to calculate the number of items to skip before retrieving the bundles based on the current page.
Then, you use the useQuery hook from Tanstack (React) Query to retrieve the bundles from the API route. Tanstack Query is a data-fetching library with features like caching, pagination, and background updates.
In the query function of useQuery, you use the JS SDK to send a GET request to /admin/bundled-products of the Medusa server. You pass the limit and offset query parameters to support paginating the bundles.
Next, you initialize a table instance using the useDataTable hook from Medusa UI. Finally, you render the table in the page.
Test it Out#
To test out the UI route, start the Medusa application by running the following command:
Then, open the Medusa Admin dashboard in your browser at http://localhost:9000/app and log in.
After you log in, you'll see a new "Bundled Products" item in the sidebar. Click on it to open the Bundled Products page.
The table will be empty as you haven't added any bundled products yet. You'll add the form to create a bundled product next.

Step 8: Create Bundled Product Form#
In this step, you'll add a form that allows admin users to create a bundled product. The form will be shown in a modal when the user clicks on a "Create" button in the Bundled Products page.
The form will have the following fields:
- The title of the bundle.
- For each bundle item, a selector to choose the associated product, and a quantity input field.
Create Form Component#
To create the component that shows the form, create the file src/admin/components/create-bundled-product.tsx with the following content:
12import { sdk } from "../lib/sdk"13import { HttpTypes } from "@medusajs/framework/types"14 15const CreateBundledProduct = () => {16 const [open, setOpen] = useState(false)17 const [title, setTitle] = useState("")18 const [items, setItems] = useState<{19 product_id: string | undefined20 quantity: number21 }[]>([22 {23 product_id: undefined,24 quantity: 1,25 },26 ])27 // TODO fetch products28}29export default CreateBundledProduct
You create a CreateBundledProduct component that defines the following state variables:
open: A boolean indicating whether the modal is open or closed.title: The title of the bundle.items: An array of objects representing the items in the bundle. Each object has the following properties:product: The ID of the product.quantity: The quantity of the product in the bundle.
Fetch Products in Form Component#
Next, you need to retrieve the list of products in Medusa to show them in a selector input. Replace the TODO in the CreateBundledProduct with the following:
1const [products, setProducts] = useState<HttpTypes.AdminProduct[]>([])2const productsLimit = 153const [currentProductPage, setCurrentProductPage] = useState(0)4const [productsCount, setProductsCount] = useState(0)5const hasNextPage = useMemo(() => {6 return productsCount ? productsCount > productsLimit : true7}, 8[productsCount, productsLimit])9const queryClient = useQueryClient()10useQuery({11 queryKey: ["products"],12 queryFn: async () => {13 const { products, count } = await sdk.admin.product.list({14 limit: productsLimit,15 offset: currentProductPage * productsLimit,16 })17 setProductsCount(count)18 setProducts((prev) => [...prev, ...products])19 return products20 },21 enabled: hasNextPage,22})23 24const fetchMoreProducts = () => {25 if (!hasNextPage) {26 return27 }28 setCurrentProductPage(currentProductPage + 1)29}30 31// TODO add creation logic
You define new state variables to store the products, the current page of products, and the total number of products.
You also define a hasNextPage memoized variable to determine whether there are more products to load.
Then, you use the useQuery hook from Tanstack Query to retrieve the products from the Medusa server. You call the sdk.admin.product.list method to retrieve the products, passing it the limit and offset query parameters.
Lastly, you define a fetchMoreProducts function that increments the current page of products, which triggers retrieving more products. You'll call this function whenever the user scrolls to the end of the products list.
Add Creation Logic to Form Component#
Next, you'll define the logic to create the bundled product in the Medusa server once the user submits the form.
Replace the new TODO with the following:
1const { 2 mutateAsync: createBundledProduct, 3 isPending: isCreating,4} = useMutation({5 mutationFn: async (data: Record<string, any>) => {6 await sdk.client.fetch("/admin/bundled-products", {7 method: "POST",8 body: data,9 })10 },11})12 13const handleCreate = async () => {14 try {15 await createBundledProduct({16 title,17 product: {18 title,19 options: [20 {21 title: "Default",22 values: ["default"],23 },24 ],25 status: "published",26 variants: [27 {28 title,29 // You can set prices in the product's page30 prices: [],31 options: {32 Default: "default",33 },34 manage_inventory: false,35 },36 ],37 },38 items: items.map((item) => ({39 product_id: item.product_id,40 quantity: item.quantity,41 })),42 })43 setOpen(false)44 toast.success("Bundled product created successfully")45 queryClient.invalidateQueries({46 queryKey: ["bundled-products"],47 })48 setTitle("")49 setItems([{ product_id: undefined, quantity: 1 }])50 } catch (error) {51 toast.error("Failed to create bundled product")52 }53}
You first define a mutation using the useMutation hook from Tanstack Query. The mutation is used to create the bundled product by sending a POST request to the /admin/bundled-products API route.
Then, you define a handleCreate function that will be called when the user submits the form. In this function, you:
- Create the bundled product using the
createBundledProductmutation. You pass it the details of the bundle, its product, and its items.- Notice that you don't set the prices. You can use custom logic to set the prices, or set the price from the bundle's associated product page.
- Close the modal and show a success message using the
toastcomponent from Medusa UI.
Add Component for Each Item in the Form#
Before adding the UI for the form, you'll add a component that renders the form fields for each item in the bundle. You'll later render this as part of the form UI.
In the same file, add the following after the CreateBundledProduct component:
1type BundledProductItemProps = {2 item: { 3 product_id: string | undefined, 4 quantity: number, 5 }6 index: number7 setItems: React.Dispatch<React.SetStateAction<{8 product_id: string | undefined;9 quantity: number;10 }[]>>11 products: HttpTypes.AdminProduct[] | undefined12 fetchMoreProducts: () => void13 hasNextPage: boolean14}15 16const BundledProductItem = ({ 17 item, 18 index, 19 setItems, 20 products, 21 fetchMoreProducts, 22 hasNextPage,23}: BundledProductItemProps) => {24 const observer = useRef(25 new IntersectionObserver(26 (entries) => {27 if (!hasNextPage) {28 return29 }30 const first = entries[0]31 if (first.isIntersecting) {32 fetchMoreProducts()33 }34 },35 { threshold: 1 }36 )37 )38 39 const lastOptionRef = useCallback(40 (node: HTMLDivElement) => {41 if (!hasNextPage) {42 return43 }44 if (observer.current) {45 observer.current.disconnect()46 }47 if (node) {48 observer.current.observe(node)49 }50 },51 [hasNextPage]52 )53 54 return (55 <div className="my-2">56 <Heading level={"h3"} className="mb-2">Item {index + 1}</Heading>57 <Select 58 value={item.product_id} 59 onValueChange={(value) => 60 setItems((items) => 61 items.map((item, i) => {62 return i === index 63 ? { 64 ...item, 65 product_id: value, 66 } 67 : item68 })69 )70 }71 >72 <Select.Trigger>73 <Select.Value placeholder="Select Product" />74 </Select.Trigger>75 <Select.Content>76 {products?.map((product, productIndex) => (77 <Select.Item 78 key={product.id} 79 value={product.id} 80 ref={81 productIndex === products.length - 1 82 ? lastOptionRef 83 : null84 }85 >86 {product.title}87 </Select.Item>88 ))}89 </Select.Content>90 </Select>91 <div className="flex items-center gap-x-2 [&_div]:flex-1">92 <Label>Quantity</Label>93 <Input94 type="number"95 placeholder="Quantity"96 className="w-full mt-1 rounded-md border border-gray-200 p-2"97 value={item.quantity}98 onChange={(e) => 99 setItems((items) => 100 items.map((item, i) => {101 return i === index 102 ? { ...item, quantity: parseInt(e.target.value) } 103 : item104 })105 )106 }107 />108 </div>109 </div>110 )111}
You define a BundledProductItem component that accepts the following props:
item: The item in the bundle as stored in theitemsstate variable.index: The index of the item in theitemsstate variable.setItems: The state setter function to update theitemsstate variable.products: The list of products retrieved from the Medusa server.fetchMoreProducts: The function to fetch more products when the user scrolls to the end of the list.hasNextPage: A boolean indicating whether there are more products to load.
In the component, you render the selector field using the Select component from Medusa UI. You show the products as options in the select, and update the product ID in the items state variable whenever the user selects a product.
You also observe the last option in the list of products using the Intersection Observer API. This allows you to fetch more products when the user scrolls to the end of the list.
Finally, you render an input field for the quantity of the item in the bundle. You update the quantity in the items state variable whenever the user changes it.
Add Form UI#
Now that you have the component to render each item in the bundle, you can add the form UI in the CreateBundledProduct component.
In CreateBundledProduct, add the following return statement
1return (2 <FocusModal open={open} onOpenChange={setOpen}>3 <FocusModal.Trigger asChild>4 <Button variant="primary">Create</Button>5 </FocusModal.Trigger>6 <FocusModal.Content>7 <FocusModal.Header>8 <div className="flex items-center justify-end gap-x-2">9 <Heading level={"h1"}>Create Bundled Product</Heading>10 </div>11 </FocusModal.Header>12 <FocusModal.Body>13 <div className="flex flex-1 flex-col items-center overflow-y-auto">14 <div className="mx-auto flex w-full max-w-[720px] flex-col gap-y-8 px-2 py-16">15 <div>16 <Label>Bundle Title</Label>17 <Input18 value={title}19 onChange={(e) => setTitle(e.target.value)}20 />21 </div>22 <div>23 <Heading level={"h2"}>Bundle Items</Heading>24 {items.map((item, index) => (25 <BundledProductItem26 key={index}27 item={item}28 index={index}29 setItems={setItems}30 products={products}31 fetchMoreProducts={fetchMoreProducts}32 hasNextPage={hasNextPage}33 />34 ))}35 <Button36 variant="secondary"37 onClick={() =>38 setItems([39 ...items,40 { product_id: undefined, quantity: 1 },41 ])42 }43 >44 Add Item45 </Button>46 </div>47 </div>48 </div>49 </FocusModal.Body>50 <FocusModal.Footer>51 <div className="flex items-center justify-end gap-x-2">52 <Button variant="secondary" onClick={() => setOpen(false)}>53 Cancel54 </Button>55 <Button56 variant="primary"57 onClick={handleCreate}58 isLoading={isCreating}59 >60 Create Bundle61 </Button>62 </div>63 </FocusModal.Footer>64 </FocusModal.Content>65 </FocusModal>66)
You use the FocusModal component from Medusa UI to show the form in a modal. The modal is opened when the "Create" button is clicked.
In the modal, you show an input field for the bundle title, and you show the list of bundle items using the BundledProductItem component. You also add a button to add new items to the bundle.
Finally, you show a "Create Bundle" button that calls the handleCreate function when clicked to create the bundle.
Add Form to Bundled Products Page#
Now that the form component is ready, you'll add it to the Bundled Products page. This will show the button to open the modal with the form.
In src/admin/routes/bundled-products/page.tsx, add the following import at the top of the file:
Then, in the DataTable.Toolbar component, add the CreateBundledProduct component after the heading:
This will show the button to open the form at the right side of the page's header.
Test it Out#
To test out the form, start the Medusa application by running the following command:
Then, open the Medusa Admin dashboard in your browser at http://localhost:9000/app, log in, and open the Bundled Products page.
You'll see a new "Create" button at the top right. Click on it to open the modal with the form.

In the modal:
- Enter a title for the bundle. This title will also be used to create the associated product.
- For each item:
- Select a product from the dropdown. You can scroll to the end of the list to load more products.
- Enter a quantity for the item.
- To add a new item, click on the "Add Item" button.
- Once you're done, click on the "Create Bundle" button to create the bundle.

After you create the bundle, the modal will close, and you can see the bundle in the table.
Edit Associated Product#
Once you have a bundle, you can go to its associated product page using the "View Product" link in the table.
In the associated product's page, you should:
- Set the sales channel that the product is available in to ensure it's available for sale.
- Set the shipping profile the product belongs to. This will allow customers to select the appropriate shipping option for the bundle during checkout.
- You can optionally edit other product details, such as the title, description, and images.

Step 9: Add Bundled Product to Cart#
Now that you have bundled products, you need to support adding them to the cart.
In the storefront, when the customer adds the bundle to the cart, they'll select the variant for each item. For example, they can choose a "Black" or "Blue" camera bag.
So, you need to build a flow that adds the chosen product variants of the bundle's items to the cart. You'll add the variants with their default price and the quantity specified in the bundle.
You can customize this logic to fit your needs, such as adding the bundle as a single item in the cart with its total price, or setting custom price for each of the items.
To implement the add-to-cart logic for bundled products, you will:
- Create a workflow that implements the logic.
- Execute the workflow in an API route for storefronts.
Create Workflow#
The add-to-cart workflow for bundled products has the following steps:
View step details
You only need to implement the second step, as the other steps are provided by Medusa's @medusajs/medusa/core-flows package.
a. prepareBundleCartDataStep
The second step of the workflow validates that the customer chose valid variants for each bundle item, and returns the items to be added to the cart.
To create the step, create the file src/workflows/steps/prepare-bundle-cart-data.ts with the following content:
5import { BundleItem } from "../../modules/bundled-product/models/bundle-item"6 7type BundleItemWithProduct = InferTypeOf<typeof BundleItem> & {8 product: ProductDTO9}10 11export type PrepareBundleCartDataStepInput = {12 bundle: InferTypeOf<typeof Bundle> & {13 items: BundleItemWithProduct[]14 }15 quantity: number16 items: {17 item_id: string18 variant_id: string19 }[]20}21 22export const prepareBundleCartDataStep = createStep(23 "prepare-bundle-cart-data",24 async ({ bundle, quantity, items }: PrepareBundleCartDataStepInput) => {25 const bundleItems = bundle.items.map((item: BundleItemWithProduct) => {26 const selectedItem = items.find((i) => i.item_id === item.id)27 if (!selectedItem) {28 throw new MedusaError(29 MedusaError.Types.INVALID_DATA, 30 `No variant selected for bundle item ${item.id}`31 )32 }33 const variant = item.product.variants.find((v) => 34 v.id === selectedItem.variant_id35 )36 if (!variant) {37 throw new MedusaError(38 MedusaError.Types.INVALID_DATA, 39 `Variant ${40 selectedItem.variant_id41 } is invalid for bundle item ${item.id}`42 )43 }44 return {45 variant_id: selectedItem.variant_id,46 quantity: item.quantity * quantity,47 metadata: {48 bundle_id: bundle.id,49 quantity: quantity,50 },51 }52 })53 54 return new StepResponse(bundleItems)55 } 56)
The step receives as an input the bundle's details, the quantity of the bundle to add to the cart, and the selected variants for each item in the bundle.
In the step, you throw an error if an item in the bundle doesn't have a selected variant, or if the selected variant is invalid for that item.
Otherwise, you return an array of objects representing the items to be added to the cart. Each object has the following properties:
variant_id: The ID of the selected variant to add to the cart.quantity: The quantity of the variant to add to the cart. This is calculated by multiplying the quantity of the item in the bundle with the quantity of the bundle to add to the cart.metadata: A line item in the cart has ametadataproperty that can be used to store custom key-value pairs. You store in it the ID of the bundle and its quantity that was added to the cart. This will be useful later when you want to retrieve the item's bundle.
Using Custom Prices
If you want to add the items to the cart with custom prices, you can modify the returned object in the loop to include a unit_price property. For example:
The item will then be added to the cart with that price. Note that the currency is based on the cart's currency.
For example, if the cart's currency is usd, then you're adding an item to the cart at the price $100.
b. Implement the Workflow
You can now create the workflow with the custom add-to-cart logic.
To create the workflow, create the file src/workflows/add-bundle-to-cart.ts with the following content:
15} from "./steps/prepare-bundle-cart-data"16 17type AddBundleToCartWorkflowInput = {18 cart_id: string19 bundle_id: string20 quantity: number21 items: {22 item_id: string23 variant_id: string24 }[]25}26 27export const addBundleToCartWorkflow = createWorkflow(28 "add-bundle-to-cart",29 ({ cart_id, bundle_id, quantity, items }: AddBundleToCartWorkflowInput) => {30 const { data } = useQueryGraphStep({31 entity: "bundle",32 fields: [33 "id",34 "items.*",35 "items.product.*",36 "items.product.variants.*",37 ],38 filters: {39 id: bundle_id,40 },41 options: {42 throwIfKeyNotFound: true,43 },44 })45 46 const itemsToAdd = prepareBundleCartDataStep({47 bundle: data[0],48 quantity,49 items,50 } as unknown as PrepareBundleCartDataStepInput)51 52 acquireLockStep({53 key: cart_id,54 timeout: 2,55 ttl: 10,56 })57 58 addToCartWorkflow.runAsStep({59 input: {60 cart_id,61 items: itemsToAdd,62 },63 })64 65 const { data: updatedCarts } = useQueryGraphStep({66 entity: "cart",67 filters: { id: cart_id },68 fields: ["id", "items.*"],69 }).config({ name: "refetch-cart" })70 71 releaseLockStep({72 key: cart_id,73 })74 75 return new WorkflowResponse(updatedCarts[0])76 }77)
The workflow accepts as an input the cart's ID, the bundle's ID, the quantity of the bundle to add to the cart, and the selected variants for each item in the bundle.
In the workflow, you:
- Retrieve the bundle, its items, and their products and variants using the
useQueryGraphStep. - Validate and prepare the items to be added to the cart using the
prepareBundleCartDataStep. - Acquire a lock on the cart using the
acquireLockStep. - Add the items to the cart using the
addToCartWorkflow. - Retrieve the updated cart using the
useQueryGraphStep. - Release the lock on the cart using the
releaseLockStep.
Finally, you return the updated cart.
Create API Route#
You'll now create the API route that exposes the workflow's functionalities to storefronts.
To create the API route, create the file src/api/store/carts/[id]/line-item-bundles/route.ts with the following content:
5} from "../../../../../workflows/add-bundle-to-cart"6 7export const PostCartsBundledLineItemsSchema = z.object({8 bundle_id: z.string(),9 quantity: z.number().default(1),10 items: z.array(z.object({11 item_id: z.string(),12 variant_id: z.string(),13 })),14})15 16type PostCartsBundledLineItemsSchema = z.infer<17 typeof PostCartsBundledLineItemsSchema18>19 20export async function POST(21 req: MedusaRequest<PostCartsBundledLineItemsSchema>,22 res: MedusaResponse23) {24 const { result: cart } = await addBundleToCartWorkflow(req.scope)25 .run({26 input: {27 cart_id: req.params.id,28 bundle_id: req.validatedBody.bundle_id,29 quantity: req.validatedBody.quantity || 1,30 items: req.validatedBody.items,31 },32 })33 34 res.json({35 cart,36 })37}
You first define a Zod schema to validate the request body. The schema has the following properties:
bundle_id: The ID of the bundle to add to the cart.quantity: The quantity of the bundle to add to the cart. This is optional and defaults to1.items: An array of objects representing the selected variants for each item in the bundle. Each object has the following properties:item_id: The ID of the item in the bundle.variant_id: The ID of the selected variant for that item.
Then, you export a POST route handler, which exposes a POST API route at /store/carts/:id/line-item-bundles.
In the route handler, you execute the addBundleToCartWorkflow workflow. Finally, you return the cart's details in the response.
Add Validation Middleware#
Lastly, you need to add the middleware that enforces the validation of incoming request bodies.
In src/api/middlewares.ts, add a new middleware object to the routes array:
1// other imports...2import { 3 PostCartsBundledLineItemsSchema,4} from "./store/carts/[id]/line-item-bundles/route"5 6export default defineMiddlewares({7 routes: [8 // ...9 {10 matcher: "/store/carts/:id/line-item-bundles",11 methods: ["POST"],12 middlewares: [13 validateAndTransformBody(PostCartsBundledLineItemsSchema),14 ],15 },16 ],17})
This middleware will validate the request body against the PostCartsBundledLineItemsSchema schema before executing the route handler.
You can now use the API route to add bundles to the cart. You'll test it out in the upcoming sections when you customize the Next.js Starter Storefront.
Step 10: Retrieve Bundled Product API Route#
Before customizing the storefront, you'll create an API route to retrieve the details of a bundled product. This will be useful to show the bundle's details in the storefront.
To create the API route, create the file src/api/store/bundle-products/[id]/route.ts with the following content:
1import { MedusaRequest, MedusaResponse } from "@medusajs/framework/http"2import { QueryContext } from "@medusajs/framework/utils"3 4export async function GET(5 req: MedusaRequest,6 res: MedusaResponse7) {8 const { id } = req.params9 const query = req.scope.resolve("query")10 const { currency_code, region_id } = req.query11 12 const { data } = await query.graph({13 entity: "bundle",14 fields: [15 "*", 16 "items.*", 17 "items.product.*", 18 "items.product.options.*",19 "items.product.options.values.*",20 "items.product.variants.*",21 "items.product.variants.calculated_price.*",22 "items.product.variants.options.*",23 ],24 filters: {25 id,26 },27 context: {28 items: {29 product: {30 variants: {31 calculated_price: QueryContext({32 region_id,33 currency_code,34 }),35 },36 },37 },38 },39 40 }, {41 throwIfKeyNotFound: true,42 })43 44 res.json({45 bundle_product: data[0],46 })47}
You export a GET route handler, which exposes a GET API route at /store/bundle-products/:id.
In the route handler, you resolve Query from the Medusa container.
Then, you use Query to retrieve the bundle with its items and their products, variants, and options. These are useful to display to the customer the options for each product to select from, which will result in selecting a variant for a bundle item.
To retrieve the correct price for each variant, you also pass a Query Context with the region ID and currency code that are passed as query parameters. This ensures that the prices are shown accurately to the customer.
Finally, you return the bundle's details in the response.
You'll use this API route next as you customize the storefront.
Step 11: Show Bundled Product Details in Storefront#
In this step, you'll customize the Next.js Starter Storefront you installed with the Medusa application to show a bundled product's items.
Add Function to Retrieve Bundled Product#
You'll start by adding a server action function that retrieves the details of a bundled product.
In src/lib/data/products.ts, add the following at the end of the file:
1export type BundleProduct = {2 id: string3 title: string4 product: {5 id: string6 thumbnail: string7 title: string8 handle: string9 }10 items: {11 id: string12 title: string13 product: HttpTypes.StoreProduct14 }[]15}16 17export const getBundleProduct = async (id: string, {18 currency_code,19 region_id,20}: {21 currency_code?: string22 region_id?: string23}) => {24 const headers = {25 ...(await getAuthHeaders()),26 }27 28 return sdk.client.fetch<{29 bundle_product: BundleProduct30 }>(`/store/bundle-products/${id}`, {31 method: "GET",32 headers,33 query: {34 currency_code,35 region_id,36 },37 })38}
You define a BundledProduct type that represents the structure of a bundled product.
Then, you define a getBundleProduct function that retrieves the bundle's details from the API route you created in the previous step.
Retrieve Bundle with Product#
Since a bundle is linked to a Medusa product, you can modify the request that retrieves the Medusa product to retrieve its associated bundle, if there's any.
By retrieving the bundle's details, you can check which Medusa product is a bundled product, then retrieve its full bundle details.
To retrieve a product's bundle details, first, change the signature of the listProducts function in src/lib/data/products.ts to the following:
1export const listProducts = async ({2 pageParam = 1,3 queryParams,4 countryCode,5 regionId,6}: {7 pageParam?: number8 queryParams?: HttpTypes.FindParams & HttpTypes.StoreProductParams9 countryCode?: string10 regionId?: string11}): Promise<{12 response: { products: (HttpTypes.StoreProduct & {13 bundle?: Omit<BundleProduct, "items">14 })[]; count: number }15 nextPage: number | null16 queryParams?: HttpTypes.FindParams & HttpTypes.StoreProductParams17}> => {18 // ...19}
You modify the response type to possibly include the bundle details (without the items) in each product.
Next, find the sdk.client.fetch call in listProducts and replace the type argument of fetch with the following:
This will ensure that the response from the API route is typed correctly.
Then, in src/app/[countryCode]/(main)/products/[handle]/page.tsx, add the following import at the top of the file:
After that, in the ProductPage component in the same file, find the declaration of pricedProduct and update the query parameters passed to listProducts:
You add the fields query parameter an set it to *bundle. This will ensure that the bundle details are included in the retrieved product objects.
Next, after the if condition that checks if pricedProduct isn't undefined, add the following code:
This will retrieve the full bundled product details if the product is associated with a bundle.
Add Bundle to Cart Function#
Next, you'll add a function that adds the bundle to the cart using the API route you created in the previous step.
In src/lib/data/cart.ts, add the following function at the end of the file:
1export async function addBundleToCart({2 bundleId,3 quantity,4 countryCode,5 items,6}: {7 bundleId: string8 quantity: number9 countryCode: string10 items: {11 item_id: string12 variant_id: string13 }[]14}) {15 if (!bundleId) {16 throw new Error("Missing bundle ID when adding to cart")17 }18 19 const cart = await getOrSetCart(countryCode)20 21 if (!cart) {22 throw new Error("Error retrieving or creating cart")23 }24 25 const headers = {26 ...(await getAuthHeaders()),27 }28 29 await sdk.client.fetch<HttpTypes.StoreCartResponse>(30 `/store/carts/${cart.id}/line-item-bundles`,31 {32 method: "POST",33 body: {34 bundle_id: bundleId,35 quantity,36 items,37 },38 headers,39 })40 .then(async () => {41 const cartCacheTag = await getCacheTag("carts")42 revalidateTag(cartCacheTag)43 44 const fulfillmentCacheTag = await getCacheTag("fulfillment")45 revalidateTag(fulfillmentCacheTag)46 })47 .catch(medusaError)48}
You define the addBundleToCart function that sends a POST request to the API route you created in the previous step.
The request body includes the bundle ID, quantity, and selected variants for each item in the bundle.
Show Bundle Item Selection Actions#
You'll now add a component that shows for bundled product their items and allow the customer to select the product variant for each item, then add it to the cart.
a. Add Bundle Actions Component
To create the component, create the file src/modules/products/components/bundle-actions/index.tsx with the following content:
12import Thumbnail from "../thumbnail"13 14type BundleActionsProps = {15 bundle: BundleProduct16}17 18const optionsAsKeymap = (19 variantOptions: HttpTypes.StoreProductVariant["options"]20) => {21 return variantOptions?.reduce((acc: Record<string, string>, varopt: any) => {22 acc[varopt.option_id] = varopt.value23 return acc24 }, {})25}26 27export default function BundleActions({28 bundle,29}: BundleActionsProps) {30 const [productOptions, setProductOptions] = useState<31 Record<string, Record<string, string>>32 >({})33 const [isAdding, setIsAdding] = useState(false)34 const countryCode = useParams().countryCode as string35 36 // TODO retrieve and set selected variants and options37}
First, you define an optionsAsKeymap function that converts the product variant options into a key-value map. This is useful to later compare the selected options with the available options.
Then, you define the BundleActions component that accepts a bundle prop. In the component, you define:
productOptions: A state variable that stores the selected options for each product in the bundle. The key is the product ID, and the value is a key-value map of the selected options.isAdding: A state variable that indicates whether the bundle is being added to the cart.countryCode: The country code from the URL parameters.
b. Selected Variants and Options Logic
Next, you'll add the logic to retrieve and set the selected variants and options for each product in the bundle.
In BundleActions, replace the TODO with the following:
1// For each product, if it has only 1 variant, preselect it2useEffect(() => {3 const initialOptions: Record<string, Record<string, string>> = {}4 bundle.items.forEach((item) => {5 if (item.product.variants?.length === 1) {6 const variantOptions = optionsAsKeymap(item.product.variants[0].options)7 initialOptions[item.product.id] = variantOptions ?? {}8 } else {9 initialOptions[item.product.id] = {}10 }11 })12 setProductOptions(initialOptions)13}, [bundle.items])14 15const selectedVariants = useMemo(() => {16 return bundle.items.map((item) => {17 if (!item.product.variants || item.product.variants.length === 0) {return undefined}18 19 return item.product.variants.find((v) => {20 const variantOptions = optionsAsKeymap(v.options)21 return isEqual(variantOptions, productOptions[item.product.id])22 })23 })24}, [bundle.items, productOptions])25 26const setOptionValue = (productId: string, optionId: string, value: string) => {27 setProductOptions((prev) => ({28 ...prev,29 [productId]: {30 ...prev[productId],31 [optionId]: value,32 },33 }))34}35 36const allVariantsSelected = useMemo(() => {37 return selectedVariants.every((v) => v !== undefined)38}, [selectedVariants])39 40// TODO handle add to cart
In the useEffect hook, you check if each product in the bundle has only one variant. If it does, you preselect that variant's options. This ensures the customer doesn't need to select the options if there's only one variant available.
Then, you define a selectedVariants variable that stores the selected variants for each product in the bundle. A selected variant is inferred if all options of a product are selected.
You also define a setOptionValue function that updates the selected options for a product. You'll trigger this function when the customer selects an option.
Finally, you define an allVariantsSelected variable that indicates whether all variants are selected.
c. Handle Add to Cart
Next, you'll add a function that is triggered when the add-to-cart button is clicked.
Replace the TODO in the BundleActions component with the following code:
1const handleAddToCart = async () => {2 if (!allVariantsSelected) {return}3 4 setIsAdding(true)5 await addBundleToCart({6 bundleId: bundle.id,7 quantity: 1,8 countryCode,9 items: bundle.items.map((item, index) => ({10 item_id: item.id,11 variant_id: selectedVariants[index]?.id ?? "",12 })),13 })14 setIsAdding(false)15}
The handleAddToCart function adds the bundle to the cart if all variants have been selected. It uses the addBundleToCart function you created in the previous step.
d. Customize the ProductPrice Component
Before you render the component in BundleActions, you'll make a small adjustment to the ProductPrice component to allow passing a CSS class.
In src/modules/products/components/product-price/index.tsx, add a className prop to the ProductPrice component:
Then, in the return statement, pass the className prop in the classes of the first span child of the wrapper div:
e. Render the Component
Finally, you'll render the component that shows the bundle's items and allows the customer to select the product variant for each item.
Add the following return statement to the BundleActions component:
1return (2 <div className="flex flex-col gap-y-6 max-w-2xl mx-auto w-full">3 <h2 className="text-2xl">Items in Bundle</h2>4 <div className="grid gap-6">5 {bundle.items.map((item, index) => (6 <div 7 key={item.product.id} 8 className="rounded-lg p-6 shadow-elevation-card-rest hover:shadow-elevation-card-hover transition-shadow bg-white"9 >10 <div className="flex items-start gap-4">11 <Thumbnail12 thumbnail={item.product.thumbnail}13 className="w-24 h-24 rounded-md"14 size="square"15 images={[]}16 />17 <div>18 <h3 className="text-lg">{item.product.title}</h3>19 <ProductPrice20 product={item.product}21 variant={selectedVariants[index]}22 className="!text-sm mt-2 text-ui-fg-muted"23 />24 </div>25 </div>26 27 {(item.product.variants?.length ?? 0) > 1 && (28 <div className="space-y-4 mt-4">29 {(item.product.options || []).map((option) => (30 <div key={option.id}>31 <OptionSelect32 option={option}33 current={productOptions[item.product.id]?.[option.id]}34 updateOption={(optionId, value) =>35 setOptionValue(item.product.id, optionId, value)36 }37 title={option.title ?? ""}38 disabled={isAdding}39 />40 </div>41 ))}42 </div>43 )}44 </div>45 ))}46 </div>47 48 <Button49 onClick={handleAddToCart}50 disabled={!allVariantsSelected || isAdding}51 variant="primary"52 className="w-full h-10"53 isLoading={isAdding}54 >55 {!allVariantsSelected ? "Select all variants" : "Add bundle to cart"}56 </Button>57 </div>58)
You show the bundle's items in cards. For each item, you show the product's thumbnail, title, and price.
If a product has multiple options, you show the options as buttons that the customer can select from.
Finally, you show an add-to-cart button that is disabled if not all items have selected variants, or if the bundle is being added to the cart.
Use BundleActions Component in Product Page#
You'll show the BundleActions component in the product page if the product is a bundled product.
First, in src/modules/products/templates/product-actions-wrapper/index.tsx add the following imports at the top of the file:
Then, add a bundle prop to the ProductActionsWrapper component:
Finally, add the following before the ProductActionsWrapper component's return statement:
This will show the BundleActions component if the bundle prop is set.
Next, you need to pass the bundle prop to the ProductActionsWrapper component.
In src/modules/products/templates/index.tsx, add the following import at the top of the file:
And pass the bundle prop to the ProductTemplate component:
Then, in the ProductTemplate component's return statement, find the ProductActionsWrapper component and pass the bundle prop to it:
Lastly, you need to pass the bundle prop to the ProductTemplate component.
In src/app/[countryCode]/(main)/products/[handle]/page.tsx, add the bundle prop to ProductTemplate in the ProductPage's return statement:
You pass the bundle using the bundleProduct variable you declared earlier.
Test it Out#
To test it out, start the Medusa application by running the following command in the Medusa application's directory:
Then, start the Next.js Starter Storefront by running the following command in the storefront's directory:
Next, open the storefront in your browser at http://localhost:8000, click on Menu at the top right, then choose Store from the menu.
This will open the product catalogue page, showing the product associated with your bundled product.
If you can't see the product associated with your bundled product, make sure you've added it to the default sales channel (or the sales channel you use in your storefront), as explained in the Edit Associated Product section.
The items in the bundle must also be added to the same sales channel.
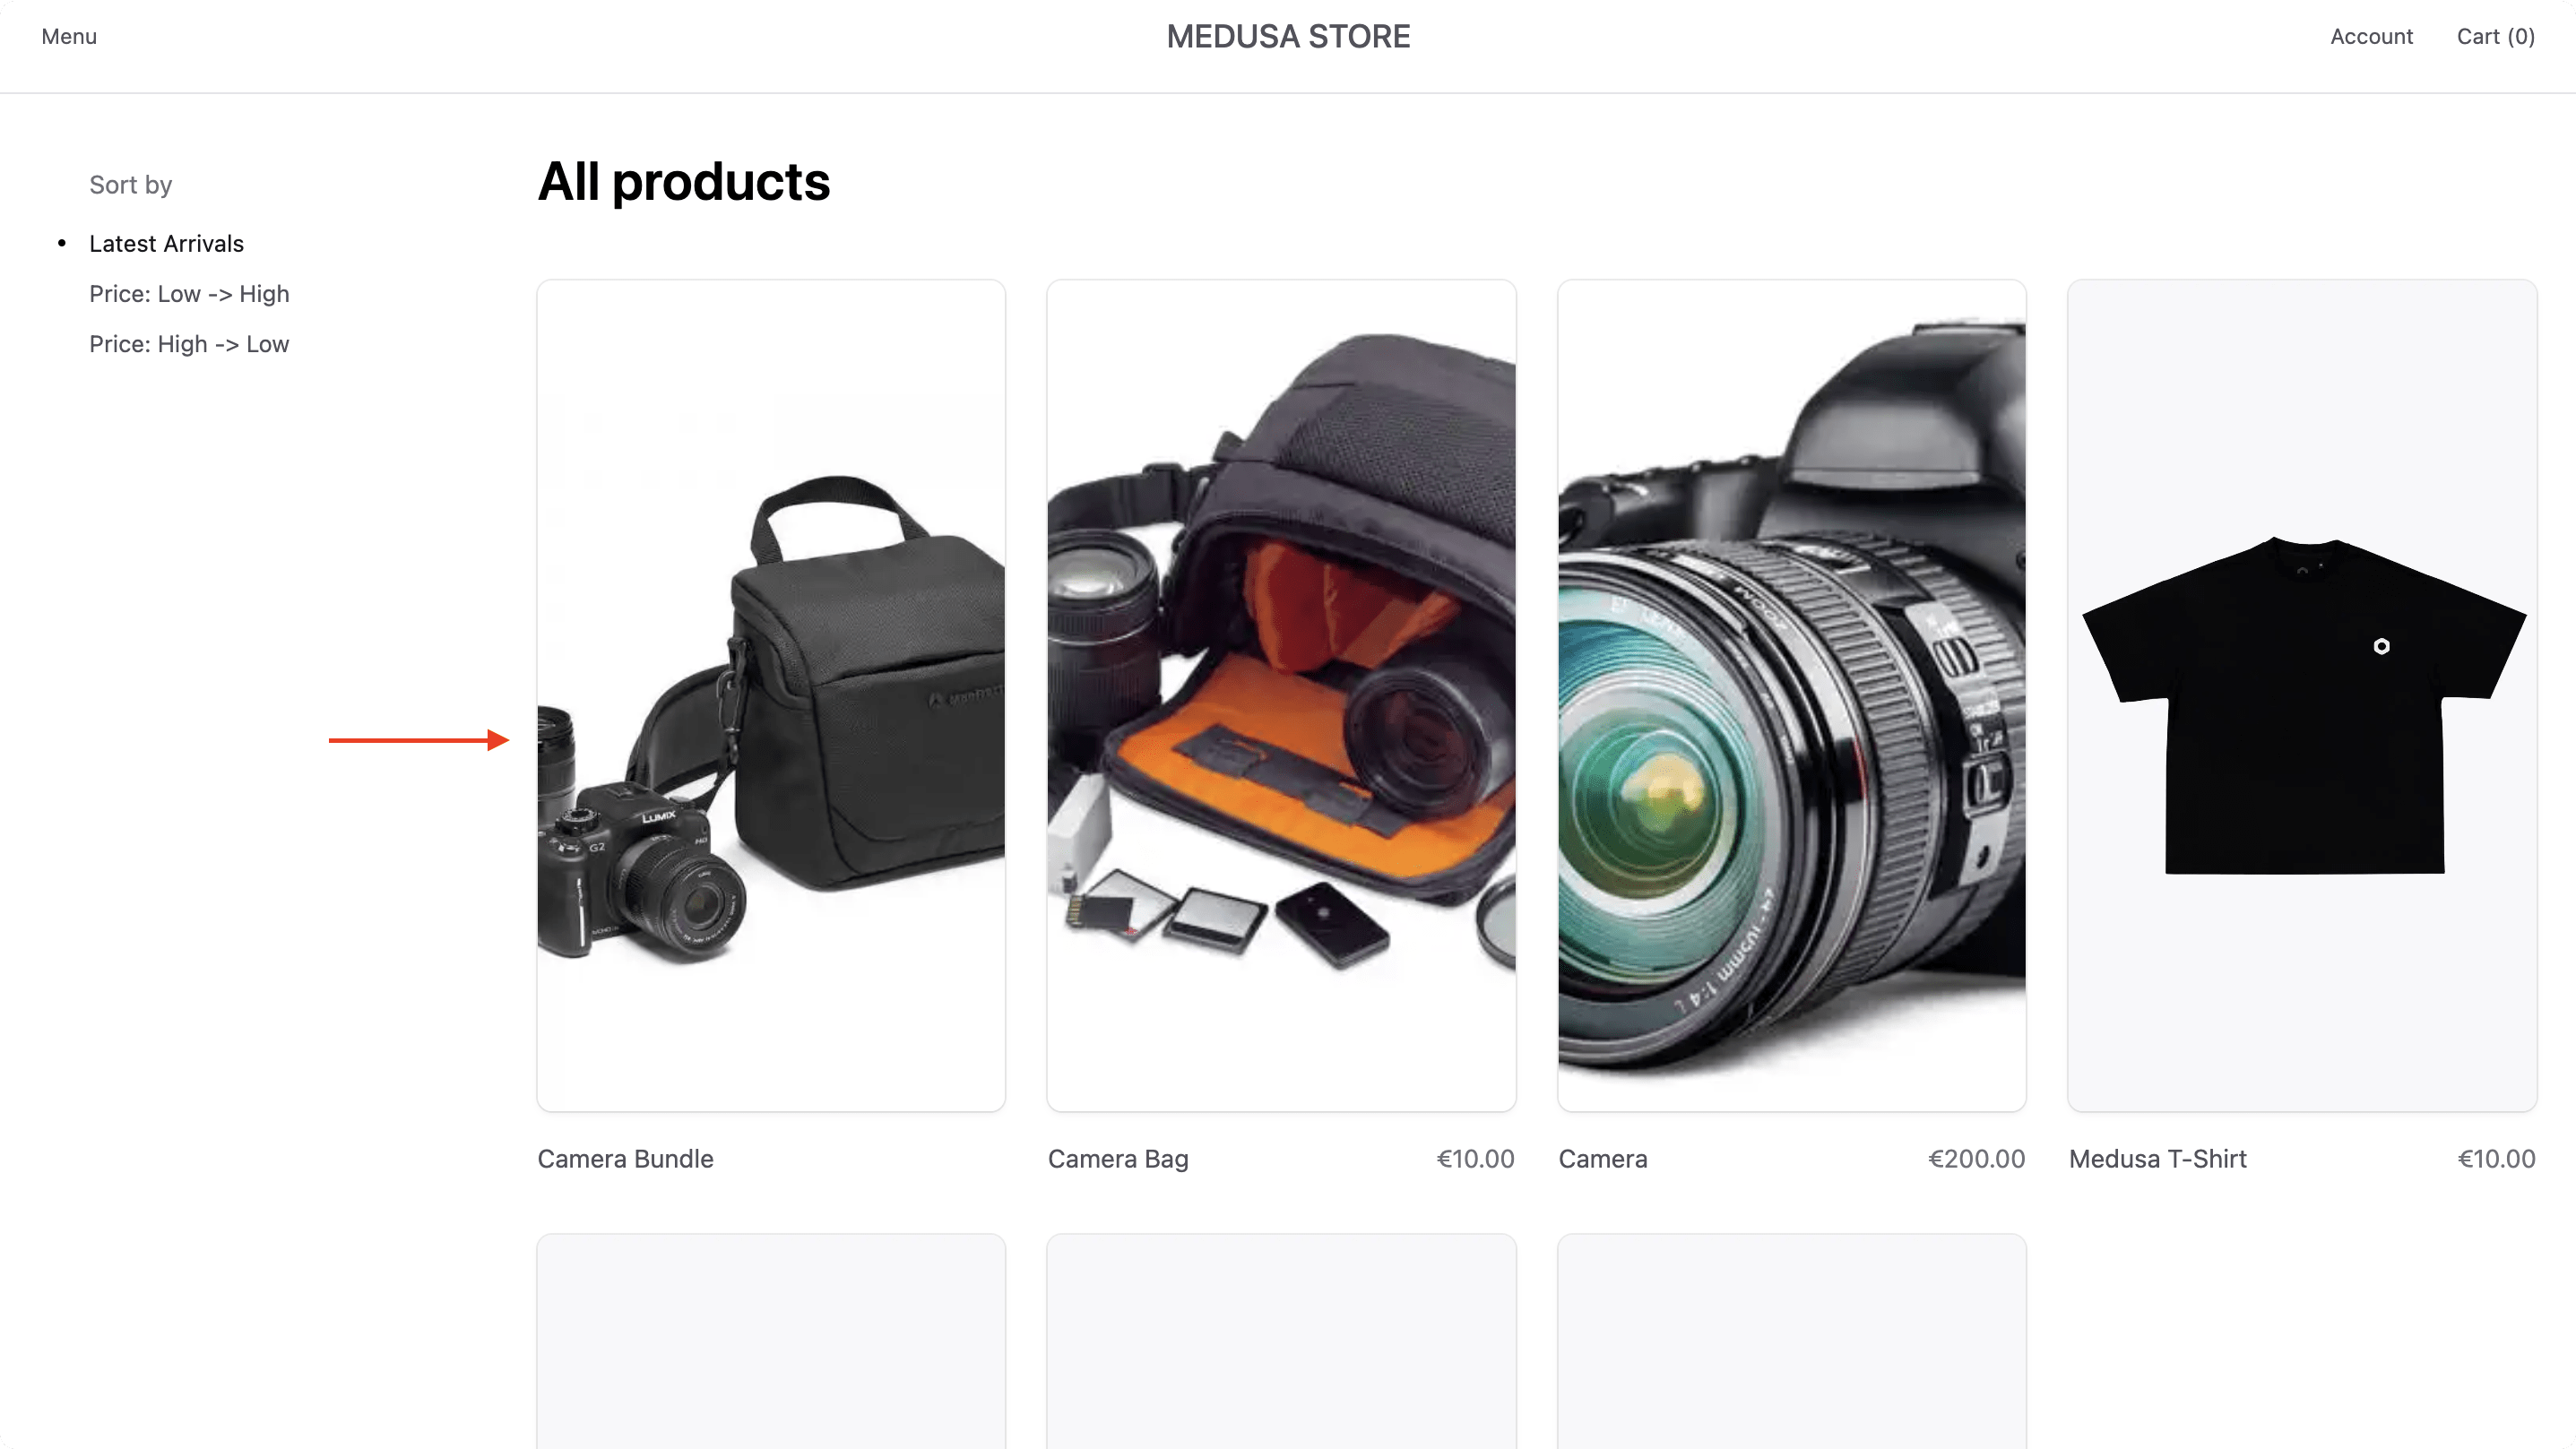
If you click on the bundled product, you can see in its details page the items in the bundle.

Once you select the necessary options for all products in the bundle, the "Add to cart" button will be enabled. You can click on it to add the bundle's items to the cart.

You can then place an order with the bundled items. Then, on the Medusa Admin dashboard, you can fulfill and process the items separately.

Step 12: Remove Bundle from Cart#
The last functionality you'll implement is the ability to remove a bundled product from the cart. When a customer chooses to remove an item in the cart that's part of a bundle, you should remove all items in the bundle from the cart.
To implement this, you need:
- A workflow that implements the logic to remove a bundle's items from the cart.
- An API route that exposes the workflow's functionality to storefronts.
- A function in the storefront that calls the API route to remove the bundle from the cart.
Create Remove Bundle from Cart Workflow#
You'll start by creating a workflow that implements the logic to remove a bundle's items from the cart.
The workflow has the following steps:
View step details
Medusa provides all these steps and workflows in its @medusajs/medusa/core-flows package. So, you can create the workflow right away.
Create the file src/workflows/remove-bundle-from-cart.ts with the following content:
11} from "@medusajs/medusa/core-flows"12 13type RemoveBundleFromCartWorkflowInput = {14 bundle_id: string15 cart_id: string16}17 18export const removeBundleFromCartWorkflow = createWorkflow(19 "remove-bundle-from-cart",20 ({ bundle_id, cart_id }: RemoveBundleFromCartWorkflowInput) => {21 const { data: carts } = useQueryGraphStep({22 entity: "cart",23 fields: [24 "*",25 "items.*",26 ],27 filters: {28 id: cart_id,29 },30 options: {31 throwIfKeyNotFound: true,32 },33 })34 35 const itemsToRemove = transform({36 cart: carts[0],37 bundle_id,38 }, (data) => {39 return data.cart.items.filter((item) => {40 return item?.metadata?.bundle_id === data.bundle_id41 }).map((item) => item!.id)42 })43 44 acquireLockStep({45 key: cart_id,46 timeout: 2,47 ttl: 10,48 })49 50 deleteLineItemsWorkflow.runAsStep({51 input: {52 cart_id,53 ids: itemsToRemove,54 },55 })56 57 // retrieve cart again58 const { data: updatedCarts } = useQueryGraphStep({59 entity: "cart",60 fields: [61 "*",62 "items.*",63 ],64 filters: {65 id: cart_id,66 },67 }).config({ name: "retrieve-cart" })68 69 releaseLockStep({70 key: cart_id,71 })72 73 return new WorkflowResponse(updatedCarts[0])74 }75)
The workflow accepts as an input the bundle's ID and the cart's ID.
In the workflow, you:
- Retrieve the cart and its items using the
useQueryGraphStep. - Use
transformto filter the items in the cart and return only the IDs of the items that belong to the bundle. - Acquire a lock on the cart using the
acquireLockStepto prevent concurrent modifications. - Remove the items from the cart using the
deleteLineItemsWorkflow. - Retrieve the updated cart using the
useQueryGraphStep. - Release the lock on the cart using the
releaseLockStep.
Finally, you return the updated cart.
Create API Route#
Next, you'll create the API route that exposes the workflow's functionality to storefronts.
Create the file src/api/store/carts/[id]/line-item-bundles/[bundle_id]/route.ts with the following content:
1import { MedusaRequest, MedusaResponse } from "@medusajs/framework/http"2import { 3 removeBundleFromCartWorkflow,4} from "../../../../../../workflows/remove-bundle-from-cart"5 6export async function DELETE(7 req: MedusaRequest,8 res: MedusaResponse9) {10 const { result: cart } = await removeBundleFromCartWorkflow(req.scope)11 .run({12 input: {13 cart_id: req.params.id,14 bundle_id: req.params.bundle_id,15 },16 })17 18 res.json({19 cart,20 })21}
You export a DELETE route handler, which exposes a DELETE API route at /store/carts/:id/line-item-bundles/:bundle_id.
In the route handler, you execute the removeBundleFromCartWorkflow workflow to delete the bundle's items from the cart.
Finally, you return the updated cart in the response.
Add Remove Bundle from Cart in Storefront#
You'll now customize the storefront to add a button that removes the bundle from the cart.
Start by adding the following function at the end of src/lib/data/cart.ts:
1export async function removeBundleFromCart(bundleId: string) {2 const cartId = await getCartId()3 const headers = {4 ...(await getAuthHeaders()),5 }6 7 await sdk.client.fetch<HttpTypes.StoreCartResponse>(8 `/store/carts/${cartId}/line-item-bundles/${bundleId}`, 9 {10 method: "DELETE",11 headers,12 }13 )14 .then(async () => {15 const cartCacheTag = await getCacheTag("carts")16 revalidateTag(cartCacheTag)17 18 const fulfillmentCacheTag = await getCacheTag("fulfillment")19 revalidateTag(fulfillmentCacheTag)20 })21 .catch(medusaError)22}
You define the removeBundleFromCart function that sends a DELETE request to the API route you created in the previous step.
Next, you'll update the delete button used in the cart UI to call the removeBundleFromCart function when removing a bundle item from the cart.
In src/modules/common/components/delete-button/index.tsx, add the following import at the top of the file:
Then, add a bundle_id prop to the DeleteButton component:
Finally, replace the handleDelete function in the DeleteButton component with the following:
1const handleDelete = async (id: string) => {2 setIsDeleting(true)3 if (bundle_id) {4 await removeBundleFromCart(bundle_id).catch((err) => {5 setIsDeleting(false)6 })7 } else {8 await deleteLineItem(id).catch((err) => {9 setIsDeleting(false)10 })11 }12}
If the bundle_id prop is set, the handleDelete function calls the removeBundleFromCart function. Otherwise, it calls the default deleteLineItem function.
Next, you'll update the components using the DeleteButton component to pass the bundle_id prop.
In src/modules/cart/components/item/index.tsx, find the DeleteButton component in the return statement and replace it with the following:
You pass the bundle_id prop to the DeleteButton component, which is set to the item's metadata. You also change the text based on whether the item is in a bundle.
Then, in src/modules/layout/components/cart-dropdown/index.tsx, find the DeleteButton component in the return statement and replace it with the following:
Similarly, you pass the bundle_id prop to the DeleteButton component and change the text based on whether the item is in a bundle.
Test it Out#
To test it out, start the Medusa application and the Next.js Starter Storefront as you did in the previous step.
Then, open the storefront in your browser at http://localhost:8000. Given you've already added a bundled product to the cart, you can now see a "Remove bundle" button next to the bundled product in the cart.

If you click on the "Remove bundle" button for any of the bundle's items, all items in the bundle will be removed from the cart.
Next Steps#
Now that you have a working bundled product feature, you can customize it further to fit your use case:
- Add API routes to update the bundled product and its items in the cart.
- Add more CRUD management features to the Bundled Products page in the Medusa Admin.
- Customize the Next.js Starter Storefront to show the bundled products together in the cart, rather than separately.
- Use custom logic to set the price of the bundled product.
If you're new to Medusa, check out the main documentation, where you'll get a more in-depth learning of all the concepts you've used in this guide and more.
To learn more about the commerce features that Medusa provides, check out Medusa's Commerce Modules.