Implement Express Checkout with Medusa
In this guide, you'll learn how to create an express checkout storefront with Medusa.
When you install a Medusa application, you get a fully-fledged commerce server and an admin dashboard to manage the commerce store's data. As for the storefront, you can either install the Next.js Starter Storefront, or create a custom storefront with your preferred tech stack, design, and features. Medusa's architecture is flexible and customizable, allowing you to build a storefront that fits your use case.
An express checkout storefront is a streamlined shopping experience that focuses on reducing friction during the checkout process, allowing customers to quickly and easily buy products with minimal input. When you have an express checkout storefront, you share a link to purchase one of your products, either through social media, blog posts, or other promotional campaigns, and the customer can complete the purchase with minimal effort.
Summary#
In this guide, you'll learn how to:
- Install and set up Medusa.
- Create a custom express checkout storefront with Next.js.

You can follow this guide whether you're new to Medusa or an advanced Medusa developer.
Step 1: Install a Medusa Application#
Start by installing the Medusa application on your machine with the following command:
You'll first be asked for the project's name. Then, when you're asked whether you want to install the Next.js Starter Storefront, choose N for no. You'll create a custom storefront instead.
Afterwards, the installation process will start, which will install the Medusa application in a directory with your project's name. Once the installation finishes successfully, the Medusa Admin dashboard will open in your browser at http://localhost:9000/app with a form to create a new user. Enter the user's credential and submit the form.
Afterwards, you can login with the new user and explore the dashboard.
Change CORS Configurations#
The Medusa application enforces Cross Origin Resource Sharing (CORS) security, which means you can only access the Medusa API from configured origins.
The Next.js development server will run on port 3000 by default, which isn't a configured origin in the Medusa application. To add it to configured origins, change the value of STORE_CORS and AUTH_CORS in the Medusa application's .env file to the following:
You can add other origins as well if necessary.
Learn more about CORS configurations in this guide.
Step 2: Install Next.js Project#
You'll create the express checkout storefront using Next.js. So, to create a Next.js project, run the following command in a directory separate from the Medusa application:
Answer the installation prompts by choosing the default values:
❯Would you like to use TypeScript? Yes❯Would you like to use ESLint? Yes❯Would you like to use Tailwind CSS? Yes❯Would you like your code inside a `src/` directory? No❯Would you like to use App Router? (recommended) Yes❯Would you like to use Turbopack for `next dev`? No❯Would you like to customize the import alias (`@/*` by default)? No
After the installation finishes, your Next.js project is installed in an express-checkout directory.
Step 3: Install Medusa Dependencies#
Before you start implementing the express checkout flow, you'll install the dependencies necessary for your storefront development.
Install Medusa UI#
Medusa provides a UI Library that provides the primitives to build applications based on Medusa's design system. To install the UI library, run the following command in your Next.js project:
You install three packages:
@medusajs/ui: The main UI library.@medusajs/ui-preset: The design and style presets for the UI library.@medusajs/icons: A package that has Medusa icons you can use in your application.
Next, to use Medusa's design system in your storefront, change the content of tailwind.config.ts to the following:
1import path from "path"2import type { Config } from "tailwindcss"3 4// get the path of the dependency "@medusajs/ui"5const medusaUI = path.join(6 path.dirname(require.resolve("@medusajs/ui")),7 "**/*.{js,jsx,ts,tsx}"8)9 10export default {11 presets: [require("@medusajs/ui-preset")],12 content: [13 "./app/**/*.{js,ts,jsx,tsx}", 14 "./components/**/*.{js,ts,jsx,tsx}",15 "@/providers/**/*.{js,ts,jsx,tsx}",16 medusaUI,17 ],18 darkMode: "class",19 theme: {20 extend: {},21 },22 plugins: [],23} satisfies Config
This adds Medusa's UI presets to Tailwind CSS's presets and includes the Medusa UI components in the Tailwind CSS content, ensuring that the styles of the UI components aren't removed by tree-shaking.
Install Medusa JS SDK#
To interact with the Medusa API in your storefront, you'll use the Medusa JS SDK. Install the SDK by running the following command in your Next.js project:
Aside from the SDK, you also install the @medusajs/types package, which provides TypeScript types useful for your development with the SDK.
Next, to use the SDK, you'll export a configured instance and re-use it across your application. So, create the file lib/sdk.ts with the following content:

1import Medusa from "@medusajs/js-sdk"2 3export let MEDUSA_BACKEND_URL = "http://localhost:9000"4 5if (process.env.NEXT_PUBLIC_MEDUSA_BACKEND_URL) {6 MEDUSA_BACKEND_URL = process.env.NEXT_PUBLIC_MEDUSA_BACKEND_URL7}8 9export const sdk = new Medusa({10 baseUrl: MEDUSA_BACKEND_URL,11 debug: process.env.NODE_ENV === "development",12 publishableKey: process.env.NEXT_PUBLIC_MEDUSA_PUBLISHABLE_KEY,13})
This file exports a configured instance of the Medusa SDK that you can use to send requests to the Medusa application. To configure the SDK, you use the following environment variables:
NEXT_PUBLIC_MEDUSA_BACKEND_URL: The URL of the Medusa application server. By default, it's set tohttp://localhost:9000.NEXT_PUBLIC_MEDUSA_PUBLISHABLE_KEY: The publishable API key of the Medusa application. You can find this key in the Medusa Admin dashboard under Settings -> Publishable API Keys.

Step 4: Create React Context Providers#
In your storefront, you'll need to access the following resources across components:
- The selected region. In Medusa, a region represents one or more countries you serve customers in. Each region can have different settings, such as currency codes, prices, payment providers, and more. You create regions in the Medusa Admin, and you can allow the customer to choose their region in the storefront.
- The customer's cart, which you'll use to add the product to purchase, set shipping and payment details, and create an order.
To easily access and manage these resources, you'll wrap your storefront with two React context providers: RegionProvider and CartProvider. You'll implement these providers in this step.
Create Region Provider#
To create the region provider, create the file providers/region.tsx with the following content:

1"use client"2 3import { 4 createContext, 5} from "react"6import { HttpTypes } from "@medusajs/types"7 8type RegionContextType = {9 region?: HttpTypes.StoreRegion10 regions: HttpTypes.StoreRegion[]11 setRegion: React.Dispatch<12 React.SetStateAction<HttpTypes.StoreRegion | undefined>13 >14}15 16const RegionContext = createContext<RegionContextType | null>(null)17 18// TODO add provider component
So far, you've created RegionContextType which represents the data that the provider's children can access. It holds:
region: The selected region.regions: A list of regions available in the Medusa application.setRegion: A function to set the selected region.
Next, you'll create the provider component that wraps the storefront with the region context. Add the following content to the file:
1// other imports...2import { 3 // other imports...4 useState,5} from "react"6 7// ...8 9type RegionProviderProps = {10 children: React.ReactNode11}12 13export const RegionProvider = (14 { children }: RegionProviderProps15) => {16 const [regions, setRegions] = useState<17 HttpTypes.StoreRegion[]18 >([])19 const [region, setRegion] = useState<20 HttpTypes.StoreRegion21 >()22 23 // TODO fetch regions24}
You create a RegionProvider component that so far only defines two state variables:
regions: A state variable that will hold the list of regions available in the Medusa application.region: A state variable that will hold the selected region.
Next, add the following imports to the top of the file:
And replace the TODO in the RegionProvider component with the following content:
When the component mounts, you fetch the regions from the Medusa application using the JS SDK. You then set the regions in the regions state variable.
Next, replace the new TODO with the following content:
1useEffect(() => {2 if (region) {3 // set its ID in the local storage in4 // case it changed5 localStorage.setItem("region_id", region.id)6 return7 }8 9 const regionId = localStorage.getItem("region_id")10 if (!regionId) {11 if (regions.length) {12 setRegion(regions[0])13 }14 } else {15 // retrieve selected region16 sdk.store.region.retrieve(regionId)17 .then(({ region: dataRegion }) => {18 setRegion(dataRegion)19 })20 }21}, [region, regions])22 23// TODO return the provider
You add another useEffect hook that sets the selected region when the component first mounts and whenever the region changes. If the region is set, you only set its value in the local storage.
If the region isn't set in the state variable, you try to retrieve the previously selected value from the local storage. If it's not found, you set the first region in the regions list as the selected region. Otherwise, you retrieve the previously selected region from the Medusa application using the JS SDK.
Finally, replace the last TODO with the following content:
This returns the RegionContext.Provider component that will wraps the storefront with the region context, allowing its children to access the region data.
To simplify the usage of the region context in child components, add to the file the following custom hook that returns the region context:
1// other imports...2import { 3 // other imports...4 useContext, 5} from "react"6 7// ...8 9export const useRegion = () => {10 const context = useContext(RegionContext)11 12 if (!context) {13 throw new Error("useRegion must be used within a RegionProvider")14 }15 16 return context17}
You export a useRegion hook that returns the region context. You'll use this hook later in child components to access the region.
Create Cart Provider#
Next, you'll create the cart provider that allows you to access the customer's cart across components. Create the file providers/cart.tsx with the following content:

1"use client"2 3import { 4 createContext, 5} from "react"6import { HttpTypes } from "@medusajs/types"7 8type CartContextType = {9 cart?: HttpTypes.StoreCart10 addToCart: (variantId: string, quantity: number) => Promise<11 HttpTypes.StoreCart12 >13 updateCart: (data: {14 updateData?: HttpTypes.StoreUpdateCart,15 shippingMethodData?: HttpTypes.StoreAddCartShippingMethods16 }) => Promise<HttpTypes.StoreCart | undefined>17 refreshCart: () => Promise<HttpTypes.StoreCart | undefined>18 updateItemQuantity: (itemId: string, quantity: number) => Promise<19 HttpTypes.StoreCart20 >21 unsetCart: () => void22}23 24const CartContext = createContext<CartContextType | null>(null)25 26// TODO add provider component
You've created CartContextType that represents the data that the provider's children can access. It holds:
cart: The customer's cart. This will be set when the customer adds the product variant to the cart, and unset when the cart is completed.addToCart: A function to add a product variant to the cart.updateCart: A function to update the cart with new details, including shipping details.refreshCart: A function to create a new cart and set it in the context.updateItemQuantity: A function to update the quantity of an item in the cart.unsetCart: A function to unset the cart from local storage and state variable.
Next, you'll create the provider component that wraps the storefront with the cart context. Add the following content to the file:
1// other imports...2import { 3 // other imports...4 useState,5} from "react"6import { useRegion } from "./region"7 8// ...9 10type CartProviderProps = {11 children: React.ReactNode12}13 14export const CartProvider = ({ children }: CartProviderProps) => {15 const [cart, setCart] = useState<16 HttpTypes.StoreCart17 >()18 const { region } = useRegion()19 20 // TODO set cart21}
You create a CartProvider component that defines two state variables:
cartstate variable that will hold the customer's cart details.regionholding the selected region retrieved from the region context.
Next, you'll add the logic to set the customer's cart in the provider. Add the following imports to the top of the file:
And replace the TODO in the CartProvider component with the following content:
1useEffect(() => {2 if (!region) {3 return4 }5 if (cart) {6 localStorage.setItem("cart_id", cart.id)7 return8 }9 10 const cartId = localStorage.getItem("cart_id")11 if (!cartId) {12 // create a cart13 refreshCart()14 } else {15 // retrieve cart16 sdk.store.cart.retrieve(cartId, {17 fields: 18 "+items.variant.*,+items.variant.options.*,+items.variant.options.option.*",19 })20 .then(({ cart: dataCart }) => {21 setCart(dataCart)22 })23 }24}, [cart, region])25 26// TODO update cart when region changes
You add a useEffect hook that runs when the component mounts and whenever the cart is changed. If the cart is already set, you only set its value in the local storage.
If the cart isn't set, you either try to retrieve the cart set in local storage, or create a new cart.
Next, you'll add the logic to update the cart when the region changes. Replace the TODO with the following:
This useEffect hook runs when the region changes. If the cart is set and the region of the cart doesn't match the selected region, you update the cart with the new selected region.
You'll now implement the functions that are part of the context's value. Start by adding the refreshCart function in the place of the TODO:
In the refreshCart function, you create a new cart in the selected region using the JS SDK and set it in the context. You also set the cart ID in the local storage, and return the cart.
Next, add the addToCart function in the place of the TODO:
1const addToCart = async (variantId: string, quantity: number) => {2 const newCart = await refreshCart()3 if (!newCart) {4 throw new Error("Could not create cart")5 }6 7 const { cart: dataCart } = await sdk.store.cart.createLineItem(newCart.id, {8 variant_id: variantId,9 quantity,10 })11 setCart(dataCart)12 13 return dataCart14}15 16// TODO add updateCart function
In the addToCart function, you use the refreshCart function to create a new cart, then add a product variant to the cart with the specified quantity using the JS SDK. You set the updated cart in the context and return the cart.
After that, replace the TODO with the updateCart function:
1const updateCart = async ({2 updateData,3 shippingMethodData,4}: {5 updateData?: HttpTypes.StoreUpdateCart,6 shippingMethodData?: HttpTypes.StoreAddCartShippingMethods7}) => {8 if (!updateData && !shippingMethodData) {9 return cart10 }11 let returnedCart = cart12 if (updateData) {13 returnedCart = (await sdk.store.cart.update(cart!.id, updateData)).cart14 }15 16 if (shippingMethodData) {17 returnedCart = (await sdk.store.cart.addShippingMethod(cart!.id, shippingMethodData)).cart18 }19 20 setCart(returnedCart)21 22 return returnedCart23}24 25// TODO add updateItemQuantity function
In the updateCart function, you update the cart's general details and set the cart's shipping method using the JS SDK. You then set the updated cart in the context and return the cart.
Then, replace the TODO with the updateItemQuantity function:
In the updateItemQuantity function, you update the quantity of an item in the cart using the JS SDK and set the updated cart in the context.
Lastly, replace the TODO with the unsetCart function:
In the unsetCart function, you remove the cart ID from the local storage and unset the cart in the context.
Finally, you'll return the provider component. Replace the last TODO with the following content:
This returns the CartContext.Provider component that wraps the storefront with the cart context, allowing its children to access the cart data.
To simplify the usage of the cart context in child components, add in the same file the following custom hook that returns the cart context:
You export a useCart hook that returns the cart context. You'll use this hook later in child components to access the cart.
Step 5: Implement Storefront Layout#
In this step, you'll implement the general layout of the storefront. The storefront will have a simple two-column layout, with one column showing the current page's content, and another showing the current region and allowing the customer to change it.
Create Second Column#
Before creating the layout, you'll create the second column that's consistent across pages.
To create the component, create the file components/SecondCol/index.tsx with the following content:

1"use client"2 3import { clx } from "@medusajs/ui"4import { useRegion } from "@/providers/region"5 6export const SecondCol = () => {7 const { region, regions, setRegion } = useRegion()8 9 return (10 <div className={clx(11 "flex flex-col justify-center items-center gap-6",12 "lg:w-1/2 w-full"13 )}>14 <div className="flex flex-col justify-center gap-1">15 <span className="text-xs text-ui-fg-subtle">16 Powered by17 </span>18 <img 19 src="https://res.cloudinary.com/dza7lstvk/image/upload/v1735642745/Medusa%20Resources/medusa-express-logo_gqu5qy.png" 20 alt="Medusa" 21 width={67}22 height={16}23 />24 </div>25 <div className="flex justify-center gap-1">26 <span className="text-sm text-ui-fg-muted">27 Region:28 </span>29 <select30 value={region?.id}31 onChange={(e) => {32 const selectedRegion = regions.find(33 (r) => r.id === e.target.value34 )35 setRegion(selectedRegion)36 }}37 className={clx(38 "text-sm text-ui-fg-subtle",39 "select"40 )}41 >42 {regions.map((r) => (43 <option key={r.id} value={r.id}>44 {r.name}45 </option>46 ))}47 </select>48 </div>49 </div>50 )51}
You create a SecondCol component that shows the Medusa logo and a dropdown to change the selected region. You use the useRegion hook to access the region context and manage region data.
When the customer changes the selected region in the dropdown, the selected region is changed in the context, which also updates the customer cart's region.
Add Select Styling#
The SecondCol component uses custom styling for the select component using the .select class.
To add that styling, replace the content of app/globals.css with the following content:
1@tailwind base;2@tailwind components;3@tailwind utilities;4 5.select {6 @apply appearance-none border-none bg-no-repeat pr-4;7 background-image: url('data:image/svg+xml,<svg width="16" height="16" viewBox="0 0 16 16" fill="none" xmlns="http://www.w3.org/2000/svg"><path d="M4.6666 10L7.99994 13.3333L11.3333 10" stroke="%239CA3AF" stroke-width="1.5" stroke-linecap="round" stroke-linejoin="round"/><path d="M4.6666 5.99993L7.99994 2.6666L11.3333 5.99993" stroke="%239CA3AF" stroke-width="1.5" stroke-linecap="round" stroke-linejoin="round"/></svg>');8 background-size: 16px;9 background-position: right top 50%;10 background-color: transparent;11}
Create Layout Component#
Next, you'll create the layout component that wraps the storefront pages with the general layout. Replace the content of the file components/Layout/index.tsx with the following content:
1import { clx } from "@medusajs/ui"2import { Inter, Roboto_Mono } from "next/font/google"3import { RegionProvider } from "@/providers/region"4import "./globals.css"5import { SecondCol } from "../components/SecondCol"6import { CartProvider } from "@/providers/cart"7 8export const inter = Inter({9 subsets: ["latin"],10 variable: "--font-inter",11 weight: ["400", "500"],12})13 14export const robotoMono = Roboto_Mono({15 subsets: ["latin"],16 variable: "--font-roboto-mono",17})18 19 20export default function Layout({21 children,22}: {23 children: React.ReactNode24}) {25 return (26 <html className={clx(inter.variable, robotoMono.variable)}>27 <body className="bg-ui-bg-subtle w-full h-full">28 <div className={clx(29 "flex justify-center items-center min-h-screen w-full"30 )}>31 <RegionProvider>32 <CartProvider>33 <div className={clx(34 "flex gap-2 lg:my-16 my-4",35 "lg:w-[758px] lg:mx-auto w-full mx-4"36 )}>37 <div className="flex flex-col gap-2 lg:w-1/2 w-full">38 {children}39 </div>40 <SecondCol />41 </div>42 </CartProvider>43 </RegionProvider>44 </div>45 </body>46 </html>47 )48}
You change the layout component to wrap the storefront's components with the RegionProvider and CartProvider components. You also add two-column styling, always showing the SecondCol component on the right side of the page.
This layout will wrap all pages you create next.
Step 6: Create Express Checkout Page#
The express checkout flow will have four steps:
- Product variant selection: The customer will first open the page to view the product's details, choose its options, then add it to the cart.
- Address details: The customer will input their shipping address, which will also be used as a billing address.
- Shipping method selection: The customer will choose a shipping method used to deliver their order.
- Payment and cart completion: The customer will choose a payment provider to make the payment, then places the order.
These steps will be available within a single page whose path is the product's handle (for example, sweatpants), but the routing between them will depend on the cart's current state and a step query parameter. In this section, you'll create this page and the router component used to set the current active step.
handle property, which is a slug-like value that can be used on client applications to create friendly URLs.Create Router Component#
To manage the routing between the express-checkout-flow steps, you'll create a Router component that will render the correct step based on the cart's state and the step query parameter. So, create the file components/Router/index.tsx with the following content:

1"use client"2 3import { useRouter, useSearchParams } from "next/navigation"4import { useCart } from "@/providers/cart"5import { useEffect, useMemo } from "react"6 7type ActiveTab = "product" | "address" | "shipping" | "payment"8 9type RouterProps = {10 handle: string11}12 13export const Router = ({14 handle,15}: RouterProps) => {16 const { cart } = useCart()17 const searchParams = useSearchParams()18 const router = useRouter()19 const currentStep = searchParams.get("step")20 21 const isCartValid = useMemo(() => {22 return cart?.items?.[0]?.product_handle === handle23 }, [cart, handle])24 25 const activeTab: ActiveTab = currentStep === "product" || currentStep === "address" || 26 currentStep === "shipping" || currentStep === "payment" ? currentStep : "product"27 28 useEffect(() => {29 if (!cart) {30 return31 }32 33 if ((activeTab !== "product") && !isCartValid) {34 return router.push(`/${handle}`)35 }36 37 if (activeTab === "shipping" && (!cart?.shipping_address || !cart?.billing_address)) {38 return router.push(`/${handle}?step=address`)39 }40 41 if (activeTab === "payment" && (42 !cart?.shipping_address || !cart?.billing_address || !cart?.shipping_methods?.length43 )) {44 return router.push(`/${handle}?step=shipping`)45 }46 }, [isCartValid, activeTab])47 48 return (49 <>50 {/* TODO render components */}51 </>52 )53}
You create a Router component that manages the routing between the product, address, shipping, and payment steps. The component uses the useCart hook to access the cart data, the useSearchParams hook to access the query parameters, and the useRouter hook to navigate between steps.
The different steps will be shown in the page as tabs or cards. The active tab is set to one of the following values:
product: The product selection step, which is the default step.address: The shipping address details step. This step is set as active if thestepquery parameter is set toaddressand the cart has the selected product. This step is also set as active if thestepquery parameter is set toshippingorpaymentand the cart doesn't have shipping and billing addresses set.shipping: The shipping method selection step. This step is set as active if thestepquery parameter is set toshippingand the cart has the selected product and the shipping and billing addresses set. This step is also set as active if thestepquery parameter is set topaymentand the cart doesn't have a selected shipping method.payment: The payment and cart completion step. This step is set as active if thestepquery parameter is set topaymentand all previous steps have been completed.
You'll render the components for each step as you create them next.
Create Express Checkout Page#
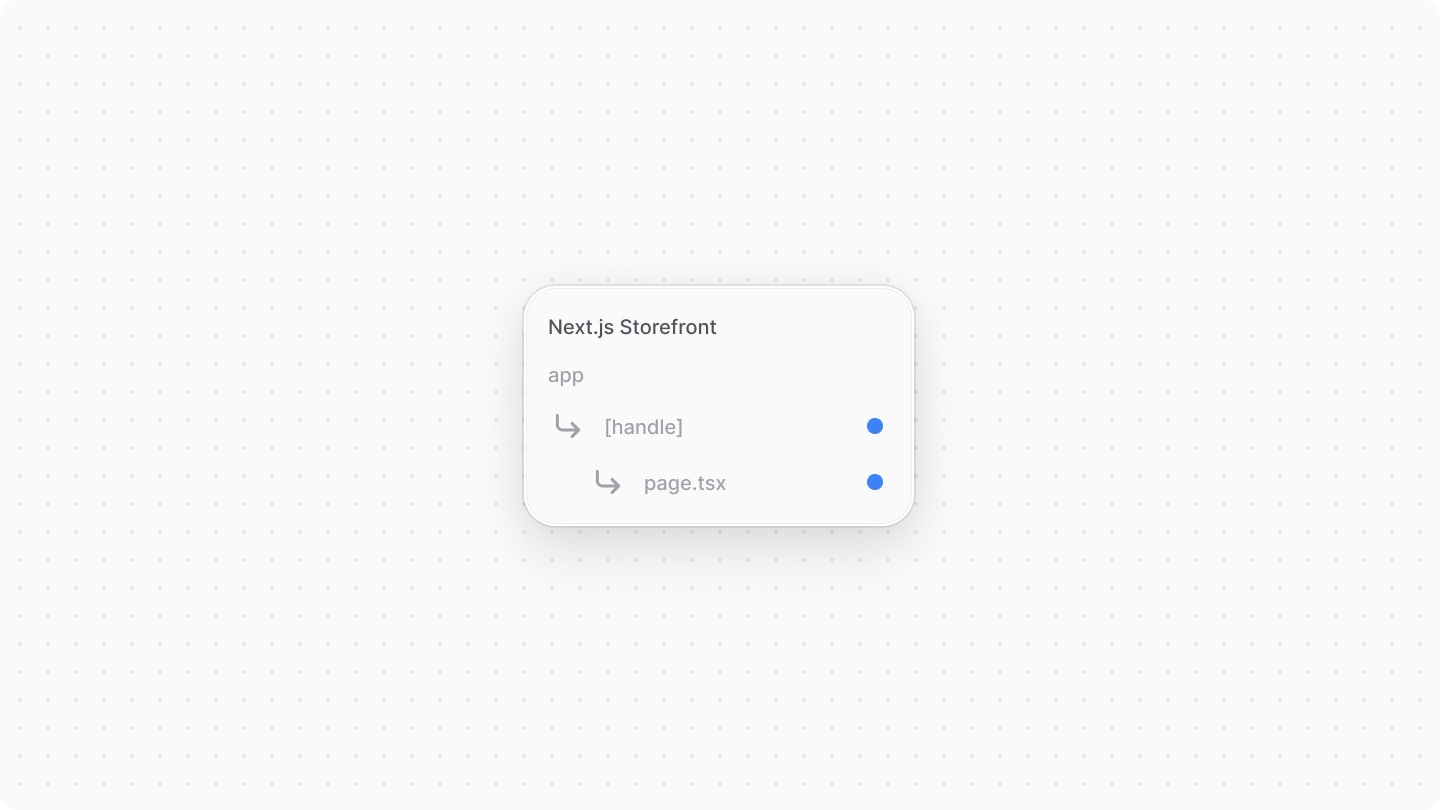
To create the page that shows the express checkout page, create the file app/[handle]/page.tsx with the following content:
This page will render the Router component, which will manage the routing between the product, address, shipping, and payment steps. You'll add the components for these steps next.
Step 7: Create Product Selection Step#
The first step in the express checkout flow is the product selection step. In this step, the customer will view the product's details, choose its options, then add it to the cart.
Create Card Component#
Before creating the component that displays the product selection step, you'll create a Card component that will wrap each step's components in the same styling.
Create the file components/Card/index.tsx with the following content:

1"use client"2 3import { CheckCircle } from "@medusajs/icons"4import { clx, Heading } from "@medusajs/ui"5import { useRouter } from "next/navigation"6 7type CardProps = {8 title: string9 isActive: boolean10 isDone: boolean11 path: string12 children: React.ReactNode13}14 15export const Card = ({16 title,17 isActive,18 isDone,19 path,20 children,21}: CardProps) => {22 const router = useRouter()23 24 return (25 <div className={clx(26 "bg-ui-bg-base rounded-lg py-4 px-6 w-full",27 "flex gap-4 flex-col shadow-elevation-card-rest",28 !isActive && "cursor-pointer"29 )}30 onClick={() => {31 if (isActive) {32 return33 }34 35 router.push(path)36 }}37 >38 <Heading level="h2" className="flex justify-between items-center">39 <span>{title}</span>40 {isDone && <CheckCircle className="text-ui-tag-green-icon" />}41 </Heading>42 {isActive && children}43 </div>44 )45}
You create a Card component that accepts the following props:
title: The title of the card.isActive: A boolean indicating whether the card is active, which is enabled based on the current step of the express checkout flow.isDone: A boolean indicating whether the card is completed, which is enabled when the customer completes the step's requirements, such as select a shipping method.path: The step's path.children: The content of the card.
The card shows the step's title and a check mark if it was completed. The card's content is only shown if the step is currently active.
Also, when the step is completed, its card can be clicked to allow the customer to go back and make changes to their choices or input.
You'll wrap each step component you'll create next with this Card component.
Create Product Component#
You'll now create the component that shows the product selection step.
Create the file components/Product/index.tsx with the following content:

1"use client"2 3import { 4 useState,5} from "react"6import { HttpTypes } from "@medusajs/types"7import { useRegion } from "@/providers/region"8import { useCart } from "@/providers/cart"9import { useRouter } from "next/navigation"10 11type ProductProps = {12 handle: string13 isActive: boolean14}15 16export const Product = ({ handle, isActive }: ProductProps) => {17 const [loading, setLoading] = useState(true)18 const [product, setProduct] = useState<HttpTypes.StoreProduct>()19 const [selectedOptions, setSelectedOptions] = useState<20 Record<string, string>21 >({})22 const [quantity, setQuantity] = useState(1)23 const { region } = useRegion()24 const { cart, addToCart } = useCart()25 const router = useRouter()26 27 // TODO get product details28}
You create a Product component that receives as a prop the product's handle and whether the component is active.
The component defines the following variables:
loading: A boolean state variable indicating whether an operation is loading, such as the product's details.product: A state variable that holds the product's details, which you'll retrieve from the Medusa application.selectedOptions: A state variable that holds the product options that the customer has selected, such as color or size.quantity: A state variable that holds the product quantity to add to the cart.region: The selected region retrieved from the region context.cartandaddToCart: The customer's cart and the function to add the selected product variant to the cart, retrieved from the cart context.router: The router instance to navigate between steps.
Retrieve Product Details
Next, you'll retrieve the product's details from the Medusa application. Start by adding the following imports to the top of the file:
Then, replace the TODO in the Product component with the following:
1useEffect(() => {2 if (product || !region) {3 return4 }5 6 sdk.store.product.list({7 handle,8 region_id: region.id,9 fields: `*variants.calculated_price,+variants.inventory_quantity`,10 })11 .then(({ products }) => {12 if (products.length) {13 setProduct(products[0])14 }15 setLoading(false)16 })17}, [product, region])18 19// TODO set selected variant
In the useEffect hook, you use the JS SDK to send a request to the List Products API route, passing the following query parameters:
handle: Filter the list of products with the unique handler.region_id: Set the selected region, which is necessary to retrieve the correct pricing.fields: Specify comma-separated fields to retrieve along with the default fields. You pass*variants.calculated_priceto retrieve the product variants' price for the current context, and+variants.inventory_quantityto retrieve the variants' inventory quantity.
fields query parameter, allowing you to specify the fields you need to retrieve. Learn more about its usage in this documentationThe API route returns a list of products, but since you passed the unique handle as a filter, the array will have only one item if the product exists. You set the retrieved product in the product state variable, and set loading to false.
Set Selected Variant
A product has variants for each of its option combinations (such as color and size). When a customer selects the values for each of the product's options, you'll find the associated variant to show its price and add it to the cart.
To determine the selected variant, first, add the following import at the top of the file:
Then, replace the TODO in Product component with the following:
1const selectedVariant = useMemo(() => {2 if (3 !product?.variants ||4 !product.options || 5 Object.keys(selectedOptions).length !== product.options?.length6 ) {7 return8 }9 10 return product.variants.find((variant) => variant.options?.every(11 (optionValue) => optionValue.id === selectedOptions[optionValue.option_id!]12 ))13}, [selectedOptions, product])14 15// TODO set variant to retrieve its price
You create a selectedVariant memoized variable that holds the selected variant based on the selected options. You find the selected variant by filtering the product's variants to find the one that matches all the selected options.
Set Price to Show
Next, you'll set the price to show to the customer. The Medusa application returns the price as a number. To display it with currency, you'll create a utility that you'll re-use whenever you show a price.
Create the file lib/price.ts with the following content:

The formatPrice utility function uses the Intl.NumberFormat API to format a number with a currency code.
Go back to components/Product/index.tsx and import the utility at the top of the file:
Then, replace the TODO in the Product component with the following:
1const price = useMemo(() => {2 const selectedVariantPrice = selectedVariant || 3 product?.variants?.sort((a: HttpTypes.StoreProductVariant, b: HttpTypes.StoreProductVariant) => {4 if (!a.calculated_price?.calculated_amount && !b.calculated_price?.calculated_amount) {5 return 06 }7 if (!a.calculated_price?.calculated_amount) {8 return 19 }10 if (!b.calculated_price?.calculated_amount) {11 return -112 }13 return (14 a.calculated_price?.calculated_amount -15 b.calculated_price?.calculated_amount16 )17 })[0]18 19 return formatPrice(20 selectedVariantPrice?.calculated_price?.calculated_amount || 0,21 region?.currency_code22 )23 }, [selectedVariant, product, region])24 25// TODO determine whether the product is in stock
In the price memoized variable, you first determine the variant to show its price:
- If a variant is selected, you show its price.
- Otherwise, you show the price of the variant having the lowest price.
Then, you return the price formatted with the formatPrice utility function, passing the variant's price and the selected region's currency code as arguments.
Determine Whether Selected Variant is in Stock
In Medusa, each product variant has different inventory quantity. So, after the customer selects a variant, you'll check whether it's in stock before allowing them to add it to the cart.
To determine whether the variant is in stock, replace the TODO in the Product component with the following:
You create an isInStock memoized variable that holds a boolean indicating whether the selected variant is in stock. A variant is considered in stock if:
- The variant's
manage_inventoryproperty is set tofalse, meaning Medusa doesn't manage the variant's inventory quantity, so, it's always considered in stock; - Or the variant's
inventory_quantityproperty is greater than 0.
Implement Add to Cart Logic
After the customer selects the variant and quantity, they can add it to the cart. To implement the logic of adding the product to the cart, replace the TODO in the Product component with the following:
You add a handleAddToCart function that first checks that a variant is selected, that it's in stock, and that the customer has set a quantity greater than 0.
If the conditions are satisfied, you set loading to true, then call the addToCart function from the cart context, passing the selected variant's ID and the quantity as arguments.
After the product is added to the cart, you navigate to the address step, which you'll create later.
Render Product Details
Finally, you'll add the return statement showing the product's details and allowing the customer to add the product to the cart.
First, add the following imports at the top of the file:
Then, replace the last TODO in the Product component with the following:
1return (2 <Card 3 title="Product" 4 isActive={isActive} 5 isDone={cart?.items !== undefined && cart?.items?.length > 0}6 path={`/${handle}`}7 >8 {loading && <Spinner />}9 {!loading && !product && <div>Product not found</div>}10 {!loading && product && (11 <div className="flex gap-4 flex-col">12 <div className="flex gap-4">13 <img 14 src={product.thumbnail || ""}15 className="rounded"16 width={160}17 height={200}18 />19 <div className="flex flex-col gap-1">20 {product.categories?.length && (21 <span className="text-xs text-ui-fg-muted">22 {product.categories[0].name}23 </span>24 )}25 <span className="text-base text-ui-fg-base">26 {product.title}27 </span>28 <span className="text-sm text-ui-fg-subtle">29 {price}30 </span>31 </div>32 </div>33 <p className="text-sm text-ui-fg-subtle">34 {product.description}35 </p>36 {product.options?.map((option) => (37 <div className="flex flex-col gap-1" key={option.id}>38 <span className="text-xs text-ui-fg-muted">39 {option.title}40 </span>41 <Select 42 onValueChange={(value) => {43 setSelectedOptions((prev) => ({44 ...prev,45 [option.id!]: value,46 }))47 }}48 value={selectedOptions[option.id!]}49 >50 <Select.Trigger>51 <Select.Value placeholder={`Select ${option.title}`} />52 </Select.Trigger>53 <Select.Content>54 {option.values?.map((value) => (55 <Select.Item56 key={value.id}57 value={value.id}58 >59 {value.value}60 </Select.Item>61 ))}62 </Select.Content>63 </Select>64 </div>65 ))}66 <div className="flex flex-col gap-1">67 <span className="text-xs text-ui-fg-muted">68 Quantity69 </span>70 <Input71 name="quantity"72 placeholder="Quantity"73 type="number"74 min="1"75 max={selectedVariant?.inventory_quantity || undefined}76 value={quantity}77 onChange={(e) => setQuantity(parseInt(e.target.value))}78 />79 </div>80 <hr className="bg-ui-bg-subtle" />81 <Button82 disabled={!selectedVariant || !isInStock || loading}83 onClick={handleAddToCart}84 className="w-full"85 >86 {!selectedVariant && "Select Options"}87 {selectedVariant && !isInStock && "Out of Stock"}88 {selectedVariant && isInStock && "Add to Cart"}89 </Button>90 </div>91 )}92 </Card>93)
You wrap the product step with the Card component you created earlier. In the card:
- If
loadingis enabled, you show a spinner icon imported from@medusajs/icons. - If
loadingis disabled and the product isn't found, you show a not found message. - If
loadingis disabled and the product is found, you show the product's details, including the product's image, title, price, and description.
You also loop over the product's options and show a select input, imported from @medusajs/ui, to allow the customer to select the value of each option.
Once the customer has selected a variant that's in stock, they can click the button to add the product to the cart, which will execute the handleAddToCart function you created earlier.
Add to Router Component#
Finally, you'll add the Product component to the Router component to show the product selection step.
First, import the Product component at the top of the components/Router/index.tsx file:
Then, change the return statement of the Router component to the following
This will show the product step and expand its details if activeTab is product.
Test it Out#
To test out what you've implemented so far, first, start the Medusa application by running the following command in the Medusa project's directory:
This will run the Medusa application at http://localhost:9000.
Then, while the Medusa application is running, run the following command in the Next.js project to start the development server:
This will run the storefront at http://localhost:3000. To open the express checkout page, go to http://localhost:3000/sweatpants, assuming you have a product with the handle sweatpants.
sweatpants product, were created by default. You can view and add products to your application by going to the Medusa Admin dashboard at http://localhost:9000/app.
You should see the product's details, including the image, title, price, description, and options. You can select the options and quantity, then click the "Add to Cart" button to add the product to the cart.
Once you add the product to the cart, the Product card will collapse, and the next step should be shown. You'll add it next.
Step 8: Create Address Step#
The second step in the express checkout flow is the address details step. In this step, the customer will input their shipping address.
To create the component of this step, create the file components/Address/index.tsx with the following content:

1"use client"2 3import { 4 useState,5} from "react"6import { useCart } from "@/providers/cart"7import { useRegion } from "@/providers/region"8import { useRouter } from "next/navigation"9 10type AddressProps = {11 handle: string12 isActive: boolean13}14 15export const Address = ({16 handle,17 isActive,18}: AddressProps) => {19 const { cart, updateCart } = useCart()20 const { region } = useRegion()21 const [loading, setLoading] = useState(false)22 const [firstName, setFirstName] = useState(23 cart?.shipping_address?.first_name || ""24 )25 const [lastName, setLastName] = useState(26 cart?.shipping_address?.last_name || ""27 )28 const [email, setEmail] = useState(cart?.email || "")29 const [phone, setPhone] = useState(cart?.shipping_address?.phone || "")30 const [address, setAddress] = useState(31 cart?.shipping_address?.address_1 || ""32 )33 const [postalCode, setPostalCode] = useState(34 cart?.shipping_address?.postal_code || ""35 )36 const [city, setCity] = useState(cart?.shipping_address?.city || "")37 const [country, setCountry] = useState(38 cart?.shipping_address?.country_code || region?.countries?.[0]?.iso_2 || ""39 )40 const router = useRouter()41 42 // TODO set whether button is disabled43}
You create an Address component that receives the product's handle and whether the component is active as props. The component defines the following variables:
cartandupdateCart: The customer's cart and the function to update the cart, retrieved from the cart context.region: The selected region retrieved from the region context.loading: A boolean state variable indicating whether an operation is loading.firstName,lastName,email,phone,address,postalCode,city, andcountry: State variables that hold the customer's shipping and billing address details.router: The router instance to navigate between steps.
Next, you'll define a variable that determines whether the customer can save the address and go to the next step. First, add the following import at the top of the file:
Then, replace the TODO in the Address component with the following:
1const isButtonDisabled = useMemo(() => {2 return loading || !firstName || !lastName || !email || 3 !phone || !address || !postalCode || !city || !country4}, [5 firstName, lastName, email, phone, address, 6 postalCode, city, country, loading,7])8 9// TODO implement submit action logic
You create an isButtonDisabled memoized variable whose value is a boolean indicating whether the button to go to the next step is disabled.
Implement Submit Action Function#
Next, you'll implement the function that will be called when the customer submits their address details.
Replace the TODO in the Address component with the following:
1const handleSubmit = () => {2 if (isButtonDisabled) {3 return4 }5 6 setLoading(true)7 8 updateCart({9 updateData: {10 shipping_address: {11 first_name: firstName,12 last_name: lastName,13 phone,14 address_1: address,15 postal_code: postalCode,16 city,17 country_code: country,18 },19 billing_address: {20 first_name: firstName,21 last_name: lastName,22 phone,23 address_1: address,24 postal_code: postalCode,25 city,26 country_code: country,27 },28 email,29 },30 })31 .then(() => {32 setLoading(false)33 router.push(`/${handle}?step=shipping`)34 })35}36 37// TODO render address form
In the handleSubmit function, if the button isn't disabled, you set loading to true, then use the updateCart function from the cart context to update the cart with the customer's shipping and billing addresses and email.
Once the address is saved, you redirect the customer to the next step in the flow, which is the shipping step.
Render Address Form#
Lastly, you'll add the return statement that shows the address form.
First, add the following imports at the top of the file:
Then, replace the last TODO in the Address component with the following:
1return (2 <Card 3 title="Delivery Address" 4 isActive={isActive} 5 isDone={!!cart?.shipping_address}6 path={`/${handle}?step=address`}7 >8 <div className="flex flex-col gap-8">9 <div className="flex flex-col gap-2">10 <span className="text-xs">Contact</span>11 <div className="flex gap-2">12 <Input13 name="first_name"14 value={firstName}15 onChange={(e) => setFirstName(e.target.value)}16 placeholder="First name"17 />18 <Input19 name="last_name"20 value={lastName}21 onChange={(e) => setLastName(e.target.value)}22 placeholder="Last name"23 />24 </div>25 <Input26 name="email"27 value={email}28 onChange={(e) => setEmail(e.target.value)}29 placeholder="Email"30 />31 <Input32 name="phone"33 value={phone}34 onChange={(e) => setPhone(e.target.value)}35 placeholder="Phone"36 />37 </div>38 <div className="flex flex-col gap-2">39 <span className="text-xs">Delivery</span>40 <Input41 name="address"42 value={address}43 onChange={(e) => setAddress(e.target.value)}44 placeholder="Address"45 />46 <div className="flex gap-2">47 <Input48 name="postal_code"49 value={postalCode}50 onChange={(e) => setPostalCode(e.target.value)}51 placeholder="Postal code"52 />53 <Input54 name="city"55 value={city}56 onChange={(e) => setCity(e.target.value)}57 placeholder="City"58 />59 </div>60 <Select61 value={country}62 onValueChange={(value) => setCountry(value)}63 >64 <Select.Trigger>65 <Select.Value placeholder="Country" />66 </Select.Trigger>67 <Select.Content>68 {region?.countries?.map((country) => (69 <Select.Item70 key={country.iso_2}71 value={country.iso_2 || ""}72 >73 {country.display_name}74 </Select.Item>75 ))}76 </Select.Content>77 </Select>78 </div>79 <hr className="bg-ui-bg-subtle" />80 <Button81 disabled={isButtonDisabled}82 onClick={handleSubmit}83 className="w-full"84 >85 Continue86 </Button>87 </div>88 </Card>89)
You wrap the address form with the Card component you created earlier. In the card, you show inputs for the address details and a button that, when clicked, executes the handleSubmit function you created earlier.
Add to Router Component#
Finally, you'll add the Address component to the Router component to show the address details step.
First, import the Address component at the top of the components/Router/index.tsx file:
Then, change the return statement of the Router component to the following
This will show the address details step and expand its details if activeTab is address.
Test it Out#
While both the Medusa application and the Next.js Starter Storefront are running, if you refresh the page you had opened or go to http://localhost:3000/sweatpants?step=address, you should see the address form where you can input your address details.

You can input your address details then click on the "Continue" button. The address will be saved in the cart and the Address card will collapse. The third step's details should be shown, which you'll add next.
Step 9: Create Shipping Step#
The third step in the express checkout flow is the shipping method selection step. In this step, the customer will choose a shipping method to deliver their order.
To create the component of this step, create the file components/Shipping/index.tsx with the following content:

1"use client"2 3import { 4 useState,5} from "react"6import { useCart } from "@/providers/cart"7import { HttpTypes } from "@medusajs/types"8import { useRouter } from "next/navigation"9 10type ShippingProps = {11 handle: string12 isActive: boolean13}14 15export const Shipping = ({16 handle,17 isActive,18}: ShippingProps) => {19 const { cart, updateCart } = useCart()20 const [loading, setLoading] = useState(true)21 const [shippingMethod, setShippingMethod] = useState(22 cart?.shipping_methods?.[0]?.shipping_option_id || ""23 )24 const [shippingOptions, setShippingOptions] = useState<25 HttpTypes.StoreCartShippingOption[]26 >([])27 const [calculatedPrices, setCalculatedPrices] = useState<28 Record<string, number>29 >({})30 const router = useRouter()31 32 // TODO retrieve shipping options33}
You create a Shipping component that receives the product's handle and whether the component is active as props. The component defines the following variables:
cartandupdateCart: The customer's cart and the function to update the cart, retrieved from the cart context.loading: A boolean state variable indicating whether an operation is loading.shippingMethod: A state variable that holds the selected shipping method.shippingOptions: A state variable that holds the available shipping options.calculatedPrices: A state variable that holds the calculated prices for each shipping option that doesn't have a flat rate price.router: The router instance to navigate between steps.
Retrieve Shipping Options#
In the Medusa application, you can define shipping options for each stock location, sales channel, or other conditions. So, during checkout, you retrieve the shipping options specific to a cart's context and allow the customer to choose from them.
To do that, first, add the following imports at the top of the file:
Then, replace the TODO in the Shipping component with the following:
1useEffect(() => {2 if (shippingOptions.length || !cart) {3 return4 }5 6 sdk.store.fulfillment.listCartOptions({7 cart_id: cart.id || "",8 })9 .then(({ shipping_options }) => {10 setShippingOptions(shipping_options)11 setLoading(false)12 })13}, [shippingOptions, cart])14 15// TODO set calculated prices
In the useEffect hook, you use the JS SDK to send a request to the List Shipping Options of a Cart API route, passing the cart's ID as a query parameter. The API route returns a list of shipping options, which you set in the shippingOptions state variable.
Retrieve Calculated Prices#
Shipping options have a price_type property whose value is either:
flat_rate: This value means the shipping option has a fixed price.calculated: This value means the shipping option's price is calculated based on the cart's context, such as the shipping address or items in the carts. This is useful when the fulfillment provider that's associated with a shipping option calculates the price based on these conditions.
So, to retrieve the prices of calculated shipping options, you use Medusa's Calculate Shipping Option Price API route.
Replace the TODO in the Shipping component with the following:
1useEffect(() => {2 if (!cart || !shippingOptions.length) {3 return4 }5 6 const promises = shippingOptions7 .filter((shippingOption) => shippingOption.price_type === "calculated")8 .map((shippingOption) => 9 sdk.client.fetch(10 `/store/shipping-options/${shippingOption.id}/calculate`, 11 {12 method: "POST",13 body: {14 cart_id: cart.id,15 data: {16 // pass any custom data useful for price calculation17 },18 },19 }20 ) as Promise<{ shipping_option: HttpTypes.StoreCartShippingOption }>21 )22 23 if (promises.length) {24 Promise.allSettled(promises).then((res) => {25 const pricesMap: Record<string, number> = {}26 res27 .filter((r) => r.status === "fulfilled")28 .forEach((p) => (29 pricesMap[p.value?.shipping_option.id || ""] = 30 p.value?.shipping_option.amount31 ))32 33 setCalculatedPrices(pricesMap)34 })35 }36}, [shippingOptions, cart])37 38// TODO add function to format price
In the useEffect hook, you filter the shippingOptions to get only the calculated shipping options. Then, you loop over these options to retrieve their calculated price from the Medusa application. You pass to the Calculate Shipping Option API route the cart's ID and any custom data that the fulfillment provider might need to calculate the price.
Once all shipping option prices are calculated, you set them in the calculatedPrices state variable, where the key is the shipping option's ID and the value is the calculated price.
Format Prices Function#
When you display the shipping options and their prices, you want to format the prices with the currency code. You'll use the formatPrice utility function you created earlier.
First, add the following imports at the top of the file:
Then, replace the TODO in the Shipping component with the following:
1const getShippingOptionPrice = useCallback(2 (shippingOption: HttpTypes.StoreCartShippingOption) => {3 const price = shippingOption.price_type === "flat" ? 4 shippingOption.amount : calculatedPrices[shippingOption.id]5 6 return formatPrice(price || 0, cart?.currency_code)7 }, [calculatedPrices]8)9 10// TODO add submit logic
You create a getShippingOptionPrice function that receives a shipping option to get its formatted price. You use the formatPrice utility function, passing it either the shipping option's flat or calculated price, based on its type. You return the formatted price.
Implement Submit Function#
Next, you'll implement the function that will be called when the customer submits their shipping method selection.
Replace the TODO in the Shipping component with the following:
1const isButtonDisabled = useMemo(() => {2 return loading || !shippingMethod3}, [shippingMethod, loading])4 5const handleSubmit = () => {6 if (isButtonDisabled) {7 return8 }9 10 setLoading(true)11 12 updateCart({13 shippingMethodData: {14 option_id: shippingMethod,15 data: {16 // TODO add any data necessary for17 // fulfillment provider18 },19 },20 })21 .then(() => {22 setLoading(false)23 router.push(`/${handle}?step=payment`)24 })25}26 27// TODO render shipping step
You define an isButtonDisabled memoized variable that indicates whether the customer can submit their selection. You also define a handleSubmit function that uses the updateCart function from the cart context to update the cart with the selected shipping method.
Once the shipping method is saved, you redirect the customer to the next step in the flow, which is the payment step.
Render Shipping Step#
Finally, you'll add the return statement showing the shipping method selection form that allows the customer to choose a shipping method.
First, add the following imports at the top of the file:
Then, replace the last TODO in the Shipping component with the following:
1return (2 <Card 3 title="Shipping" 4 isActive={isActive} 5 isDone={!!cart?.shipping_methods?.length}6 path={`/${handle}?step=shipping`}7 >8 <div className="flex flex-col gap-8">9 <div className="flex flex-col gap-2">10 <RadioGroup11 value={shippingMethod}12 onValueChange={(value) => setShippingMethod(value)}13 >14 {shippingOptions.map((shippingOption) => (15 <div className="flex gap-1" key={shippingOption.id}>16 <RadioGroup.Item value={shippingOption.id} />17 <div className="flex justify-between w-full gap-2">18 <span className="text-sm">{shippingOption.name}</span>19 <span className="text-xs text-ui-fg-muted">{20 getShippingOptionPrice(shippingOption)21 }</span>22 </div>23 </div>24 ))}25 </RadioGroup>26 </div>27 <hr className="bg-ui-bg-subtle" />28 <Button29 disabled={isButtonDisabled}30 onClick={handleSubmit}31 className="w-full"32 >33 Go to payment34 </Button>35 </div>36 </Card>37)
You wrap the shipping method selection form with the Card component you created earlier. In the card, you show a radio group with the available shipping options and their prices.
The customer can select a shipping option and click the "Go to payment" button to go to the next step.
Add to Router Component#
Finally, you'll add the Shipping component to the Router component.
First, import the Shipping component at the top of the components/Router/index.tsx file:
Then, change the return statement of the Router component to the following
This will show the shipping method selection step and expand its details if activeTab is shipping.
Test it Out#
While both the Medusa application and the Next.js Starter Storefront are running, if you refresh the page you had opened or go to http://localhost:3000/sweatpants?step=shipping, you should see the Shipping step where you can choose a shipping method.

You can select a shipping option then click on the "Go to payment" button. The shipping method will be saved in the cart and the Shipping card will collapse to show the fourth step's details, which you'll add next.
Step 10: Create Payment Step#
The fourth and last step in the express checkout flow is the payment method selection step. In this step, the customer will choose a payment method and complete their cart, placing an order.
To create the component of this step, create the file components/Payment/index.tsx with the following content:
1"use client"2 3import { 4 useState,5} from "react"6import { useCart } from "@/providers/cart"7import { HttpTypes } from "@medusajs/types"8import { useRouter } from "next/navigation"9 10type PaymentProps = {11 handle: string12 isActive: boolean13}14 15export const Payment = ({16 handle,17 isActive,18}: PaymentProps) => {19 const { cart, updateItemQuantity, unsetCart } = useCart()20 const [loading, setLoading] = useState(true)21 const [paymentProviders, setPaymentProviders] = useState<22 HttpTypes.StorePaymentProvider[]23 >([])24 const [selectedPaymentProvider, setSelectedPaymentProvider] = useState("")25 const router = useRouter()26 27 // TODO retrieve payment providers28}
You create a Payment component that receives the product's handle and whether the component is active as props. The component defines the following variables:
cart,unsetCart, andupdateItemQuantity: The customer's cart, the function to unset the cart, and the function to update the quantity of an item in the cart, retrieved from the cart context.loading: A boolean state variable indicating whether an operation is loading.paymentProviders: A state variable that holds the available payment providers in the Medusa application.selectedPaymentProvider: A state variable that holds the ID of the selected payment provider.router: The router instance to navigate between steps.
Retrieve Payment Providers#
In Medusa, each region has a set of enabled payment providers. So, during checkout, you retrieve the payment providers specific to a cart's region and allow the customer to choose from them.
To do that, first, add the following imports at the top of the file:
Then, replace the TODO in the Payment component with the following:
1useEffect(() => {2 if (!loading || !cart) {3 return4 }5 6 sdk.store.payment.listPaymentProviders({7 region_id: cart.region_id || "",8 })9 .then(({ payment_providers }) => {10 setPaymentProviders(payment_providers)11 setLoading(false)12 })13}, [loading, cart])14 15// TODO handle provider selection
In the useEffect hook, you use the JS SDK to send a request to the List Payment Providers API route, passing the cart's region ID as a query parameter.
The API route returns a list of payment providers, which you set in the paymentProviders state variable. These are the payment providers you'll allow the customer to select from.
Handle Payment Provider Selection#
After the customer selects the payment provider, you want to save that selection in the cart, but you also may need to show UI for additional actions. For example, if the customer chooses the Stripe payment provider, you want to show them a credit-card form to input their details.
So, you'll implement the logic to first save the payment provider selection in the Medusa application, then optionally show additional UI based on the chosen provider.
First, add the following imports at the top of the file:
Then, replace the TODO in the Payment component with the following:
1const handleSelectProvider = async () => {2 if (!selectedPaymentProvider || !cart) {3 return4 }5 6 setLoading(true)7 8 sdk.store.payment.initiatePaymentSession(cart, {9 provider_id: selectedPaymentProvider,10 })11 .then(() => {12 setLoading(false)13 })14}15 16useEffect(() => {17 if (!selectedPaymentProvider || !cart) {18 return19 }20 21 handleSelectProvider()22}, [selectedPaymentProvider])23 24const paymentUi = useMemo(() => {25 if (!selectedPaymentProvider) {26 return27 }28 29 switch (selectedPaymentProvider) {30 // TODO handle other providers31 default:32 return <></>33 }34}, [selectedPaymentProvider])35 36const canPlaceOrder = useMemo(() => {37 switch (selectedPaymentProvider) {38 case "":39 return false40 // TODO handle other providers41 default:42 return true43 }44}, [selectedPaymentProvider])45 46// TODO handle place order
You define a handleSelectProvider function that uses the JS SDK to set the selected payment provider in the cart. You call this function whenever the selectedPaymentProvider changes.
Then, you define two memoized variables:
paymentUi: This variable holds additional UI to show based on the selected payment provider. This guide doesn't cover any specific providers, so you're free to implement this based on the payment providers you support. By default, it returns an empty node.canPlaceOrder: This variable holds a boolean indicating whether the customer can place an order. You can define the logic based on the payment providers you support. By default, it returnstrue.
Handle Place Order Function#
After the customer chooses a payment provider and completes any additional steps, they can complete their cart and place their order.
Replace the TODO in the Payment component with the following:
1const placeOrder = () => {2 if (!cart || !canPlaceOrder) {3 return4 }5 setLoading(true)6 7 sdk.store.cart.complete(cart.id)8 .then((data) => {9 if (data.type === "cart") {10 alert(data.error.message)11 setLoading(false)12 } else {13 unsetCart()14 // redirect to confirmation page15 router.push(`/confirmation/${data.order.id}`)16 }17 })18}19 20// TODO render payment step
You define a placeOrder function that uses the JS SDK to complete the cart by sending a request to the Complete Cart API route. If the cart is successfully completed, you unset the cart and redirect the customer to the confirmation page, which you'll implement later.
Render Payment Step#
Finally, you'll add the return statement showing the Payment step that allows the customer to choose a payment method.
First, add the following imports at the top of the file:
Then, replace the last TODO in the Payment component with the following:
1const getProviderTitle = (providerId: string) => {2 switch(true) {3 case providerId.startsWith("pp_system_default"):4 return "Cash on Delivery"5 default:6 return providerId7 }8}9 10return (11 <Card 12 title="Payment" 13 isActive={isActive} 14 isDone={false}15 path={`/${handle}?step=payment`}16 >17 <span className="text-sm">Your order</span>18 {cart?.items?.map((item) => (19 <div className="flex gap-2" key={item.id}>20 <img src={item.thumbnail} alt={item.title} className="w-24 h-24 rounded" />21 <div className="flex flex-col gap-3">22 <span className="text-base">{item.product_title}</span>23 {item.variant?.options?.map((option) => (24 <span className="flex gap-1 text-sm" key={option.id}>25 <span className="text-ui-fg-muted">{option.option?.title}</span>26 <span className="text-ui-fg-base">{option.value}</span>27 </span>28 ))}29 <span className="flex gap-1 text-sm items-center">30 <span className="text-ui-fg-muted">Quantity</span>31 <Input32 type="number"33 value={item.quantity}34 onChange={(e) => {35 if (!e.target.value) {36 return37 }38 updateItemQuantity(item.id, parseInt(e.target.value))39 }}40 />41 </span>42 </div>43 </div>44 ))}45 <hr className="bg-ui-bg-subtle" />46 <div className="flex justify-between">47 <span className="text-sm text-ui-fg-muted">Subtotal:</span>48 <span className="text-sm text-ui-fg-base">{formatPrice(49 cart?.item_subtotal || 0,50 cart?.currency_code51 )}</span>52 </div>53 <div className="flex justify-between">54 <span className="text-sm text-ui-fg-muted">Shipping & handling:</span>55 <span className="text-sm text-ui-fg-base">{formatPrice(56 cart?.shipping_total || 0,57 cart?.currency_code58 )}</span>59 </div>60 <div className="flex justify-between">61 <span className="text-sm text-ui-fg-muted">Total:</span>62 <span className="text-sm text-ui-fg-base">{formatPrice(63 cart?.total || 0,64 cart?.currency_code65 )}</span>66 </div>67 <hr className="bg-ui-bg-subtle" />68 <span className="text-sm">Delivery address</span>69 <p className="text-xs text-ui-fg-muted">70 {cart?.shipping_address?.first_name} {cart?.shipping_address?.last_name}<br />71 {cart?.shipping_address?.address_1}<br />72 {cart?.shipping_address?.city}, {cart?.shipping_address?.postal_code}, {cart?.shipping_address?.country_code}<br />73 </p>74 <hr className="bg-ui-bg-subtle" />75 <span className="text-sm">Payment method</span>76 <div className="flex flex-col gap-2">77 <RadioGroup78 value={selectedPaymentProvider}79 onValueChange={(value) => setSelectedPaymentProvider(value)}80 >81 {paymentProviders.map((paymentProvider) => (82 <div className="flex gap-1" key={paymentProvider.id}>83 <RadioGroup.Item value={paymentProvider.id} />84 <div className="flex justify-between w-full gap-2">85 <span className="text-sm">{getProviderTitle(paymentProvider.id)}</span>86 </div>87 </div>88 ))}89 </RadioGroup>90 </div>91 {paymentUi}92 <hr className="bg-ui-bg-subtle" />93 <Button94 className="w-full"95 disabled={!canPlaceOrder || loading}96 onClick={placeOrder}97 >Pay {formatPrice(98 cart?.total || 0,99 cart?.currency_code100 )}</Button>101 </Card>102)
You first define a getProviderTitle function that receives a payment provider ID and returns a title based on the provider. You'll use this function to show a human-readable title for each payment provider.
Then, in the return statement, you wrap the payment method selection form with the Card component you created earlier. In the card, you show the cart's details, including the items, totals, and delivery address.
You also show the list of payment providers, allowing the customer to select one. Once the customer chooses one, you show any additional UI to complete their payment.
After the customer selects an option and clicks the "Pay" button, the placeOrder function is called to complete the cart and place the order.
Add to Router Component#
Finally, you'll add the Payment component to the Router component to show the payment method selection step.
First, import the Payment component at the top of the components/Router/index.tsx file:
Then, change the return statement of the Router component to the following
1return (2 <>3 <Product handle={handle} isActive={activeTab === "product"} />4 <Address handle={handle} isActive={activeTab === "address"} />5 <Shipping handle={handle} isActive={activeTab === "shipping"} />6 <Payment handle={handle} isActive={activeTab === "payment"} />7 </>8)
This will show the payment method selection step and expand its details if activeTab is payment.
Test it Out#
While both the Medusa application and the Next.js Starter Storefront are running, if you refresh the page you had opened or go to http://localhost:3000/sweatpants?step=payment, you should see the Payment step where you can choose a payment method.

Select a payment provider then click on the "Pay" button. The payment method will be saved in the cart and you'll be redirected to the confirmation page, which currently doesn't exist. You'll add this page next.
Step 11: Create Confirmation Page#
After the customer places an order, you redirect them to a confirmation page that shows them their general order details. In this step, you'll create this confirmation page.
The confirmation page will receive the order's ID as a path parameter. Then, it'll retrieve the order's details from the Medusa application and shows those details to the customer.
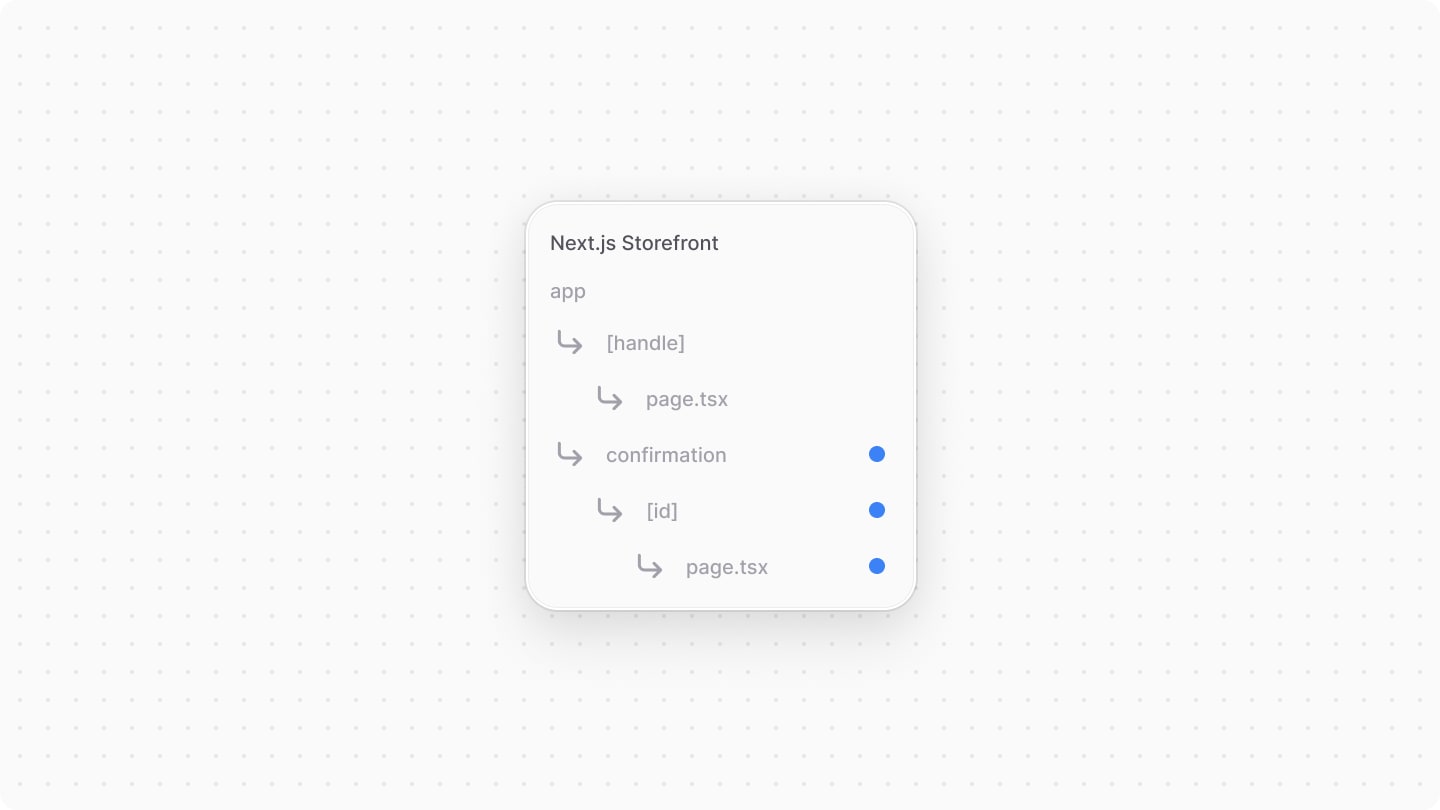
To create the confirmation page, create the file app/confirmation/[id]/page.tsx with the following content:
1import { clx, Heading } from "@medusajs/ui"2import { sdk } from "@/lib/sdk"3 4type Params = {5 params: Promise<{ id: string }>6}7 8export default async function ConfirmationPage({9 params,10}: Params) {11 const orderId = (await params).id12 13 const { order } = await sdk.store.order.retrieve(orderId)14 15 return (16 <div className={clx(17 "bg-ui-bg-base rounded-lg py-4 px-6 w-full",18 "flex gap-4 flex-col shadow-elevation-card-rest"19 )}>20 <Heading level="h2">Thank you, {order.shipping_address?.first_name}!</Heading>21 <p className="text-ui-fg-subtle">Your order has been placed. We are working to get it settled.</p>22 <hr className="bg-ui-bg-subtle" />23 <div className="flex gap-2 flex-col">24 <span className="flex gap-1">25 <span className="text-sm text-ui-fg-muted">Order number:</span>26 <span className="text-sm text-ui-fg-base">{order.display_id}</span>27 </span>28 <span className="flex gap-1">29 <span className="text-sm text-ui-fg-muted">Order date:</span>30 <span className="text-sm text-ui-fg-base">{31 order.created_at.toString()32 }</span>33 </span>34 </div>35 </div>36 )37}
The ConfirmationPage component receives the order ID as a path parameter. In the component, you retrieve the order's details from the Medusa application using the JS SDK.
Then, you show the order's details, including the order number, order date, and a thank you message.
Test it Out#
While both the Medusa application and the Next.js Starter Storefront are running, either refresh the page you had open from the previous step, or restart the express checkout flow to place an order. You'll see the confirmation page showing the order's details.

Next Steps#
By following this guide, you now have an express checkout storefront built with Next.js that connects to a Medusa commerce application.
You can add more features to your storefront or commerce application. For example, you can integrate a Notification Module Provider to send the customer a confirmation email when they place their order.
If you're new to Medusa, check out the main documentation, where you'll get a more in-depth learning of all the concepts you've used in this guide and more.
To learn more about the commerce features that Medusa provides, check out Medusa's Commerce Modules.