Integrate Strapi (CMS) with Medusa
In this tutorial, you'll learn how to integrate Strapi with Medusa.
When you install a Medusa application, you get a fully-fledged commerce platform with a Framework for customization. Medusa also facilitates integrating third-party services that enrich your application with features specific to your unique business use case.
By integrating Strapi, you can manage your products' content with powerful content management capabilities, including custom fields, media, localization, and more.
Summary#
By following this tutorial, you'll learn how to:
- Install and set up Medusa.
- Install and set up Strapi.
- Integrate Strapi with Medusa to interact with Strapi's API.
- Implement two-way synchronization of product data between Medusa and Strapi:
- Handle product events to sync data from Medusa to Strapi.
- Handle Strapi webhooks to sync data from Strapi to Medusa.
- Display product data from Strapi in the Next.js Starter Storefront.
You can follow this tutorial whether you're new to Medusa or an advanced Medusa developer, but you're expected to have knowledge in Strapi, as its concepts are not explained in the tutorial.

Step 1: Install a Medusa Application#
Start by installing the Medusa application on your machine with the following command:
First, you'll be asked for the project's name. Then, when prompted about installing the Next.js Starter Storefront, choose "Yes."
Afterwards, the installation process will start, which will install the Medusa application as a monorepository in a directory with your project's name. The backend is installed in the apps/backend directory, and the Next.js Starter Storefront is installed in the apps/storefront directory.
Once the installation finishes successfully, the Medusa Admin dashboard will open with a form to create a new user. Enter the user's credentials and submit the form. Afterwards, you can log in with the new user and explore the dashboard.
apps/backend directory of your Medusa project.Step 2: Set Up Strapi#
In this step, you'll install and set up Strapi to manage your product content.
a. Install Strapi#
In a separate directory from your Medusa application, run the following command to create a new Strapi project:
You can pick the default options during the installation process. Once the installation is complete, navigate to the newly created directory:
b. Setup Strapi#
Next, you'll start Strapi and create a new admin user.
Run the following command to start Strapi:
This command starts Strapi in development mode and opens the admin panel setup page in your default browser.
On this page, you can create a new admin user to log in to the Strapi admin panel. You'll return to the admin panel later to manage settings and content.
c. Define Product Content Type#
In this section, you'll define a content type for products in Strapi. These products will be synced from Medusa, allowing you to manage their content using Strapi's CMS features.
You'll use schema.json files to define content types.
Product schema.json
To create the schema for the Product content type, create the file src/api/product/content-types/product/schema.json with the following content:
1{2 "kind": "collectionType",3 "collectionName": "products",4 "info": {5 "singularName": "product",6 "pluralName": "products",7 "displayName": "Product",8 "description": "Products from Medusa"9 },10 "options": {11 "draftAndPublish": false12 },13 "pluginOptions": {},14 "attributes": {15 "medusaId": {16 "type": "string",17 "required": true,18 "unique": true19 },20 "title": {21 "type": "string",22 "required": true23 },24 "subtitle": {25 "type": "string"26 },27 "description": {28 "type": "richtext"29 },30 "handle": {31 "type": "uid",32 "targetField": "title"33 },34 "images": {35 "type": "media",36 "multiple": true,37 "required": false,38 "allowedTypes": ["images"]39 },40 "thumbnail": {41 "type": "media",42 "multiple": false,43 "required": false,44 "allowedTypes": ["images"]45 },46 "locale": {47 "type": "string",48 "default": "en"49 },50 "variants": {51 "type": "relation",52 "relation": "oneToMany",53 "target": "api::product-variant.product-variant",54 "mappedBy": "product"55 },56 "options": {57 "type": "relation",58 "relation": "oneToMany",59 "target": "api::product-option.product-option",60 "mappedBy": "product"61 }62 }63}
You define the following fields for the Product content type:
medusaId: A unique identifier that maps to the Medusa product ID.title: The product's title.subtitle: A subtitle for the product.description: A rich text field for the product's description.handle: A unique identifier for the product used in URLs.images: A media field to store multiple images of the product.thumbnail: A media field to store a single thumbnail image of the product.locale: A string field to support localization.variants: A one-to-many relation to the Product Variant content type, which you'll define later.options: A one-to-many relation to the Product Option content type, which you'll define later.
Product Lifecycle Hooks
Next, you'll handle product deletion by deleting associated product variants and options.
Create the file src/api/product/content-types/product/lifecycles.ts with the following content:
1export default {2 async beforeDelete(event) {3 const { where } = event.params4 5 // Find the product with its relations6 const product = await strapi.db.query("api::product.product").findOne({7 where: {8 id: where.id,9 },10 populate: {11 variants: true,12 options: true,13 },14 })15 16 if (product) {17 // Delete all variants18 if (product.variants && product.variants.length > 0) {19 for (const variant of product.variants) {20 await strapi.documents("api::product-variant.product-variant").delete({21 documentId: variant.documentId,22 })23 }24 }25 26 // Delete all options (their values will27 // be cascade deleted by the option lifecycle)28 if (product.options && product.options.length > 0) {29 for (const option of product.options) {30 await strapi.documents("api::product-option.product-option").delete({31 documentId: option.documentId,32 })33 }34 }35 }36 },37}
You define a beforeDelete lifecycle hook that deletes all associated product variants and options when a product is deleted.
Product Controllers
Next, you'll create custom controllers to handle product management.
Create the file src/api/product/controllers/product.ts with the following content:
This code creates a core controller for the Product content type using Strapi's factory method.
Product Services
Next, you'll create custom services to handle product management.
Create the file src/api/product/services/product.ts with the following content:
This code creates a core service for the Product content type using Strapi's factory method.
Product Routes
Next, you'll create custom routes to handle product management.
Create the file src/api/product/routes/product.ts with the following content:
This code creates a core router for the Product content type using Strapi's factory method.
c. Define Product Variant Content Type#
Next, you'll define a content type for product variants in Strapi.
Product Variant schema.json
To create the schema for the Product Variant content type, create the file src/api/product-variant/content-types/product-variant/schema.json with the following content:
1{2 "kind": "collectionType",3 "collectionName": "product_variants",4 "info": {5 "singularName": "product-variant",6 "pluralName": "product-variants",7 "displayName": "Product Variant",8 "description": "Product variants from Medusa"9 },10 "options": {11 "draftAndPublish": false12 },13 "pluginOptions": {},14 "attributes": {15 "medusaId": {16 "type": "string",17 "required": true,18 "unique": true19 },20 "title": {21 "type": "string",22 "required": true23 },24 "sku": {25 "type": "string"26 },27 "images": {28 "type": "media",29 "multiple": true,30 "required": false,31 "allowedTypes": ["images"]32 },33 "thumbnail": {34 "type": "media",35 "multiple": false,36 "required": false,37 "allowedTypes": ["images"]38 },39 "locale": {40 "type": "string",41 "default": "en"42 },43 "product": {44 "type": "relation",45 "relation": "manyToOne",46 "target": "api::product.product",47 "inversedBy": "variants"48 },49 "option_values": {50 "type": "relation",51 "relation": "manyToMany",52 "target": "api::product-option-value.product-option-value",53 "inversedBy": "variants"54 }55 }56}
You define the following fields for the Product Variant content type:
medusaId: A unique identifier that maps to the Medusa product variant ID.title: The variant's title.sku: The stock keeping unit for the variant.images: A media field to store multiple images of the variant.thumbnail: A media field to store a single thumbnail image of the variant.locale: A string field to support localization.product: A many-to-one relation to the Product content type.option_values: A many-to-many relation to the Product Option Value content type, which you'll define later.
Product Variant Controllers
Next, you'll create custom controllers to handle product variant management.
Create the file src/api/product-variant/controllers/product-variant.ts with the following content:
This code creates a core controller for the Product Variant content type using Strapi's factory method.
Product Variant Services
Next, you'll create custom services to handle product variant management.
Create the file src/api/product-variant/services/product-variant.ts with the following content:
This code creates a core service for the Product Variant content type using Strapi's factory method.
Product Variant Routes
Next, you'll create custom routes to handle product variant management.
Create the file src/api/product-variant/routes/product-variant.ts with the following content:
This code creates a core router for the Product Variant content type using Strapi's factory method.
d. Define Product Option Content Type#
Next, you'll define a content type for product options in Strapi.
Product Option schema.json
To create the schema for the Product Option content type, create the file src/api/product-option/content-types/product-option/schema.json with the following content:
1{2 "kind": "collectionType",3 "collectionName": "product_options",4 "info": {5 "singularName": "product-option",6 "pluralName": "product-options",7 "displayName": "Product Option",8 "description": "Product options from Medusa"9 },10 "options": {11 "draftAndPublish": false12 },13 "pluginOptions": {},14 "attributes": {15 "medusaId": {16 "type": "string",17 "required": true,18 "unique": true19 },20 "title": {21 "type": "string",22 "required": true23 },24 "locale": {25 "type": "string",26 "default": "en"27 },28 "product": {29 "type": "relation",30 "relation": "manyToOne",31 "target": "api::product.product",32 "inversedBy": "options"33 },34 "values": {35 "type": "relation",36 "relation": "oneToMany",37 "target": "api::product-option-value.product-option-value",38 "mappedBy": "option"39 }40 }41}
You define the following fields for the Product Option content type:
medusaId: A unique identifier that maps to the Medusa product option ID.title: The option's title.locale: A string field to support localization.product: A many-to-one relation to the Product content type.values: A one-to-many relation to the Product Option Value content type, which you'll define later.
Product Option Lifecycle Hooks
Next, you'll handle option deletion by deleting associated option values.
Create the file src/api/product-option/content-types/product-option/lifecycles.ts with the following content:
1export default {2 async beforeDelete(event) {3 const { where } = event.params4 5 // Find the option with its values6 const option = await strapi.db.query("api::product-option.product-option").findOne({7 where: {8 id: where.id,9 },10 populate: {11 values: true,12 },13 })14 15 if (option && option.values && option.values.length > 0) {16 // Delete all option values17 for (const value of option.values) {18 await strapi.documents("api::product-option-value.product-option-value").delete({19 documentId: value.documentId,20 })21 }22 }23 },24}
You define a beforeDelete lifecycle hook that deletes all associated option values when an option is deleted.
Product Option Controllers
Next, you'll create custom controllers to handle managing product options.
Create the file src/api/product-option/controllers/product-option.ts with the following content:
This code creates a core controller for the Product Option content type using Strapi's factory method.
Product Option Services
Next, you'll create custom services to handle managing product options.
Create the file src/api/product-option/services/product-option.ts with the following content:
This code creates a core service for the Product Option content type using Strapi's factory method.
Product Option Routes
Next, you'll create custom routes to handle managing product options.
Create the file src/api/product-option/routes/product-option.ts with the following content:
This code creates a core router for the Product Option content type using Strapi's factory method.
e. Define Product Option Value Content Type#
The last content type you'll define is for product option values in Strapi.
Product Option Value schema.json
To create the schema for the Product Option Value content type, create the file src/api/product-option-value/content-types/product-option-value/schema.json with the following content:
1{2 "kind": "collectionType",3 "collectionName": "product_option_values",4 "info": {5 "singularName": "product-option-value",6 "pluralName": "product-option-values",7 "displayName": "Product Option Value",8 "description": "Product option values from Medusa"9 },10 "options": {11 "draftAndPublish": false12 },13 "pluginOptions": {},14 "attributes": {15 "medusaId": {16 "type": "string",17 "required": true,18 "unique": true19 },20 "value": {21 "type": "string",22 "required": true23 },24 "locale": {25 "type": "string",26 "default": "en"27 },28 "option": {29 "type": "relation",30 "relation": "manyToOne",31 "target": "api::product-option.product-option",32 "inversedBy": "values"33 },34 "variants": {35 "type": "relation",36 "relation": "manyToMany",37 "target": "api::product-variant.product-variant",38 "mappedBy": "option_values"39 }40 }41}
You define the following fields for the Product Option Value content type:
medusaId: A unique identifier that maps to the Medusa product option value ID.value: The option value's title.locale: A string field to support localization.option: A many-to-one relation to the Product Option content type.variants: A many-to-many relation to the Product Variant content type.
Product Option Value Controllers
Next, you'll create custom controllers to handle managing product option values.
Create the file src/api/product-option-value/controllers/product-option-value.ts with the following content:
This code creates a core controller for the Product Option Value content type using Strapi's factory method.
Product Option Value Services
Next, you'll create custom services to handle managing product option values.
Create the file src/api/product-option-value/services/product-option-value.ts with the following content:
This code creates a core service for the Product Option Value content type using Strapi's factory method.
Product Option Value Routes
Next, you'll create custom routes to handle managing product option values.
Create the file src/api/product-option-value/routes/product-option-value.ts with the following content:
This code creates a core router for the Product Option Value content type using Strapi's factory method.
You now have all the customizations in Strapi ready. You'll return to Strapi later after you set up the integration with Medusa.
Step 3: Integrate Strapi with Medusa#
In this step, you'll integrate Strapi with Medusa by creating a Strapi Module.
A module is a reusable package that provides functionalities related to a single feature or domain. Medusa integrates the module into your application without implications or side effects on your setup.
a. Install Strapi Client#
First, you'll install the Strapi client in your Medusa application to interact with Strapi's API.
In your apps/backend directory, run the following command to install the Strapi client:
b. Create Module Directory#
A module is created under the src/modules directory of your Medusa application. So, create the directory src/modules/strapi.
c. Create Strapi Client Loader#
Next, you'll create the Strapi client when the Medusa server starts by creating a loader.
A loader is an asynchronous function that runs when the Medusa server starts. Loaders are useful for setting up connections to third-party services and reusing those connections throughout your module.
To create the loader that initializes the Strapi client, create the file src/modules/strapi/loaders/init-client.ts with the following content:
1import { LoaderOptions } from "@medusajs/framework/types"2import { asValue } from "@medusajs/framework/awilix"3import { MedusaError } from "@medusajs/framework/utils"4import { strapi } from "@strapi/client"5 6export type ModuleOptions = {7 apiUrl: string8 apiToken: string9 defaultLocale?: string10}11 12export default async function initStrapiClientLoader({13 container,14 options,15}: LoaderOptions<ModuleOptions>) {16 if (!options?.apiUrl || !options?.apiToken) {17 throw new MedusaError(18 MedusaError.Types.INVALID_DATA,19 "Strapi API URL and token are required"20 )21 }22 23 const logger = container.resolve("logger")24 25 try {26 // Create Strapi client instance27 const strapiClient = strapi({28 baseURL: options.apiUrl,29 auth: options.apiToken,30 })31 32 // Register the client in the container33 container.register({34 strapiClient: asValue(strapiClient),35 })36 37 logger.info("Strapi client initialized successfully")38 } catch (error) {39 logger.error(`Failed to initialize Strapi client: ${error}`)40 throw error41 }42}
A loader file must export an asynchronous function that receives an object with the following properties:
container: The module container that allows you to resolve and register module and Framework resources.options: The options passed to the module during its registration. You define the following options for the Strapi Module:apiUrl: The URL of the Strapi API.apiToken: The API token to authenticate requests to Strapi.defaultLocale: An optional default locale for content.
In the loader function, you create a Strapi client instance using the provided API URL and token. Then, you register the client in the module container so that it can be resolved and used in the module's service.
d. Create Strapi Module Service#
Next, you'll create the main service of the Strapi Module.
A module has a service that contains its logic. The Strapi Module's service will contain the logic to create, update, retrieve, and delete data in Strapi.
Create the file src/modules/strapi/service.ts with the following content:
1import type { StrapiClient } from "@strapi/client"2import { Logger } from "@medusajs/framework/types"3import { ModuleOptions } from "./loaders/init-client"4 5type InjectedDependencies = {6 logger: Logger7 strapiClient: StrapiClient8}9 10export default class StrapiModuleService {11 protected readonly options_: ModuleOptions12 protected readonly logger_: any13 protected readonly client_: StrapiClient14 15 constructor(16 { logger, strapiClient }: InjectedDependencies, 17 options: ModuleOptions18 ) {19 this.options_ = options20 this.logger_ = logger21 this.client_ = strapiClient22 }23 24 // TODO add methods25}
The constructor of a module's service receives the following parameters:
- The module's container.
- The module's options.
You resolve the Logger and the Strapi client that you registered in the loader. You also store the module options for later use.
In the next sections, you'll add methods to this service to handle managing data in Strapi.
Format Errors Method
First, you'll add a helper method to format errors from Strapi.
In src/modules/strapi/service.ts, add the following method to the StrapiModuleService class:
1export default class StrapiModuleService {2 // ...3 formatStrapiError(error: any, context: string): string {4 // Handle Strapi client HTTP response errors5 if (error?.response) {6 const response = error.response7 const parts = [context]8 9 if (response.status) {10 parts.push(`HTTP ${response.status}`)11 }12 13 if (response.statusText) {14 parts.push(response.statusText)15 }16 17 // Add request URL if available18 if (response.url) {19 parts.push(`URL: ${response.url}`)20 }21 22 // Add request method if available23 if (error.request?.method) {24 parts.push(`Method: ${error.request.method}`)25 }26 27 return parts.join(" - ")28 }29 30 // If error has a response with Strapi error structure31 if (error?.error) {32 const strapiError = error.error33 const parts = [context]34 35 if (strapiError.status) {36 parts.push(`Status ${strapiError.status}`)37 }38 39 if (strapiError.name) {40 parts.push(`[${strapiError.name}]`)41 }42 43 if (strapiError.message) {44 parts.push(strapiError.message)45 }46 47 if (strapiError.details && Object.keys(strapiError.details).length > 0) {48 parts.push(`Details: ${JSON.stringify(strapiError.details)}`)49 }50 51 return parts.join(" - ")52 }53 54 // Fallback for non-Strapi errors55 return `${context}: ${error.message || error}`56 }57}
This method takes an error object and a context string as parameters. It formats the error based on the structure of Strapi client errors, making it easier to log and debug issues related to Strapi API requests.
You'll use this method in other service methods to handle errors consistently.
Upload Images Method
Next, you'll add a method to upload images to Strapi.
In src/modules/strapi/service.ts, add the following method to the StrapiModuleService class:
1export default class StrapiModuleService {2 // ...3 async uploadImages(imageUrls: string[]): Promise<number[]> {4 const uploadedIds: number[] = []5 6 for (const imageUrl of imageUrls) {7 try {8 // Fetch the image from the URL9 const imageResponse = await fetch(imageUrl)10 if (!imageResponse.ok) {11 this.logger_.warn(`Failed to fetch image: ${imageUrl}`)12 continue13 }14 15 const imageBuffer = await imageResponse.arrayBuffer()16 17 // Extract filename from URL or generate one18 const urlParts = imageUrl.split("/")19 const filename = urlParts[urlParts.length - 1] || `image-${Date.now()}.jpg`20 21 // Create a Blob from the buffer22 const blob = new Blob([imageBuffer], {23 type: imageResponse.headers.get("content-type") || "image/jpeg",24 })25 26 // Upload to Strapi using the files API27 const result = await this.client_.files.upload(blob, {28 fileInfo: {29 name: filename,30 },31 })32 33 if (result && result[0] && result[0].id) {34 uploadedIds.push(result[0].id)35 }36 } catch (error) {37 this.logger_.error(this.formatStrapiError(error, `Failed to upload image ${imageUrl}`))38 }39 }40 41 return uploadedIds42 }43}
This method takes an array of image URLs, fetches each image, and uploads it to Strapi using the Strapi client's files API. It returns an array of uploaded image IDs.
You'll use this method later when creating or updating products and product variants in Strapi.
Delete Images Method
Next, you'll add a method to delete images from Strapi. This will be useful when reverting changes if a failure occurs.
In src/modules/strapi/service.ts, add the following import at the top of the file:
Then, add the following method to the StrapiModuleService class:
1export default class StrapiModuleService {2 // ...3 async deleteImage(imageId: number): Promise<void> {4 try {5 await this.client_.files.delete(imageId)6 } catch (error) {7 throw new MedusaError(8 MedusaError.Types.UNEXPECTED_STATE,9 this.formatStrapiError(error, `Failed to delete image ${imageId} from Strapi`)10 )11 }12 }13}
This method takes an image ID as a parameter and deletes the corresponding image from Strapi using the Strapi client's files API. If the deletion fails, it throws a MedusaError with a formatted error message.
Create Document Type Method
Next, you'll add a method to create a document of a content type in Strapi, such as a product or product variant.
In src/modules/strapi/service.ts, add the following enum type before the StrapiModuleService class:
Then, add the following method to the StrapiModuleService class:
1export default class StrapiModuleService {2 // ...3 async create(collection: Collection, data: Record<string, unknown>) {4 try {5 return await this.client_.collection(collection).create(data)6 } catch (error) {7 throw new MedusaError(8 MedusaError.Types.UNEXPECTED_STATE,9 this.formatStrapiError(error, `Failed to create ${collection} in Strapi`)10 )11 }12 }13}
This method takes the following parameters:
collection: The collection (content type) in which to create the document. It uses theCollectionenum.data: An object containing the data for the document to be created.
In the method, you create the document and return it.
Update Document Method
Next, you'll add a method to update a document of a content type in Strapi. This will be useful to implement two-way synching between Medusa and Strapi.
In src/modules/strapi/service.ts, add the following method to the StrapiModuleService class:
1export default class StrapiModuleService {2 // ...3 async update(collection: Collection, id: string, data: Record<string, unknown>) {4 try {5 return await this.client_.collection(collection).update(id, data)6 } catch (error) {7 throw new MedusaError(8 MedusaError.Types.UNEXPECTED_STATE,9 this.formatStrapiError(error, `Failed to update ${collection} in Strapi`)10 )11 }12 }13}
This method takes the following parameters:
collection: The collection (content type) in which the document exists. It uses theCollectionenum.id: The ID of the document to be updated.data: An object containing the data to update the document with.
In the method, you update the document and return it.
Delete Document Method
Next, you'll add a method to delete a document of a content type from Strapi. You'll use this method when a document is deleted in Medusa, or when reverting document creation in case of failures.
In src/modules/strapi/service.ts, add the following method to the StrapiModuleService class:
1export default class StrapiModuleService {2 // ...3 async delete(collection: Collection, id: string) {4 try {5 return await this.client_.collection(collection).delete(id)6 } catch (error) {7 throw new MedusaError(8 MedusaError.Types.UNEXPECTED_STATE,9 this.formatStrapiError(error, `Failed to delete ${collection} in Strapi`)10 )11 }12 }13}
This method takes the following parameters:
collection: The collection (content type) in which the document exists. It uses theCollectionenum.id: The ID of the document to be deleted.
In the method, you delete the document.
Retrieve Document by Medusa ID Method
Next, you'll add a method to retrieve a document of a content type from Strapi by its Medusa ID. This will be useful to retrieve a document in case you need to revert changes.
In src/modules/strapi/service.ts, add the following method to the StrapiModuleService class:
1export default class StrapiModuleService {2 // ...3 async findByMedusaId(4 collection: Collection, 5 medusaId: string, 6 populate?: string[]7 ) {8 try {9 const result = await this.client_.collection(collection).find({10 filters: {11 medusaId: {12 $eq: medusaId,13 },14 },15 populate,16 })17 18 return result.data[0]19 }20 catch (error) {21 throw new MedusaError(22 MedusaError.Types.UNEXPECTED_STATE,23 this.formatStrapiError(error, `Failed to find ${collection} in Strapi`)24 )25 }26 }27}
This method takes the following parameters:
collection: The collection (content type) in which the document exists. It uses theCollectionenum.medusaId: The Medusa ID of the document to be retrieved.populate: An optional array of relations to populate in the retrieved document.
In the method, you retrieve the documents and return the first result.
e. Export Module Definition#
The final piece of a module is its definition, which you export in an index.ts file at the module's root directory. This definition tells Medusa the name of the module, its service, and optionally its loaders.
To create the module's definition, create the file src/modules/strapi/index.ts with the following content:
1import { Module } from "@medusajs/framework/utils"2import StrapiModuleService from "./service"3import initStrapiClientLoader from "./loaders/init-client"4 5export const STRAPI_MODULE = "strapi"6 7export default Module(STRAPI_MODULE, {8 service: StrapiModuleService,9 loaders: [initStrapiClientLoader],10})
You use Module from the Modules SDK to create the module's definition. It accepts two parameters:
- The module's name, which is
strapi. - An object with a required
serviceproperty indicating the module's service. You also pass the loader you created to ensure it's executed when the application starts.
Aside from the module definition, you export the module's name as STRAPI_MODULE for later reference.
f. Add Module to Medusa's Configurations#
Once you finish building the module, add it to Medusa's configurations to start using it.
In medusa-config.ts, add a modules property and pass an array with your custom module:
1module.exports = defineConfig({2 // ...3 modules: [4 {5 resolve: "./modules/strapi",6 options: {7 apiUrl: process.env.STRAPI_API_URL || "http://localhost:1337/api",8 apiToken: process.env.STRAPI_API_TOKEN || "",9 defaultLocale: process.env.STRAPI_DEFAULT_LOCALE || "en",10 },11 },12 ],13})
Each object in the modules array has a resolve property, whose value is either a path to the module's directory or an npm package's name.
You also pass an options property with the module's options. You'll set the values of these options next.
g. Set Environment Variables#
Before you can use the Strapi Module, you need to set the environment variables it requires.
One of these options is an API token that has permissions to manage the content types you created in Strapi.
To retrieve the API token from Strapi, run the following command in the Strapi project directory to start the Strapi server:
Then:
- Log in to the Strapi admin panel at
http://localhost:1337/admin. - Go to Settings -> API Tokens.
- Click on "Create new API Token".

- In the API token form:
- Set a name for the token, such as "Medusa".
- Set the type to "Custom", and:
- For each content type you created (products, product variants, product options, and product option values), expand its permissions section and enable all the permissions (create, read, update, delete, find).
- Also enable the permissions for "Upload" to allow image uploads.
- Click on "Save".

Then, copy the generated API token.
Finally, set the following environment variables in your Medusa project's .env file:
Make sure to replace your_generated_api_token with the actual API token you copied from Strapi.
Step 4: Create Virtual Read-Only Link to Strapi Products#
Medusa's Module Links feature allows you to virtually link data models from external services to modules in your Medusa application. Then, when you retrieve data from Medusa, you can also retrieve the linked data from the third-party service automatically.
In this step, you'll define a virtual read-only link between the product content type in Strapi and the Product model in Medusa. Later, you'll be able to retrieve products from Strapi when retrieving products in Medusa.
a. Define the Link#
To define a virtual read-only link, create the file src/links/product-strapi.ts with the following content:
1import { defineLink } from "@medusajs/framework/utils"2import ProductModule from "@medusajs/medusa/product"3import { STRAPI_MODULE } from "../modules/strapi"4 5export default defineLink(6 {7 linkable: ProductModule.linkable.product,8 field: "id",9 },10 {11 linkable: {12 serviceName: STRAPI_MODULE,13 alias: "strapi_product",14 primaryKey: "product_id",15 },16 },17 {18 readOnly: true,19 }20)
The defineLink function accepts three parameters:
- An object of the first data model that is part of the link. In this case, it's the
Productmodel from Medusa's Product Module. - An object of the second data model that is part of the link. In this case, it's the product content type from the Strapi Module. You set the following properties:
serviceName: the name of the Strapi Module, which isstrapi.alias: an alias for the linked data model, which isstrapi_product. You'll use this alias to reference the linked data model in queries.primaryKey: the primary key of the linked data model, which isproduct_id. Medusa will look for this field in the retrievedProductsfrom Strapi to match it with theidfield of theProductmodel.
- An object with the
readOnlyproperty set totrue, indicating that this link is read-only. This means you can only retrieve the linked data, but you don't manage the link in the database.
b. Add list Method to the Strapi Module Service#
When you retrieve products from Medusa with their strapi_product link, Medusa will call the list method of the Strapi Module's service to retrieve the linked products from Strapi.
So, in src/modules/strapi/service.ts, add a list method to the StrapiModuleService class:
1export default class StrapiModuleService {2 // ...3 async list(filter: { product_id: string | string[] }) {4 const ids = Array.isArray(filter.product_id) 5 ? filter.product_id 6 : [filter.product_id]7 8 const results: any[] = []9 10 for (const productId of ids) {11 try {12 // Fetch product with all relations populated13 const result = await this.client_.collection("products").find({14 filters: {15 medusaId: {16 $eq: productId,17 },18 },19 populate: {20 variants: {21 populate: ["option_values"],22 },23 options: {24 populate: ["values"],25 },26 },27 })28 29 if (result.data && result.data.length > 0) {30 const product = result.data[0]31 results.push({32 ...product,33 id: `${product.id}`,34 product_id: productId,35 // Include populated relations36 variants: (product.variants || []).map((variant) => ({37 ...variant,38 id: `${variant.id}`,39 option_values: (variant.option_values || []).map((option_value) => ({40 ...option_value,41 id: `${option_value.id}`,42 })),43 })),44 options: (product.options || []).map((option) => ({45 ...option,46 id: `${option.id}`,47 values: (option.values || []).map((value) => ({48 ...value,49 id: `${value.id}`,50 })),51 })),52 })53 }54 } catch (error) {55 this.logger_.warn(this.formatStrapiError(error, `Failed to fetch product ${productId} from Strapi`))56 }57 }58 59 return results60 }61}
The list method receives a filter object with a product_id property, which contains the Medusa product ID(s) to retrieve their corresponding data from Strapi.
In the method, you fetch each product from Strapi using the Strapi client's collection API, populating its relations (variants and options). You then format the retrieved data to match the expected structure and return an array of products.
You can now retrieve product data from Strapi when retrieving products in Medusa. You'll learn how to do this in the upcoming steps.
Step 5: Handle Product Creation#
In this step, you'll implement the logic to listen to product creation events in Medusa and create the corresponding product data in Strapi.
To do this, you'll create:
- Workflows that implement the logic to create product data in Strapi.
- A subscriber that listens to the product creation event in Medusa and triggers the workflow.
a. Create Product Options Workflow#
Before creating the main workflow to handle product creation, you'll create a sub-workflow to handle the creation of product options and their values in Strapi. You'll use this sub-workflow in the main product creation workflow.
You create custom commerce features in workflows. A workflow is a series of queries and actions, called steps, that complete a task. A workflow is similar to a function, but allows you to track execution progress, define rollback logic, and configure other advanced features.
The workflow to create product options in Strapi has the following steps:
View step details
The first step is available out-of-the-box in Medusa. You need to create the rest of the steps.
createOptionsInStrapiStep
The createOptionsInStrapiStep creates product options in Strapi.
To create the step, create the file src/workflows/steps/create-options-in-strapi.ts with the following content:
1import { createStep, StepResponse } from "@medusajs/framework/workflows-sdk"2import { STRAPI_MODULE } from "../../modules/strapi"3import StrapiModuleService, { Collection } from "../../modules/strapi/service"4 5export type CreateOptionsInStrapiInput = {6 options: {7 id: string8 title: string9 strapiProductId: number10 }[]11}12 13export const createOptionsInStrapiStep = createStep(14 "create-options-in-strapi",15 async ({ options }: CreateOptionsInStrapiInput, { container }) => {16 const strapiService: StrapiModuleService = container.resolve(STRAPI_MODULE)17 18 const results: Record<string, any>[] = []19 20 try {21 for (const option of options) {22 // Create option in Strapi23 const strapiOption = await strapiService.create(24 Collection.PRODUCT_OPTIONS, 25 {26 medusaId: option.id,27 title: option.title,28 product: option.strapiProductId,29 }30 )31 32 results.push(strapiOption.data)33 }34 } catch (error) {35 // If error occurs during loop,36 // pass results created so far to compensation37 return StepResponse.permanentFailure(38 strapiService.formatStrapiError(39 error, 40 "Failed to create options in Strapi"41 ),42 { results }43 )44 }45 46 return new StepResponse(47 results,48 results49 )50 },51 async (compensationData, { container }) => {52 if (!compensationData) {53 return54 }55 56 const strapiService: StrapiModuleService = container.resolve(STRAPI_MODULE)57 58 // Delete all created options59 for (const result of compensationData) {60 await strapiService.delete(Collection.PRODUCT_OPTIONS, result.documentId)61 }62 }63)
You create a step with the createStep function. It accepts three parameters:
- The step's unique name.
- An async function that receives two parameters:
- The step's input, which is an object holding the product options to create in Strapi.
- An object that has properties including the Medusa container, which is a registry of Framework and commerce tools that you can access in the step.
- An async compensation function that undoes the actions performed by the step function. This function is only executed if an error occurs during the workflow's execution.
In the step function, you resolve the Strapi Module's service from the Medusa container. Then, you loop through the product options and create them in Strapi using the service's create method.
If an error occurs during the creation loop, you return a permanent failure response with the results created so far. This allows the compensation function to delete any options that were successfully created before the error occurred.
Finally, a step must return a StepResponse instance, which accepts two parameters:
- The step's output, which is an array of created Strapi product options.
- The data to pass to the compensation function, which is also the array of created Strapi product options.
In the compensation function, you delete all the created product options in Strapi if an error occurs during the workflow's execution.
createOptionValuesInStrapiStep
The createOptionValuesInStrapiStep creates product option values in Strapi.
To create the step, create the file src/workflows/steps/create-option-values-in-strapi.ts with the following content:
1import { createStep, StepResponse } from "@medusajs/framework/workflows-sdk"2import { STRAPI_MODULE } from "../../modules/strapi"3import StrapiModuleService, { Collection } from "../../modules/strapi/service"4 5export type CreateOptionValuesInStrapiInput = {6 optionValues: {7 id: string8 value: string9 strapiOptionId: number10 }[]11}12 13export const createOptionValuesInStrapiStep = createStep(14 "create-option-values-in-strapi",15 async ({ optionValues }: CreateOptionValuesInStrapiInput, { container }) => {16 const strapiService: StrapiModuleService = container.resolve(STRAPI_MODULE)17 18 const results: Record<string, any>[] = []19 20 try {21 for (const optionValue of optionValues) {22 // Create option value in Strapi23 const strapiOptionValue = await strapiService.create(24 Collection.PRODUCT_OPTION_VALUES,25 {26 medusaId: optionValue.id,27 value: optionValue.value,28 option: optionValue.strapiOptionId,29 }30 )31 32 results.push(strapiOptionValue.data)33 }34 } catch (error) {35 // If error occurs during loop,36 // pass results created so far to compensation37 return StepResponse.permanentFailure(38 strapiService.formatStrapiError(39 error, 40 "Failed to create option values in Strapi"41 ),42 { results }43 )44 }45 46 return new StepResponse(47 results,48 results49 )50 },51 async (compensationData, { container }) => {52 if (!compensationData) {53 return54 }55 56 const strapiService: StrapiModuleService = container.resolve(STRAPI_MODULE)57 58 // Delete all created option values59 for (const result of compensationData) {60 await strapiService.delete(61 Collection.PRODUCT_OPTION_VALUES, 62 result.documentId63 )64 }65 }66)
This step receives the option values to create in Strapi. In the step, you create each option value in Strapi using the Strapi Module's service.
In the compensation function, you delete all the created option values in Strapi if an error occurs during the workflow's execution.
updateProductOptionValuesMetadataStep
The updateProductOptionValuesMetadataStep stores the Strapi IDs of the created product option values in the metadata property of the corresponding product option values in Medusa. This allows you to reference the Strapi option values later, such as when updating or deleting them.
To create the step, create the file src/workflows/steps/update-product-option-values-metadata.ts with the following content:
1import { createStep, StepResponse } from "@medusajs/framework/workflows-sdk"2import { Modules } from "@medusajs/framework/utils"3import { ProductOptionValueDTO } from "@medusajs/framework/types"4 5export type UpdateProductOptionValuesMetadataInput = {6 updates: {7 id: string8 strapiId: number9 strapiDocumentId: string10 }[]11}12 13export const updateProductOptionValuesMetadataStep = createStep(14 "update-product-option-values-metadata",15 async ({ updates }: UpdateProductOptionValuesMetadataInput, { container }) => {16 const productModuleService = container.resolve(Modules.PRODUCT)17 18 const updatedOptionValues: ProductOptionValueDTO[] = []19 20 // Fetch original metadata for compensation21 const originalOptionValues = await productModuleService.listProductOptionValues({ 22 id: updates.map((u) => u.id),23 })24 25 // Update each option value's metadata26 for (const update of updates) {27 const optionValue = originalOptionValues.find((ov) => ov.id === update.id)28 if (optionValue) {29 30 const updated = await productModuleService.updateProductOptionValues(31 update.id, 32 {33 metadata: {34 ...optionValue.metadata,35 strapi_id: update.strapiId,36 strapi_document_id: update.strapiDocumentId,37 },38 }39 )40 41 updatedOptionValues.push(updated)42 43 }44 }45 46 return new StepResponse(updatedOptionValues, originalOptionValues)47 },48 async (compensationData, { container }) => {49 if (!compensationData) {50 return51 }52 53 const productModuleService = container.resolve(Modules.PRODUCT)54 55 // Restore original metadata56 for (const original of compensationData) {57 await productModuleService.updateProductOptionValues(original.id, {58 metadata: original.metadata,59 })60 }61 }62)
This step receives an array of option values to update with their corresponding Strapi IDs.
In the step, you resolve the Product Module's service and update each option value's metadata property with the Strapi ID and document ID.
In the compensation function, you restore the original metadata of the option values if an error occurs during the workflow's execution.
Create Product Options Workflow
Now that you have created the necessary steps, you can create the workflow.
To create the workflow, create the file src/workflows/create-options-in-strapi.ts with the following content:
14} from "./steps/update-product-option-values-metadata"15 16export type CreateOptionsInStrapiWorkflowInput = {17 ids: string[]18}19 20export const createOptionsInStrapiWorkflow = createWorkflow(21 "create-options-in-strapi",22 (input: CreateOptionsInStrapiWorkflowInput) => {23 // Fetch the option with all necessary fields24 // including metadata and product metadata25 const { data: options } = useQueryGraphStep({26 entity: "product_option",27 fields: [28 "id",29 "title",30 "product_id",31 "metadata",32 "product.metadata",33 "values.*",34 ],35 filters: {36 id: input.ids,37 },38 options: {39 throwIfKeyNotFound: true,40 },41 })42 43 // @ts-ignore44 const preparedOptions = transform({ options }, (data) => {45 return data.options.map((option) => ({46 id: option.id,47 title: option.title,48 strapiProductId: Number(option.product?.metadata?.strapi_id),49 }))50 })51 52 // Pass the prepared option data to the step53 const strapiOptions = createOptionsInStrapiStep({54 options: preparedOptions,55 })56 57 // Extract option values58 const optionValuesData = transform({ options, strapiOptions }, (data) => {59 return data.options.flatMap((option) => {60 return option.values.map((value) => {61 const strapiOption = data.strapiOptions.find(62 (strapiOption) => strapiOption.medusaId === option.id63 )64 if (!strapiOption) {65 return null66 }67 return {68 id: value.id,69 value: value.value,70 strapiOptionId: strapiOption.id,71 }72 })73 })74 })75 76 const strapiOptionValues = createOptionValuesInStrapiStep({77 optionValues: optionValuesData,78 } as CreateOptionValuesInStrapiInput)79 80 const optionValuesMetadataUpdate = transform({ strapiOptionValues }, (data) => {81 return {82 updates: [83 ...data.strapiOptionValues.map((optionValue) => ({84 id: optionValue.medusaId,85 strapiId: optionValue.id,86 strapiDocumentId: optionValue.documentId,87 })),88 ],89 }90 })91 92 updateProductOptionValuesMetadataStep(optionValuesMetadataUpdate)93 94 return new WorkflowResponse({95 strapi_options: strapiOptions,96 })97 }98)
You create a workflow using the createWorkflow function. It accepts the workflow's unique name as a first parameter.
It accepts a second parameter: a constructor function that holds the workflow's implementation. The function accepts an input object holding the IDs of the product options to create in Strapi.
In the workflow, you:
- Retrieve the product options in Medusa using the
useQueryGraphStep.- This step uses Query to retrieve data in Medusa across modules.
- Prepare the option data to create using transform.
- This function allows you to manipulate data in workflows.
- Create the product options in Strapi using the
createOptionsInStrapiStep. - Prepare the option values to create using
transform. - Create the product option values in Strapi using the
createOptionValuesInStrapiStep. - Prepare the data to update the option values' metadata using
transform. - Update the option values' metadata using the
updateProductOptionValuesMetadataStep.
A workflow must return an instance of WorkflowResponse that accepts the data to return to the workflow's executor.
You'll use this workflow when you implement the create products in Strapi workflow.
b. Create Product Variants Workflow#
Next, you'll create another sub-workflow to handle the creation of product variants in Strapi. You'll use this sub-workflow in the main product creation workflow.
The workflow to create product variants in Strapi has the following steps:
View step details
The first, second, and last steps are available out-of-the-box in Medusa. You need to create the rest of the steps.
uploadImagesToStrapiStep
The uploadImagesToStrapiStep uploads images to Strapi. You'll use it to upload product and variant images.
To create the step, create the file src/workflows/steps/upload-images-to-strapi.ts with the following content:
1import { createStep, StepResponse } from "@medusajs/framework/workflows-sdk"2import { STRAPI_MODULE } from "../../modules/strapi"3import StrapiModuleService from "../../modules/strapi/service"4import { promiseAll } from "@medusajs/framework/utils"5 6export type UploadImagesToStrapiInput = {7 items: {8 entity_id: string9 url: string10 }[]11}12 13export const uploadImagesToStrapiStep = createStep(14 "upload-images-to-strapi",15 async ({ items }: UploadImagesToStrapiInput, { container }) => {16 const strapiService: StrapiModuleService = container.resolve(STRAPI_MODULE)17 18 const uploadedImages: {19 entity_id: string20 image_id: number21 }[] = []22 23 try {24 for (const item of items) {25 // Upload image to Strapi26 const uploadedImageId = await strapiService.uploadImages([item.url])27 uploadedImages.push({28 entity_id: item.entity_id,29 image_id: uploadedImageId[0],30 })31 }32 } catch (error) {33 // If error occurs, pass all uploaded files to compensation34 return StepResponse.permanentFailure(35 strapiService.formatStrapiError(36 error, 37 "Failed to upload images to Strapi"38 ),39 { uploadedImages }40 )41 }42 43 return new StepResponse(44 uploadedImages,45 uploadedImages46 )47 },48 async (compensationData, { container }) => {49 if (!compensationData) {50 return51 }52 53 const strapiService: StrapiModuleService = container.resolve(STRAPI_MODULE)54 55 await promiseAll(56 compensationData.map(57 (uploadedImage) => strapiService.deleteImage(uploadedImage.image_id)58 )59 )60 }61)
The step accepts an array of items, each having the ID of the item that the image is associated with, and the URL of the image to upload.
In the step, you upload each image to Strapi using the Strapi Module's service.
In the compensation function, you delete all the uploaded images in Strapi if an error occurs during the workflow's execution.
createVariantsInStrapiStep
The createVariantsInStrapiStep creates product variants in Strapi.
To create the step, create the file src/workflows/steps/create-variants-in-strapi.ts with the following content:
1import { createStep, StepResponse } from "@medusajs/framework/workflows-sdk"2import { STRAPI_MODULE } from "../../modules/strapi"3import StrapiModuleService, { Collection } from "../../modules/strapi/service"4 5export type CreateVariantsInStrapiInput = {6 variants: {7 id: string8 title: string9 sku?: string10 strapiProductId: number11 optionValueIds?: number[]12 imageIds?: number[]13 thumbnailId?: number14 }[]15}16 17export const createVariantsInStrapiStep = createStep(18 "create-variants-in-strapi",19 async ({ variants }: CreateVariantsInStrapiInput, { container }) => {20 const strapiService: StrapiModuleService = container.resolve(STRAPI_MODULE)21 22 const results: Record<string, any>[] = []23 24 try {25 // Process all variants26 for (const variant of variants) {27 // Create variant in Strapi28 const strapiVariant = await strapiService.create(29 Collection.PRODUCT_VARIANTS, 30 {31 medusaId: variant.id,32 title: variant.title,33 sku: variant.sku,34 product: variant.strapiProductId,35 option_values: variant.optionValueIds || [],36 images: variant.imageIds || [],37 thumbnail: variant.thumbnailId,38 }39 )40 41 results.push(strapiVariant.data)42 }43 } catch (error) {44 // If error occurs during loop,45 // pass results created so far to compensation46 return StepResponse.permanentFailure(47 strapiService.formatStrapiError(48 error, 49 "Failed to create variants in Strapi"50 ),51 { results }52 )53 }54 55 return new StepResponse(56 results,57 results58 )59 },60 async (compensationData, { container }) => {61 if (!compensationData) {62 return63 }64 65 const strapiService: StrapiModuleService = container.resolve(STRAPI_MODULE)66 67 // Delete all created variants68 for (const result of compensationData) {69 await strapiService.delete(Collection.PRODUCT_VARIANTS, result.documentId)70 }71 }72)
The step receives the product variants to create in Strapi. In the step, you create each variant in Strapi using the Strapi Module's service.
In the compensation function, you delete all the created variants in Strapi if an error occurs during the workflow's execution.
updateProductVariantsMetadataStep
The updateProductVariantsMetadataStep stores the Strapi IDs of the created product variants in the metadata property of the corresponding product variants in Medusa. This allows you to reference the Strapi variants later, such as when updating or deleting them.
To create the step, create the file src/workflows/steps/update-product-variants-metadata.ts with the following content:
1import { createStep, StepResponse } from "@medusajs/framework/workflows-sdk"2import { Modules } from "@medusajs/framework/utils"3import { ProductVariantDTO } from "@medusajs/framework/types"4 5export type UpdateProductVariantsMetadataInput = {6 updates: {7 variantId: string8 strapiId: number9 strapiDocumentId: string10 }[]11}12 13export const updateProductVariantsMetadataStep = createStep(14 "update-product-variants-metadata",15 async ({ updates }: UpdateProductVariantsMetadataInput, { container }) => {16 const productModuleService = container.resolve(Modules.PRODUCT)17 18 const updatedVariants: ProductVariantDTO[] = []19 20 // Fetch original metadata for compensation21 const originalVariants = await productModuleService.listProductVariants({ 22 id: updates.map((u) => u.variantId),23 })24 25 // Update each variant's metadata26 for (const update of updates) {27 const variant = originalVariants.find((v) => v.id === update.variantId)28 if (variant) {29 30 const updated = await productModuleService.updateProductVariants(31 update.variantId, 32 {33 metadata: {34 ...variant.metadata,35 strapi_id: update.strapiId,36 strapi_document_id: update.strapiDocumentId,37 },38 }39 )40 41 updatedVariants.push(updated)42 43 }44 }45 46 return new StepResponse(updatedVariants, originalVariants)47 },48 async (compensationData, { container }) => {49 if (!compensationData) {50 return51 }52 53 const productModuleService = container.resolve(Modules.PRODUCT)54 55 // Restore original metadata56 for (const original of compensationData) {57 await productModuleService.updateProductVariants(original.id, {58 metadata: original.metadata,59 })60 }61 }62)
This step receives an array of variants to update with their corresponding Strapi IDs.
In the step, you resolve the Product Module's service and update each variant's metadata property with the Strapi ID and document ID.
In the compensation function, you restore the original metadata of the variants if an error occurs during the workflow's execution.
Create Product Variants Workflow
Now that you have created the necessary steps, you can create the workflow.
To create the workflow, create the file src/workflows/create-variants-in-strapi.ts with the following content:
11import { updateProductVariantsMetadataStep } from "./steps/update-product-variants-metadata"12 13export type CreateVariantsInStrapiWorkflowInput = {14 ids: string[]15 productId: string16}17 18export const createVariantsInStrapiWorkflow = createWorkflow(19 "create-variants-in-strapi",20 (input: CreateVariantsInStrapiWorkflowInput) => {21 acquireLockStep({22 key: ["strapi-product-create", input.productId],23 })24 // Fetch the variant with all necessary fields including option values25 const { data: variants } = useQueryGraphStep({26 entity: "product_variant",27 fields: [28 "id",29 "title",30 "sku",31 "product_id",32 "product.metadata",33 "product.options.id",34 "product.options.values.id",35 "product.options.values.value",36 "product.options.values.metadata",37 "product.strapi_product.*",38 "images.*",39 "thumbnail",40 "options.*",41 ],42 filters: {43 id: input.ids,44 },45 options: {46 throwIfKeyNotFound: true,47 },48 })49 50 const strapiVariants = when({ 51 variants,52 }, (data) => !!(data.variants[0].product as any)?.strapi_product)53 .then(() => {54 const variantImages = transform({ 55 variants,56 }, (data) => {57 return data.variants.flatMap((variant) => variant.images?.map(58 (image) => ({59 entity_id: variant.id,60 url: image.url,61 })62 ) || [])63 })64 const variantThumbnail = transform({ 65 variants,66 }, (data) => {67 return data.variants68 // @ts-ignore69 .filter((variant) => !!variant.thumbnail)70 .flatMap((variant) => ({71 entity_id: variant.id,72 // @ts-ignore73 url: variant.thumbnail!,74 }))75 })76 77 const strapiVariantImages = uploadImagesToStrapiStep({78 items: variantImages,79 })80 81 const strapiVariantThumbnail = uploadImagesToStrapiStep({82 items: variantThumbnail,83 }).config({ name: "upload-variant-thumbnail" })84 85 const variantsData = transform({ 86 variants, 87 strapiVariantImages, 88 strapiVariantThumbnail,89 }, (data) => {90 const varData = data.variants.map((variant) => ({91 id: variant.id,92 title: variant.title,93 sku: variant.sku,94 strapiProductId: Number(variant.product?.metadata?.strapi_id),95 strapiVariantImages: data.strapiVariantImages96 .filter((image) => image.entity_id === variant.id)97 .map((image) => image.image_id),98 strapiVariantThumbnail: data.strapiVariantThumbnail99 .find((image) => image.entity_id === variant.id)?.image_id,100 optionValueIds: variant.options.flatMap((option) => {101 // find the strapi option value id for the option value102 return variant.product?.options.flatMap(103 (productOption) => productOption.values.find(104 (value) => value.value === option.value105 )?.metadata?.strapi_id).filter((value) => value !== undefined)106 }),107 }))108 109 return varData110 })111 112 const strapiVariants = createVariantsInStrapiStep({113 variants: variantsData,114 } as CreateVariantsInStrapiInput)115 116 const variantsMetadataUpdate = transform({ strapiVariants }, (data) => {117 return {118 updates: data.strapiVariants.map((strapiVariant) => ({119 variantId: strapiVariant.medusaId,120 strapiId: strapiVariant.id,121 strapiDocumentId: strapiVariant.documentId,122 })),123 }124 })125 126 updateProductVariantsMetadataStep(variantsMetadataUpdate)127 128 return strapiVariants129 })130 131 releaseLockStep({132 key: ["strapi-product-create", input.productId],133 })134 135 return new WorkflowResponse({136 variants: strapiVariants,137 })138 }139)
The workflow receives the IDs of the product variants to create in Strapi and the Medusa product ID they belong to.
In the workflow, you:
- Acquire a lock to prevent concurrent creation of variants for the same product. This is necessary to handle both the product and variant creation events without duplications.
- Retrieve the product variants in Medusa using the
useQueryGraphStep. - Check if the product has been created in Strapi using when. If so, you:
- Prepare the variant images to upload using
transform. - Prepare the variant thumbnail to upload using
transform. - Upload the variant images to Strapi using the
uploadImagesToStrapiStep. - Upload the variant thumbnail to Strapi using the
uploadImagesToStrapiStep. - Prepare the variant data to create using
transform. - Create the product variants in Strapi using the
createVariantsInStrapiStep. - Prepare the data to update the variants' metadata using
transform. - Update the variants' metadata using the
updateProductVariantsMetadataStep.
- Prepare the variant images to upload using
- Release the acquired lock.
c. Create Product Creation Workflow#
Now that you have created the necessary sub-workflows, you can create the main workflow to handle product creation in Strapi.
The workflow to create products in Strapi has the following steps:
View step details
You only need to create the createProductInStrapiStep step. The rest of the steps and workflows are either available out-of-the-box in Medusa or you have already created them.
createProductInStrapiStep
The createProductInStrapiStep creates a product in Strapi.
To create the step, create the file src/workflows/steps/create-product-in-strapi.ts with the following content:
1import { createStep, StepResponse } from "@medusajs/framework/workflows-sdk"2import { STRAPI_MODULE } from "../../modules/strapi"3import StrapiModuleService, { Collection } from "../../modules/strapi/service"4 5export type CreateProductInStrapiInput = {6 product: {7 id: string8 title: string9 subtitle?: string10 description?: string11 handle: string12 imageIds?: number[]13 thumbnailId?: number14 }15}16 17export const createProductInStrapiStep = createStep(18 "create-product-in-strapi",19 async ({ product }: CreateProductInStrapiInput, { container }) => {20 const strapiService: StrapiModuleService = container.resolve(STRAPI_MODULE)21 22 // Create product in Strapi23 const strapiProduct = await strapiService.create(Collection.PRODUCTS, {24 medusaId: product.id,25 title: product.title,26 subtitle: product.subtitle,27 description: product.description,28 handle: product.handle,29 images: product.imageIds || [],30 thumbnail: product.thumbnailId,31 })32 33 return new StepResponse(34 strapiProduct.data,35 strapiProduct.data36 )37 },38 async (compensationData, { container }) => {39 if (!compensationData) {40 return41 }42 43 const strapiService: StrapiModuleService = container.resolve(STRAPI_MODULE)44 45 // Delete the product46 await strapiService.delete(Collection.PRODUCTS, compensationData.documentId)47 }48)
The step receives the product to create in Strapi. In the step, you create the product in Strapi using the Strapi Module's service.
In the compensation function, you delete the created product in Strapi if an error occurs during the workflow's execution.
Create Product Workflow
Now that you have created the necessary step, you can create the main workflow to handle product creation in Strapi.
To create the workflow, create the file src/workflows/create-product-in-strapi.ts with the following content:
1import { 2 createWorkflow, 3 WorkflowResponse,4 transform,5 when,6} from "@medusajs/framework/workflows-sdk"7import { 8 CreateProductInStrapiInput, 9 createProductInStrapiStep,10} from "./steps/create-product-in-strapi"11import { uploadImagesToStrapiStep } from "./steps/upload-images-to-strapi"12import { 13 useQueryGraphStep, 14 updateProductsWorkflow, 15 acquireLockStep, 16 releaseLockStep,17} from "@medusajs/medusa/core-flows"18import { createOptionsInStrapiWorkflow } from "./create-options-in-strapi"19import { createVariantsInStrapiWorkflow } from "./create-variants-in-strapi"20 21export type CreateProductInStrapiWorkflowInput = {22 id: string23}24 25export const createProductInStrapiWorkflow = createWorkflow(26 "create-product-in-strapi",27 (input: CreateProductInStrapiWorkflowInput) => {28 acquireLockStep({29 key: ["strapi-product-create", input.id],30 timeout: 60,31 })32 const { data: products } = useQueryGraphStep({33 entity: "product",34 fields: [35 "id",36 "title",37 "subtitle",38 "description",39 "handle",40 "images.url",41 "thumbnail",42 "variants.id",43 "options.id",44 ],45 filters: {46 id: input.id,47 },48 options: {49 throwIfKeyNotFound: true,50 },51 })52 53 const productImages = transform({ products }, (data) => {54 return data.products[0].images.map((image) => {55 return {56 entity_id: data.products[0].id,57 url: image.url,58 }59 })60 })61 62 const strapiProductImages = uploadImagesToStrapiStep({63 items: productImages,64 })65 66 const strapiProductThumbnail = when(67 ({ products }), 68 // @ts-ignore69 (data) => !!data.products[0].thumbnail70 ).then(() => {71 return uploadImagesToStrapiStep({72 items: [{73 entity_id: products[0].id,74 url: products[0].thumbnail!,75 }],76 }).config({ name: "upload-product-thumbnail" })77 })78 79 const productWithImages = transform(80 { strapiProductImages, strapiProductThumbnail, products },81 (data) => {82 return {83 id: data.products[0].id,84 title: data.products[0].title,85 subtitle: data.products[0].subtitle,86 description: data.products[0].description,87 handle: data.products[0].handle,88 imageIds: data.strapiProductImages.map((image) => image.image_id),89 thumbnailId: data.strapiProductThumbnail?.[0]?.image_id,90 }91 }92 )93 94 const strapiProduct = createProductInStrapiStep({95 product: productWithImages,96 } as CreateProductInStrapiInput)97 98 const productMetadataUpdate = transform({ strapiProduct }, (data) => {99 return {100 selector: { id: data.strapiProduct.medusaId },101 update: {102 metadata: {103 strapi_id: data.strapiProduct.id,104 strapi_document_id: data.strapiProduct.documentId,105 },106 },107 }108 })109 110 updateProductsWorkflow.runAsStep({111 input: productMetadataUpdate,112 })113 114 const variantIds = transform({ 115 products,116 }, (data) => data.products[0].variants.map((variant) => variant.id))117 const optionIds = transform({118 products,119 }, (data) => data.products[0].options.map((option) => option.id))120 121 createOptionsInStrapiWorkflow.runAsStep({122 input: {123 ids: optionIds,124 },125 })126 127 releaseLockStep({128 key: ["strapi-product-create", input.id],129 })130 131 createVariantsInStrapiWorkflow.runAsStep({132 input: {133 ids: variantIds,134 productId: input.id,135 },136 })137 138 return new WorkflowResponse(strapiProduct)139 }140)
The workflow receives the ID of the product to create in Strapi.
In the workflow, you:
- Acquire a lock to prevent concurrent creation of variants for the same product. This is necessary to handle both the product and variant creation events. Otherwise, variants might be created multiple times.
- Retrieve the product in Medusa using the
useQueryGraphStep. - Prepare the product images to upload using
transform. - Upload the product images to Strapi using the
uploadImagesToStrapiStep. - Check if the product has a thumbnail using
when. If so, you upload the thumbnail to Strapi using theuploadImagesToStrapiStep. - Prepare the product data to create using
transform. - Create the product in Strapi using the
createProductInStrapiStep. - Prepare the data to update the product's metadata using
transform. - Update the product's metadata using the
updateProductsWorkflow. - Prepare the IDs of the product options and variants using
transform. - Create the product options in Strapi using the
createOptionsInStrapiWorkflow. - Release the acquired lock.
- Create the product variants in Strapi using the
createVariantsInStrapiWorkflow.
The workflow returns the created Strapi product as a response.
d. Create Product Created Subscriber#
Finally, you need to create a subscriber that listens to the product creation event in Medusa and triggers the createProductInStrapiWorkflow.
A subscriber is an asynchronous function that is executed whenever its associated event is emitted.
To create the subscriber, create the file src/subscribers/product-created-strapi-sync.ts with the following content:
1import {2 type SubscriberConfig,3 type SubscriberArgs,4} from "@medusajs/framework"5import { createProductInStrapiWorkflow } from "../workflows/create-product-in-strapi"6 7export default async function productCreatedStrapiSyncHandler({8 event: { data },9 container,10}: SubscriberArgs<{ id: string }>) {11 await createProductInStrapiWorkflow(container).run({12 input: {13 id: data.id,14 },15 })16}17 18export const config: SubscriberConfig = {19 event: "product.created",20}
A subscriber file must export:
- An asynchronous function, which is the subscriber function that is executed when the event is emitted.
- A configuration object that defines the event the subscriber listens to, which is
product.createdin this case.
In the subscriber function, you run the createProductInStrapiWorkflow, passing the ID of the created product as input.
Test Product Creation#
Now that you have implemented the product creation workflow and subscriber, you can test the integration.
First, run the following command in the Strapi application's directory to start the Strapi server:
Then, run the following command in the apps/backend directory to start the Medusa server:
Next, open the Medusa Admin dashboard and create a new product. Once you create the product, you'll see the following in the Medusa server logs:
This indicates that the subscriber has been triggered.
Then, open the Strapi Admin dashboard and navigate to the Products collection. You should see the newly created product in the list.
Step 6: Handle Strapi Product Updates#
Next, you'll handle product updates in Strapi and synchronize the changes back to Medusa. You'll create a workflow to update the relevant product data in Medusa based on the data received from Strapi.
Then, you'll create an API route webhook that Strapi can call whenever product data is updated. With this setup, you'll have two-way synchronization between Medusa and Strapi for product data.
a. Handle Strapi Webhook Workflow#
The workflow to handle Strapi webhooks has the following steps:
View step details
You only need to create the prepareStrapiUpdateDataStep, clearProductCacheStep, and updateProductOptionValueStep steps. The rest of the steps and workflows are available out-of-the-box in Medusa.
prepareStrapiUpdateDataStep
The prepareStrapiUpdateDataStep extracts the data to update from the Strapi webhook payload.
To create the step, create the file src/workflows/steps/prepare-strapi-update-data.ts with the following content:
1import { createStep, StepResponse } from "@medusajs/framework/workflows-sdk"2 3export const prepareStrapiUpdateDataStep = createStep(4 "prepare-strapi-update-data",5 async ({ entry }: { entry: any }) => {6 let data: Record<string, unknown> = {}7 const model = entry.model8 9 switch (model) {10 case "product":11 data = {12 id: entry.entry.medusaId,13 title: entry.entry.title,14 subtitle: entry.entry.subtitle,15 description: entry.entry.description,16 handle: entry.entry.handle,17 }18 break19 case "product-variant":20 data = {21 id: entry.entry.medusaId,22 title: entry.entry.title,23 sku: entry.entry.sku,24 }25 break26 case "product-option":27 data = {28 selector: {29 id: entry.entry.medusaId,30 },31 update: {32 title: entry.entry.title,33 },34 }35 break36 case "product-option-value":37 data = {38 optionValueId: entry.entry.medusaId,39 value: entry.entry.value,40 }41 break42 }43 44 return new StepResponse({ data, model })45 }46)
The step receives the Strapi webhook payload containing the updated entry.
In the step, you extract the relevant data based on the model type (product, product variant, product option, or product option value) and return it.
clearProductCacheStep
The clearProductCacheStep clears the product cache in Medusa to ensure that updated data is served to clients. This is necessary as you'll enable caching later, which may cause stale data to be served to the storefront.
To create the step, create the file src/workflows/steps/clear-product-cache.ts with the following content:
1import { createStep, StepResponse } from "@medusajs/framework/workflows-sdk"2import { Modules } from "@medusajs/framework/utils"3 4type ClearProductCacheInput = {5 productId: string | string[]6}7 8export const clearProductCacheStep = createStep(9 "clear-product-cache",10 async ({ productId }: ClearProductCacheInput, { container }) => {11 const cachingModuleService = container.resolve(Modules.CACHING)12 13 const productIds = Array.isArray(productId) ? productId : [productId]14 15 // Clear cache for all specified products16 for (const id of productIds) {17 if (id) {18 await cachingModuleService.clear({19 tags: [`Product:${id}`],20 })21 }22 }23 24 return new StepResponse({})25 }26)
The step receives the ID or IDs of the products to clear the cache for.
In the step, you clear the cache for each specified product using the Caching Module's service.
updateProductOptionValueStep
The updateProductOptionValueStep updates product option values in Medusa based on the data received from Strapi.
To create the step, create the file src/workflows/steps/update-product-option-value.ts with the following content:
1import { createStep, StepResponse } from "@medusajs/framework/workflows-sdk"2import { Modules } from "@medusajs/framework/utils"3import { IProductModuleService } from "@medusajs/framework/types"4 5type UpdateProductOptionValueInput = {6 id: string7 value: string8}9 10export const updateProductOptionValueStep = createStep(11 "update-product-option-value",12 async ({ id, value }: UpdateProductOptionValueInput, { container }) => {13 const productModuleService: IProductModuleService = container.resolve(14 Modules.PRODUCT15 )16 17 // Store the old value for compensation18 const oldOptionValue = await productModuleService19 .retrieveProductOptionValue(id)20 21 // Update the option value22 const updatedOptionValue = await productModuleService23 .updateProductOptionValues(24 id,25 {26 value,27 }28 )29 30 return new StepResponse(updatedOptionValue, oldOptionValue)31 },32 async (compensateData, { container }) => {33 if (!compensateData) {34 return35 }36 37 const productModuleService: IProductModuleService = container.resolve(38 Modules.PRODUCT39 )40 41 // Revert the option value to its old value42 await productModuleService.updateProductOptionValues(43 compensateData.id,44 {45 value: compensateData.value,46 }47 )48 }49)
The step receives the ID of the option value to update and the new value.
In the step, you resolve the Product Module's service and update the option value in Medusa.
In the compensation function, you revert the option value to its old value if an error occurs during the workflow's execution.
Handle Strapi Webhook Workflow
Now that you have created the necessary steps, you can create the workflow to handle Strapi webhooks.
To create the workflow, create the file src/workflows/handle-strapi-webhook.ts with the following content:
18} from "@medusajs/framework/types"19 20export type WorkflowInput = {21 entry: any22}23 24export const handleStrapiWebhookWorkflow = createWorkflow(25 "handle-strapi-webhook-workflow",26 (input: WorkflowInput) => {27 const preparedData = prepareStrapiUpdateDataStep({28 entry: input.entry,29 })30 31 when(input, (input) => input.entry.model === "product")32 .then(() => {33 updateProductsWorkflow.runAsStep({34 input: {35 products: [preparedData.data as unknown as UpsertProductDTO],36 },37 })38 39 // Clear the product cache after update40 const productId = transform({ preparedData }, (data) => {41 return (data.preparedData.data as any).id42 })43 44 clearProductCacheStep({ productId })45 })46 47 when(input, (input) => input.entry.model === "product-variant")48 .then(() => {49 const variants = updateProductVariantsWorkflow.runAsStep({50 input: {51 product_variants: [52 preparedData.data as unknown as UpsertProductVariantDTO,53 ],54 },55 })56 57 clearProductCacheStep({ 58 productId: variants[0].product_id!,59 }).config({ name: "clear-product-cache-variant" })60 })61 62 when(input, (input) => input.entry.model === "product-option")63 .then(() => {64 const options = updateProductOptionsWorkflow.runAsStep({65 input: preparedData.data as any,66 })67 68 clearProductCacheStep({ 69 productId: options[0].product_id!,70 }).config({ name: "clear-product-cache-option" })71 })72 73 when(input, (input) => input.entry.model === "product-option-value")74 .then(() => {75 // Update the option value using the Product Module76 const optionValueData = transform({ preparedData }, (data) => ({77 id: data.preparedData.data.optionValueId as string,78 value: data.preparedData.data.value as string,79 }))80 81 updateProductOptionValueStep(optionValueData)82 83 // Find all variants that use this option value to84 // clear their product cache85 const { data: variants } = useQueryGraphStep({86 entity: "product_variant",87 fields: [88 "id",89 "product_id",90 ],91 filters: {92 options: {93 id: preparedData.data.optionValueId as string,94 },95 },96 }).config({ name: "get-variants-from-option-value" })97 98 // Clear the product cache for all affected products99 const productIds = transform({ variants }, (data) => {100 const uniqueProductIds = [101 ...new Set(data.variants.map((v) => v.product_id)),102 ]103 return uniqueProductIds as string[]104 })105 106 clearProductCacheStep({ 107 productId: productIds,108 }).config({ name: "clear-product-cache-option-value" })109 })110 }111)
The workflow receives the Strapi webhook payload containing the updated entry.
In the workflow, you:
- Prepare the update data using the
prepareStrapiUpdateDataStep. - Check if the updated model is a product using
when. If so, you:- Update the product in Medusa using the
updateProductsWorkflow. - Clear the product cache using the
clearProductCacheStep.
- Update the product in Medusa using the
- Check if the updated model is a product variant using
when. If so, you- Update the product variant in Medusa using the
updateProductVariantsWorkflow. - Clear the product cache using the
clearProductCacheStep.
- Update the product variant in Medusa using the
- Check if the updated model is a product option using
when. If so, you:- Update the product option in Medusa using the
updateProductOptionsWorkflow. - Clear the product cache using the
clearProductCacheStep.
- Update the product option in Medusa using the
- Check if the updated model is a product option value using
when. If so, you:- Update the product option value in Medusa using the
updateProductOptionValueStep. - Retrieve all product variants that use the updated option value using the
useQueryGraphStep. - Clear the product cache for all affected products using the
clearProductCacheStep.
- Update the product option value in Medusa using the
b. Create Strapi Webhook API Route#
Next, you need to create an API route webhook that Strapi can call whenever product data is updated.
An API route is an endpoint that exposes business logic and commerce features to clients.
An API route is created in a route.ts file under a sub-directory of the src/api directory. The path of the API route is the file's path relative to src/api.
To create the API route, create the file src/api/webhooks/strapi/route.ts with the following content:
1import { MedusaRequest, MedusaResponse } from "@medusajs/framework/http"2import { simpleHash, Modules } from "@medusajs/framework/utils"3import { 4 handleStrapiWebhookWorkflow, 5 WorkflowInput,6} from "../../../workflows/handle-strapi-webhook"7 8export const POST = async (9 req: MedusaRequest,10 res: MedusaResponse11) => {12 const body = req.body as Record<string, unknown>13 const logger = req.scope.resolve("logger")14 const cachingService = req.scope.resolve(Modules.CACHING)15 16 // Generate a hash of the webhook payload to detect duplicates17 const payloadHash = simpleHash(JSON.stringify(body))18 const cacheKey = `strapi-webhook:${payloadHash}`19 20 // Check if we've already processed this webhook21 const alreadyProcessed = await cachingService.get({ key: cacheKey })22 23 if (alreadyProcessed) {24 logger.debug(`Webhook already processed (hash: ${payloadHash}), skipping to prevent infinite loop`)25 res.status(200).send("OK - Already processed")26 return27 }28 29 if (body.event === "entry.update") {30 const entry = body.entry as Record<string, unknown>31 const entityCacheKey = `strapi-update:${body.model}:${entry.medusaId}`32 await cachingService.set({33 key: entityCacheKey,34 data: { status: "processing", timestamp: Date.now() },35 ttl: 10,36 })37 38 await handleStrapiWebhookWorkflow(req.scope).run({39 input: {40 entry: body,41 } as WorkflowInput,42 })43 44 // Cache the hash to prevent reprocessing (TTL: 60 seconds)45 await cachingService.set({46 key: cacheKey,47 data: { status: "processed", timestamp: Date.now() },48 ttl: 60,49 })50 logger.debug(`Webhook processed and cached (hash: ${payloadHash})`)51 }52 53 res.status(200).send("OK")54}
Since you export POST function, you expose a POST API route at /webhooks/strapi.
In the API route, you:
- Retrieve the webhook payload from the request body.
- Resolve the Caching Module's service.
- Generate a hash of the webhook payload to detect duplicate webhook calls. This is necessary since you've implemented two-way synchronization between Medusa and Strapi, which may lead to infinite loops of updates.
- If the hash exists in the cache, the webhook has already been processed, so you skip further processing and return a
200response. - If the webhook event is
entry.update, you:- Cache the entity being updated to prevent concurrent updates.
- Run the
handleStrapiWebhookWorkflow, passing the webhook payload as input. - Cache the hash of the webhook payload to prevent reprocessing for 60 seconds.
c. Add Webhook Validation Middleware#
To ensure that webhook requests are coming from your Strapi application, you'll add a middleware that validates the webhook requests.
To add the middleware, create the file src/api/middlewares.ts with the following content:
1import { 2 defineMiddlewares, 3 MedusaNextFunction, 4 MedusaRequest, 5 MedusaResponse,6} from "@medusajs/framework/http"7import { Modules } from "@medusajs/framework/utils"8 9export default defineMiddlewares({10 routes: [11 {12 matcher: "/webhooks/strapi",13 middlewares: [14 async (15 req: MedusaRequest,16 res: MedusaResponse,17 next: MedusaNextFunction18 ) => {19 const apiKeyModuleService = req.scope.resolve(20 Modules.API_KEY21 )22 23 // Extract Bearer token from Authorization header24 const authHeader = req.headers["authorization"]25 const apiKey = authHeader?.replace("Bearer ", "")26 27 if (!apiKey) {28 return res.status(401).json({29 message: "Unauthorized: Missing API key",30 })31 }32 33 try {34 // Validate the API key using Medusa's API Key Module35 const isValid = await apiKeyModuleService.authenticate(apiKey)36 37 if (!isValid) {38 return res.status(401).json({39 message: "Unauthorized: Invalid API key",40 })41 }42 43 // API key is valid, proceed to route handler44 next()45 } catch (error) {46 return res.status(401).json({47 message: "Unauthorized: API key authentication failed",48 })49 }50 },51 ],52 },53 ],54})
The middleware file must create middlewares with the defineMiddlewares function.
You define a middleware for the /webhooks/strapi route that:
- Resolves the API Key Module's service.
- Extracts the API key from the
Authorizationheader. - If the API key is missing, returns a
401 Unauthorizedresponse. - Validates the API key using the API Key Module's service.
- If the API key is invalid, returns a
401 Unauthorizedresponse. - Otherwise, calls the
nextfunction to proceed to the route handler.
d. Enable Caching in Medusa#
The Caching Module is currently guarded by a feature flag. To enable it, add the feature flag and module in your medusa-config.ts file:
1module.exports = defineConfig({2 // ...3 modules: [4 // ...5 {6 resolve: "@medusajs/medusa/caching",7 options: {8 providers: [9 {10 resolve: "@medusajs/caching-redis",11 id: "caching-redis",12 options: {13 redisUrl: process.env.REDIS_URL,14 },15 },16 ],17 },18 },19 ],20 featureFlags: {21 caching: true,22 },23})
This configuration enables the Caching Module with Redis as the caching provider. Make sure to set the REDIS_URL environment variable to point to your Redis server:
You can now use the Caching Module's service in your workflows and API routes. Medusa will also cache product and cart data automatically to improve performance.
e. Webhook Handling Preparation#
Before you test the webhook handling, you need to create a secret API key in Medusa, then configure webhooks in Strapi.
Make sure to start both the Medusa and Strapi servers if they are not already running.
Create Secret API Key in Medusa
To create the secret API key in Medusa:
- Open the Medusa Admin dashboard.
- Go to Settings -> Secret API Keys.
- Click on the "Create" button at the top right.
- Enter a name for the API key. For example, "Strapi".
- Click on the "Save" button.
- Copy the generated API key. You'll need it to configure the webhook in Strapi.
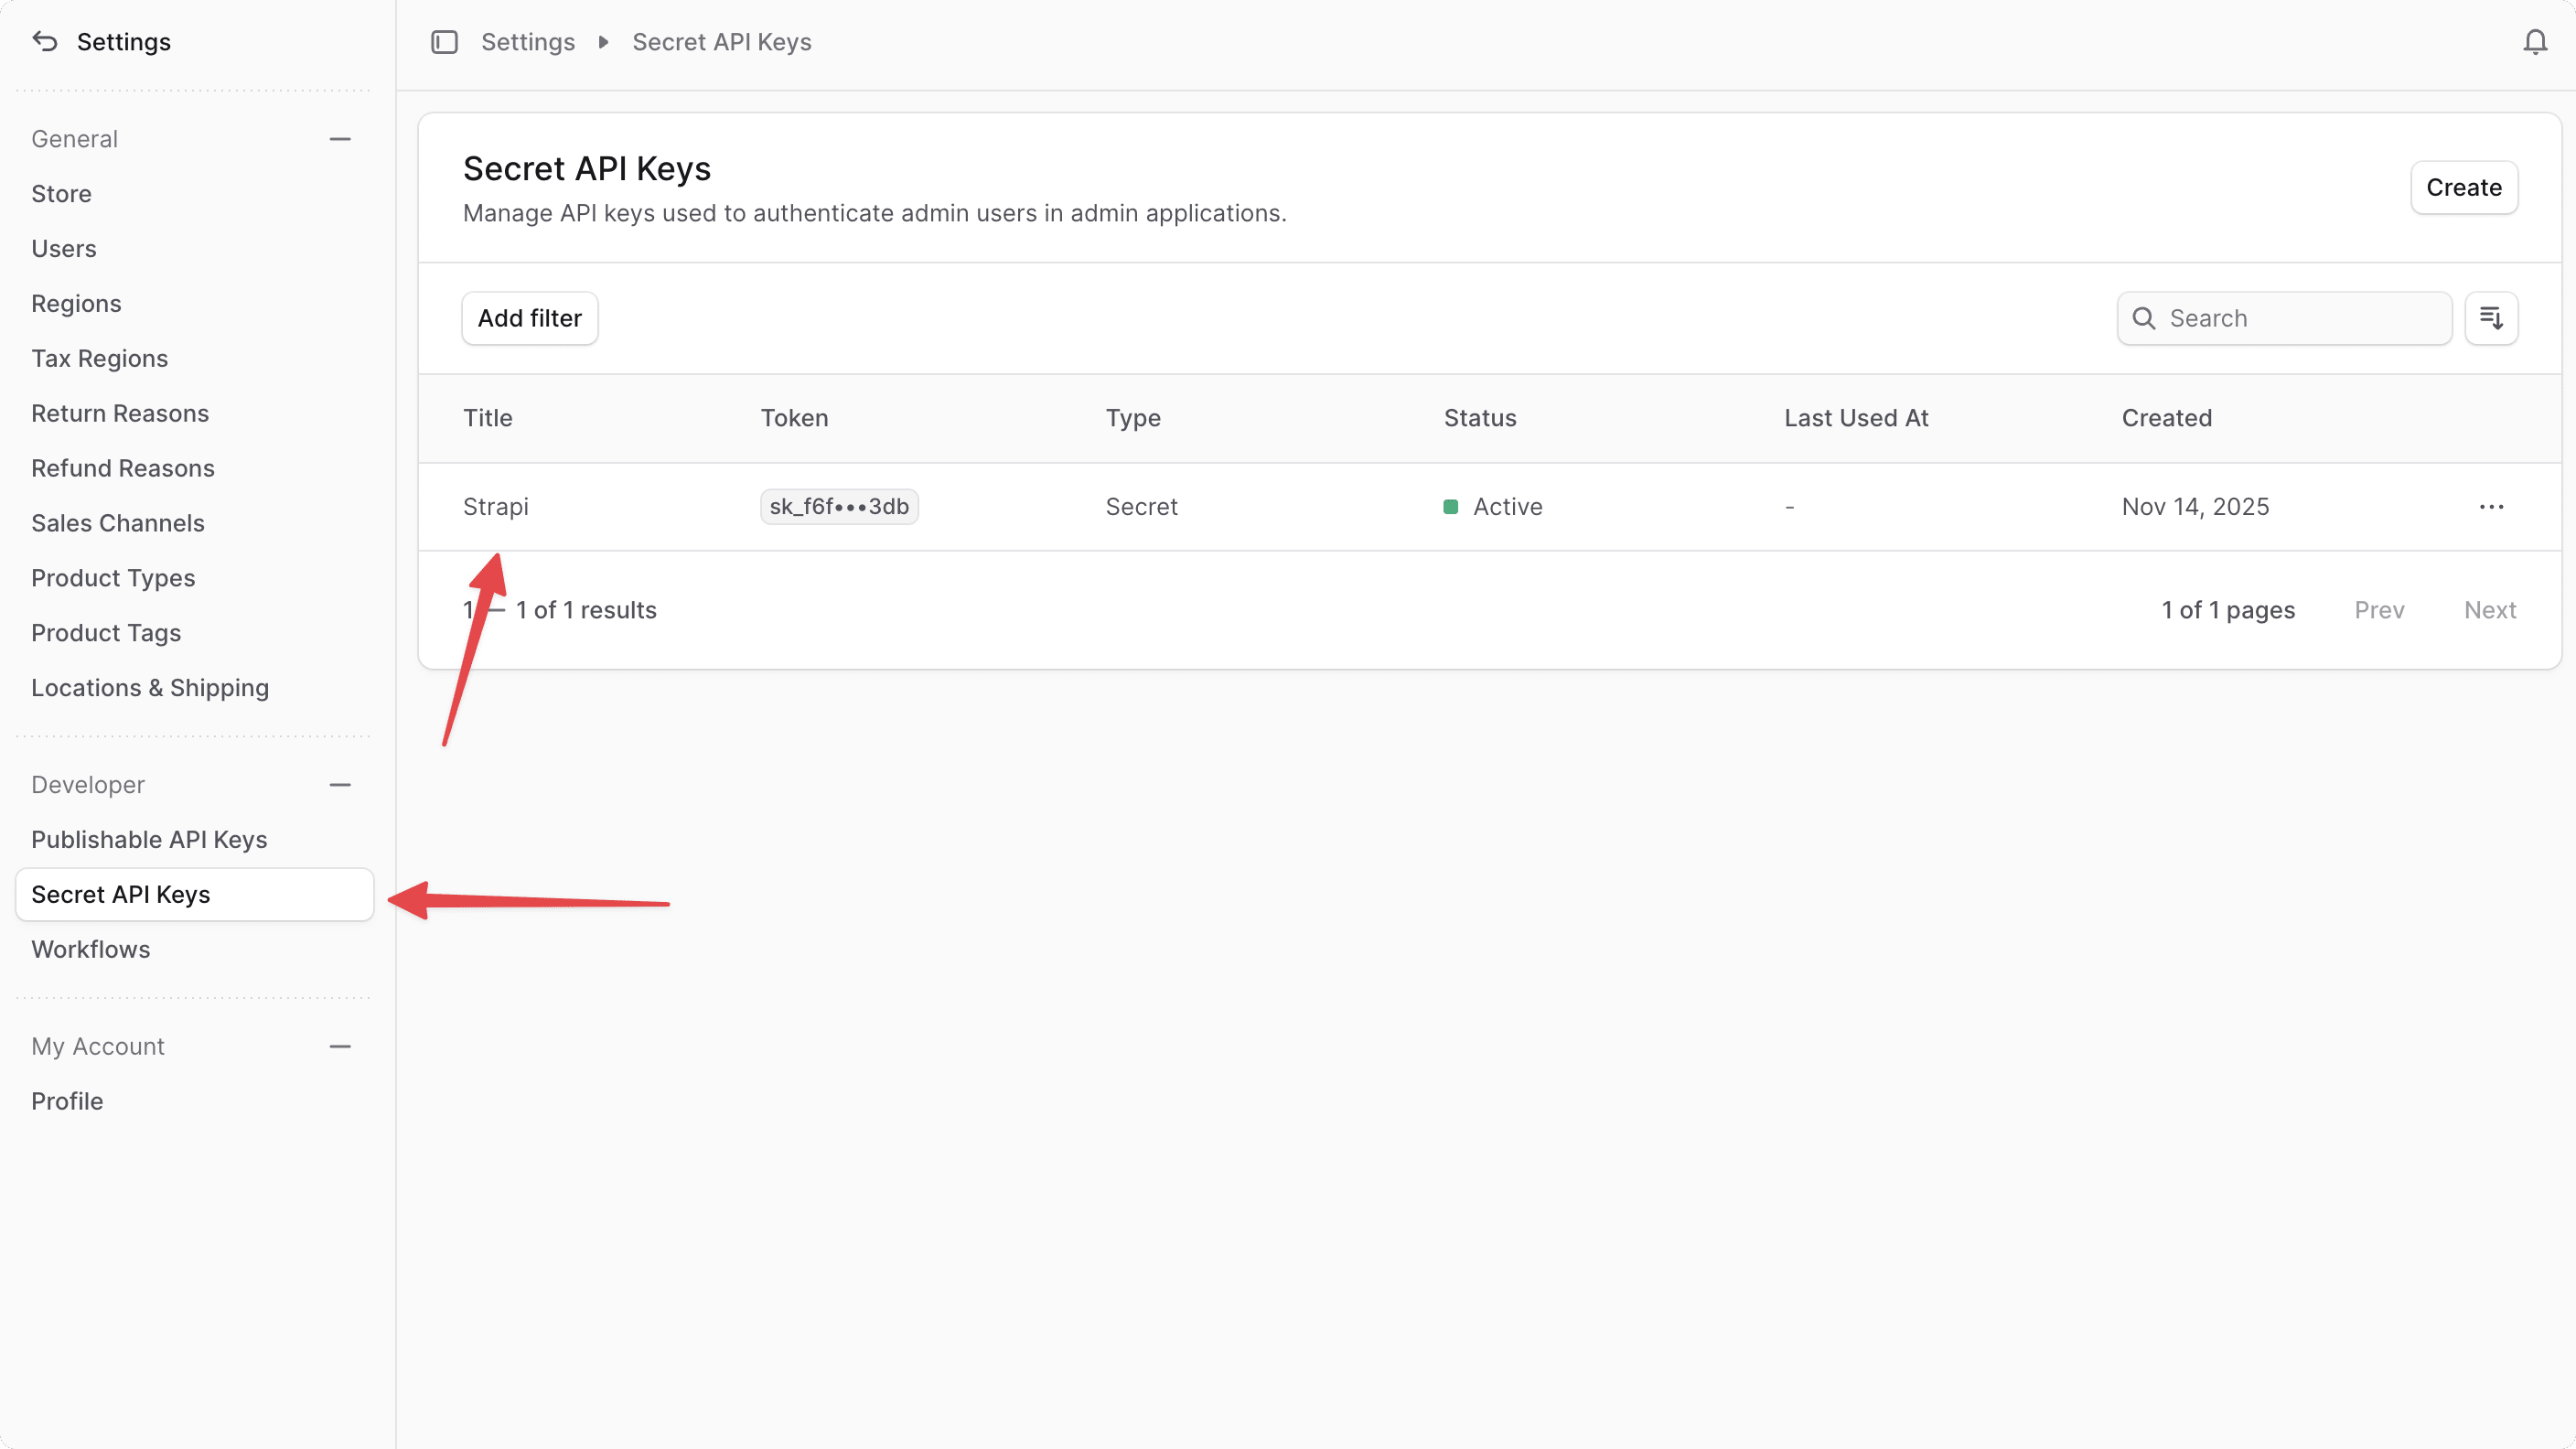
Configure Webhook in Strapi
Next, you need to configure a webhook in Strapi to call the Medusa webhook API route whenever product data is updated.
To configure the webhook in Strapi:
- Open the Strapi Admin dashboard.
- Go to Settings -> Webhooks.
- Click on the "Create new webhook" button at the top right.
- In the webhook creation form:
- Name: Enter a name for the webhook. For example, "Medusa".
- URL: Enter the URL of the Medusa webhook API route. It should be
http://localhost:9000/webhooks/strapiif you're running Medusa locally. - Headers: Add a new header with the key
Authorizationand the valueBearer YOUR_SECRET_API_KEY. ReplaceYOUR_SECRET_API_KEYwith the API key you created in Medusa. - Events: Select the "Update" event for "Entry". This ensures that the webhook is triggered whenever an entry is updated in Strapi.
- Click on the "Save" button to create the webhook.

Test Strapi Webhook Handling#
To test out the webhook handling:
- Make sure both the Medusa and Strapi servers are running.
- On the Strapi Admin dashboard, go to Content Manager -> Products.
- Select an existing product to edit.
- Update the product's title or description.
- Click on the "Save" button to save the changes.
Once you save the changes, Strapi will send a webhook to Medusa. You should see the following in the Medusa server logs:
This indicates that the webhook was received and processed successfully.
You can also check the product in the Medusa Admin dashboard to verify that the changes made in Strapi are reflected in Medusa.
Step 7: Show Strapi Data in Storefront#
Now that you've integrated Strapi with Medusa, you can customize the Next.js Starter Storefront to display product content from Strapi, allowing you to show product content and assets optimized for the storefront.
In this step, you'll customize the Next.js Starter Storefront to show the Strapi product data.
a. Retrieve Strapi Product Data#
Since you've created a virtual read-only link to Strapi products in Medusa, you can retrieve Strapi product data when retrieving Medusa products.
To retrieve Strapi product data, open src/lib/data/product.ts, and add *strapi_product to the fields query parameter passed in the listProducts function:
1export const listProducts = async ({2 // ...3}: {4 // ...5}): Promise<{6 // ...7}> => {8 // ...9 10 return sdk.client11 .fetch<{ products: HttpTypes.StoreProduct[]; count: number }>(12 `/store/products`,13 {14 query: {15 fields:16 "*variants.calculated_price,+variants.inventory_quantity,*variants.images,+metadata,+tags,*strapi_product",17 // ...18 },19 // ...20 }21 )22 // ...23}
The Strapi product data will now be included in the strapi_product property of each Medusa product.
b. Define Strapi Product Types#
Next, you'll define types for the Strapi product data to use in the storefront.
Create the file src/types/strapi.ts with the following content:
1export interface StrapiMedia {2 id: number3 url: string4 alternativeText?: string5 caption?: string6 width?: number7 height?: number8 formats?: {9 thumbnail?: { url: string; width: number; height: number }10 small?: { url: string; width: number; height: number }11 medium?: { url: string; width: number; height: number }12 large?: { url: string; width: number; height: number }13 }14}15 16export interface StrapiProductOptionValue {17 id: number18 medusaId: string19 value: string20 locale: string21 option?: StrapiProductOption22 variants?: StrapiProductVariant[]23}24 25export interface StrapiProductOption {26 id: number27 medusaId: string28 title: string29 locale: string30 product?: StrapiProduct31 values?: StrapiProductOptionValue[]32}33 34export interface StrapiProductVariant {35 id: number36 medusaId: string37 title: string38 sku?: string39 locale: string40 product?: StrapiProduct41 option_values?: StrapiProductOptionValue[]42 images?: StrapiMedia[]43 thumbnail?: StrapiMedia44}45 46export interface StrapiProduct {47 id: number48 medusaId: string49 title: string50 subtitle?: string51 description?: string52 handle: string53 images?: StrapiMedia[]54 thumbnail?: StrapiMedia55 locale: string56 variants?: StrapiProductVariant[]57 options?: StrapiProductOption[]58}
You define types for Strapi media, product option values, product options, product variants, and products.
c. Add Strapi Product Utilities#
Next, add utilities that will allow you to easily retrieve Strapi product data from a product object.
Create the file src/lib/util/strapi.ts with the following content:
1import { HttpTypes } from "@medusajs/types"2import {3 StrapiProduct,4 StrapiMedia,5} from "../../types/strapi"6 7/**8 * Get Strapi product data from a Medusa product9 */10export function getStrapiProduct(11 product: HttpTypes.StoreProduct12): StrapiProduct | undefined {13 return (product as any).strapi_product as StrapiProduct | undefined14}15 16/**17 * Get product title from Strapi, fallback to Medusa18 */19export function getProductTitle(20 product: HttpTypes.StoreProduct21): string {22 const strapiProduct = getStrapiProduct(product)23 return strapiProduct?.title || product.title || ""24}25 26/**27 * Get product subtitle from Strapi28 */29export function getProductSubtitle(30 product: HttpTypes.StoreProduct31): string | undefined {32 const strapiProduct = getStrapiProduct(product)33 return strapiProduct?.subtitle34}35 36/**37 * Get product description from Strapi, fallback to Medusa38 */39export function getProductDescription(40 product: HttpTypes.StoreProduct41): string | null {42 const strapiProduct = getStrapiProduct(product)43 if (strapiProduct?.description) {44 // Strapi richtext is typically stored as a string or structured data45 // For now, we'll handle it as a string. You may need to parse it based on your Strapi configuration46 return typeof strapiProduct.description === "string"47 ? strapiProduct.description48 : JSON.stringify(strapiProduct.description)49 }50 return product.description51}52 53/**54 * Get product thumbnail from Strapi, fallback to Medusa55 */56export function getProductThumbnail(57 product: HttpTypes.StoreProduct58): string | null {59 const strapiProduct = getStrapiProduct(product)60 61 if (strapiProduct?.thumbnail?.url) {62 return strapiProduct.thumbnail.url63 }64 65 return product.thumbnail || null66}67 68/**69 * Get product images from Strapi, fallback to Medusa70 */71export function getProductImages(72 product: HttpTypes.StoreProduct73): HttpTypes.StoreProductImage[] {74 const strapiProduct = getStrapiProduct(product)75 76 if (strapiProduct?.images && strapiProduct.images.length > 0) {77 // Convert Strapi media to Medusa product image format78 return strapiProduct.images.map((image: StrapiMedia, index: number) => ({79 id: image.id.toString(),80 url: image.url,81 metadata: {82 alt: image.alternativeText || `Product image ${index + 1}`,83 },84 rank: index + 1,85 })) as HttpTypes.StoreProductImage[]86 }87 88 return product.images || []89}90 91/**92 * Get variant title from Strapi, fallback to Medusa93 */94export function getVariantTitle(95 variant: HttpTypes.StoreProductVariant,96 product: HttpTypes.StoreProduct97): string {98 const strapiProduct = getStrapiProduct(product)99 const strapiVariant = strapiProduct?.variants?.find(100 (v) => v.medusaId === variant.id101 )102 return strapiVariant?.title || variant.title || ""103}104 105/**106 * Get option title from Strapi, fallback to Medusa107 */108export function getOptionTitle(109 option: HttpTypes.StoreProductOption,110 product: HttpTypes.StoreProduct111): string {112 const strapiProduct = getStrapiProduct(product)113 const strapiOption = strapiProduct?.options?.find(114 (o) => o.medusaId === option.id115 )116 return strapiOption?.title || option.title || ""117}118 119/**120 * Get option value text from Strapi, fallback to Medusa121 */122export function getOptionValueText(123 optionValue: { id: string; option_id: string; value: string },124 product: HttpTypes.StoreProduct125): string {126 const strapiProduct = getStrapiProduct(product)127 const strapiOption = strapiProduct?.options?.find(128 (o) => o.medusaId === optionValue.option_id129 )130 const strapiOptionValue = strapiOption?.values?.find(131 (v) => v.medusaId === optionValue.id132 )133 return strapiOptionValue?.value || optionValue.value134}135 136/**137 * Get all option values for a variant with Strapi labels138 */139export function getVariantOptionValues(140 variant: HttpTypes.StoreProductVariant,141 product: HttpTypes.StoreProduct142): Array<{ optionTitle: string; value: string }> {143 if (!variant.options || variant.options.length === 0) {144 return []145 }146 147 return variant.options148 .filter((opt) => opt.option_id && opt.id)149 .map((opt) => {150 const option = product.options?.find((o) => o.id === opt.option_id)151 const optionTitle = option152 ? getOptionTitle(option, product)153 : ""154 const value = getOptionValueText(155 { id: opt.id, option_id: opt.option_id!, value: opt.value! },156 product157 )158 return { optionTitle, value }159 })160 .filter((opt) => opt.optionTitle && opt.value)161}162 163/**164 * Get images for a specific variant from Strapi165 */166export function getVariantImages(167 variant: HttpTypes.StoreProductVariant,168 product: HttpTypes.StoreProduct169): HttpTypes.StoreProductImage[] {170 const strapiProduct = getStrapiProduct(product)171 const strapiVariant = strapiProduct?.variants?.find(172 (v) => v.medusaId === variant.id173 )174 175 // If variant has specific images in Strapi, use those176 if (strapiVariant?.images && strapiVariant.images.length > 0) {177 return strapiVariant.images.map((image: StrapiMedia, index: number) => ({178 id: image.id.toString(),179 url: image.url,180 metadata: {181 alt: image.alternativeText || `Variant image ${index + 1}`,182 },183 rank: index + 1,184 })) as HttpTypes.StoreProductImage[]185 }186 187 // Fall back to Medusa variant images188 if ((variant as any).images && (variant as any).images.length > 0) {189 return (variant as any).images190 }191 192 // Finally, fall back to product images193 return getProductImages(product)194}
You define the following utilities:
getStrapiProduct: Retrieves the Strapi product data from a Medusa product.getProductTitle: Retrieves the product title from Strapi, falling back to Medusa if not available.getProductSubtitle: Retrieves the product subtitle from Strapi.getProductDescription: Retrieves the product description from Strapi, falling back to Medusa if not available.getProductThumbnail: Retrieves the product thumbnail from Strapi, falling back to Medusa if not available.getProductImages: Retrieves the product images from Strapi, falling back to Medusa if not available.getVariantTitle: Retrieves the variant title from Strapi, falling back to Medusa if not available.getOptionTitle: Retrieves the option title from Strapi, falling back to Medusa if not available.getOptionValueText: Retrieves the option value text from Strapi, falling back to Medusa if not available.getVariantOptionValues: Retrieves all option values for a variant with Strapi labels.getVariantImages: Retrieves images for a specific variant from Strapi, falling back to Medusa if not available.
d. Customize Product Preview#
Next, you'll customize the product preview component to show Strapi product data. This component is displayed on the product listing page.
In src/modules/products/components/product-preview/index.tsx, add the following imports at the top of the file:
Then, in the ProductPreview component, define the following variables before the return statement:
Finally, replace the return statement with the following:
1return (2 <LocalizedClientLink href={`/products/${product.handle}`} className="group">3 <div data-testid="product-wrapper">4 <Thumbnail5 thumbnail={thumbnail}6 images={images}7 size="full"8 isFeatured={isFeatured}9 />10 <div className="flex txt-compact-medium mt-4 justify-between">11 <Text className="text-ui-fg-subtle" data-testid="product-title">12 {title}13 </Text>14 <div className="flex items-center gap-x-2">15 {cheapestPrice && <PreviewPrice price={cheapestPrice} />}16 </div>17 </div>18 </div>19 </LocalizedClientLink>20)
You make two key changes:
- Pass the
imagesandthumbnailvariables as props to theThumbnailcomponent to show Strapi product images. - Use the
titlevariable to display the Strapi product title.
e. Customize Product Details Metadata#
Next, you'll customize the product details component to show Strapi product data.
First, you'll use the Strapi product title, subtitle, and images in the page's metadata.
In src/app/[countryCode]/(main)/products/[handle]/page.tsx, add the following imports at the top of the file:
Then, replace the getImagesForVariant function with the following:
1function getImagesForVariant(2 product: HttpTypes.StoreProduct,3 selectedVariantId?: string4) {5 // Get Strapi images or fallback to Medusa images6 const productImages = getProductImages(product)7 8 if (!selectedVariantId || !product.variants) {9 return productImages10 }11 12 const variant = product.variants!.find((v) => v.id === selectedVariantId)13 if (!variant) {14 return productImages15 }16 17 // Get variant images from Strapi or fallback to Medusa18 const variantImages = getVariantImages(variant, product)19 20 // If variant has specific images, use those; otherwise use product images21 if (22 variantImages.length > 0 && 23 (variant as any).images && 24 (variant as any).images.length > 025 ) {26 const imageIdsMap = new Map((variant as any)27 .images.map((i: StrapiMedia) => [i.id, true]))28 return productImages.filter((i) => imageIdsMap.has(i.id))29 }30 31 return productImages32}
This function now retrieves product and variant images from Strapi using the utilities you defined earlier. These images will be shown on the product's details page.
Next, in the generateMetadata function, replace the return statement with the following:
1const title = getProductTitle(product)2const subtitle = getProductSubtitle(product)3const thumbnail = getProductThumbnail(product) || product.thumbnail4 5return {6 title: `${title} | Medusa Store`,7 description: subtitle || title,8 openGraph: {9 title: `${title} | Medusa Store`,10 description: subtitle || title,11 images: thumbnail ? [thumbnail] : [],12 },13}
You use the Strapi product title, subtitle, and thumbnail in the page's metadata.
f. Customize Product Details Page#
Next, you'll customize the product details page to show Strapi product data.
getImagesForVariant function.Show Product Title and Description
First, you'll show the Strapi product title and description on the product details page.
Since the product description is in markdown format, you need to install the react-markdown package to render it. Run the following command in your storefront directory:
Then, in src/modules/products/templates/product-info/index.tsx, add the following imports at the top of the file:
Next, in the ProductInfo component, define the following variables before the return statement:
Finally, in the return statement, replace {product.title} with {title}:
Then, find the Text component wrapping the {product.description} and replace it with the following:
1<div2 className="text-medium text-ui-fg-subtle whitespace-pre-line"3 data-testid="product-description"4>5 <Markdown 6 allowedElements={[7 "p", "ul", "ol", "li", "strong", "em", "blockquote", "hr", "br", "a",8 ]}9 unwrapDisallowed10 >11 {description}12 </Markdown>13</div>
Show Option Titles and Values
Next, you'll show Strapi option titles and values on the product details page.
Replace the content of src/modules/products/components/product-actions/option-select.tsx with the following:
1import { HttpTypes } from "@medusajs/types"2import { clx } from "@medusajs/ui"3import React from "react"4import { getOptionValueText } from "@lib/util/strapi"5 6type OptionSelectProps = {7 option: HttpTypes.StoreProductOption8 current: string | undefined9 updateOption: (title: string, value: string) => void10 title: string11 product: HttpTypes.StoreProduct12 disabled: boolean13 "data-testid"?: string14}15 16const OptionSelect: React.FC<OptionSelectProps> = ({17 option,18 current,19 updateOption,20 title,21 product,22 "data-testid": dataTestId,23 disabled,24}) => {25 const filteredOptions = (option.values ?? []).map((v) => ({26 originalValue: v.value,27 displayValue: getOptionValueText(28 { id: v.id, option_id: option.id, value: v.value },29 product30 ),31 }))32 33 return (34 <div className="flex flex-col gap-y-3">35 <span className="text-sm">Select {title}</span>36 <div37 className="flex flex-wrap justify-between gap-2"38 data-testid={dataTestId}39 >40 {filteredOptions.map(({ originalValue, displayValue }) => {41 return (42 <button43 onClick={() => updateOption(option.id, originalValue)}44 key={originalValue}45 className={clx(46 "border-ui-border-base bg-ui-bg-subtle border text-small-regular h-10 rounded-rounded p-2 flex-1 ",47 {48 "border-ui-border-interactive": originalValue === current,49 "hover:shadow-elevation-card-rest transition-shadow ease-in-out duration-150":50 originalValue !== current,51 }52 )}53 disabled={disabled}54 data-testid="option-button"55 >56 {displayValue}57 </button>58 )59 })}60 </div>61 </div>62 )63}64 65export default OptionSelect
You make the following key changes:
- Add the
productprop to theOptionSelectcomponent. - Use the
getOptionValueTextutility to get the option value text from Strapi. - Display the Strapi option value text in the option buttons.
Then, in src/modules/products/components/product-actions/index.tsx, add the following import at the top of the file:
And in the return statement, find the product.options loop and replace it with the following:
1return (2 <>3 {/* ... */}4 {(product.options || []).map((option) => {5 const optionTitle = getOptionTitle(option, product)6 return (7 <div key={option.id}>8 <OptionSelect9 option={option}10 current={options[option.id]}11 updateOption={setOptionValue}12 title={optionTitle}13 product={product}14 data-testid="product-options"15 disabled={!!disabled || isAdding}16 />17 </div>18 )19 })}20 {/* ... */}21 </>22)
You use the getOptionTitle utility to get the option title from Strapi and pass the product prop to the OptionSelect component.
You need to make similar changes in the src/modules/products/components/product-actions/mobile-actions.tsx component. First, add the following imports at the top of the file:
Then, in the return statement, replace the {product.title} with the following:
Then, find the product.options loop and replace it with the following:
1return (2 <>3 {/* ... */}4 {(product.options || []).map((option) => {5 const optionTitle = getOptionTitle(option, product)6 return (7 <div key={option.id}>8 <OptionSelect9 option={option}10 current={options[option.id]}11 updateOption={updateOptions}12 title={optionTitle}13 product={product}14 disabled={optionsDisabled}15 />16 </div>17 )18 })}19 {/* ... */}20 </>21)
You retrieve the Strapi option title and pass the product prop to the OptionSelect component.
g. Customize Line Item Options#
Finally, you'll customize the line item options to either show Strapi variant titles or option titles and values.
Replace the content of src/modules/common/components/line-item-options/index.tsx with the following:
1import { HttpTypes } from "@medusajs/types"2import { Text } from "@medusajs/ui"3import { getVariantTitle, getVariantOptionValues } from "@lib/util/strapi"4 5type LineItemOptionsProps = {6 variant: HttpTypes.StoreProductVariant | undefined7 product?: HttpTypes.StoreProduct8 "data-testid"?: string9 "data-value"?: HttpTypes.StoreProductVariant10}11 12const LineItemOptions = ({13 variant,14 product,15 "data-testid": dataTestid,16 "data-value": dataValue,17}: LineItemOptionsProps) => {18 if (!variant) {19 return null20 }21 22 // Get product from variant if not provided23 const productData = product || (variant as any).product24 25 // Get variant title from Strapi26 const variantTitle = productData27 ? getVariantTitle(variant, productData)28 : variant.title29 30 // Get option values from Strapi31 const optionValues = productData32 ? getVariantOptionValues(variant, productData)33 : []34 35 // If we have option values, show them; otherwise show variant title36 if (optionValues.length > 0) {37 const displayText = optionValues38 .map((opt) => `${opt.optionTitle}: ${opt.value}`)39 .join(" / ")40 41 return (42 <Text43 data-testid={dataTestid}44 data-value={dataValue}45 className="inline-block txt-medium text-ui-fg-subtle w-full overflow-hidden text-ellipsis"46 >47 {displayText}48 </Text>49 )50 }51 52 return (53 <Text54 data-testid={dataTestid}55 data-value={dataValue}56 className="inline-block txt-medium text-ui-fg-subtle w-full overflow-hidden text-ellipsis"57 >58 Variant: {variantTitle}59 </Text>60 )61}62 63export default LineItemOptions
You make the following key changes:
- Add a
productprop to theLineItemOptionscomponent. - Use the
getVariantTitleutility to get the variant title from Strapi. - Use the
getVariantOptionValuesutility to get the option titles and values from Strapi. - If option values are available, display them; otherwise, display the variant title.
This component is used in cart and order components to show line item details. So, you need to pass the product prop where the component is used.
In src/modules/cart/components/item/index.tsx, find the LineItemOptions component in the return statement and update it as follows:
Next, in src/modules/layout/components/cart-dropdown/index.tsx, find the LineItemOptions component in the return statement and update it as follows:
Finally, in src/modules/order/components/item/index.tsx, find the LineItemOptions component in the return statement and update it as follows:
This will show Strapi variant titles or option titles and values in the cart and order line items.
Test Storefront Customizations#
To test the storefront customizations, make sure both the Medusa and Strapi servers are running.
Then, run the following command in the Next.js Starter Storefront directory to start the storefront:
You can open the storefront in your browser at http://localhost:8000.
You'll see the Strapi product data in the following places:
- Go to Menu -> Store. On the product listing page, you'll see the Strapi product titles and images.
- Open a product's details page. You'll see the Strapi product title, description, images, option titles, and option values.
- Add the product to the cart. You'll see the Strapi variant titles or option titles and values in the cart dropdown and cart page.
- Place an order. You'll see the Strapi variant titles or option titles and values in the order confirmation page.
Step 8: Handle More Product Events#
Your setup now supports creating products in Strapi when they're created in Medusa. However, you should also support updating and deleting products and their related models to keep data in sync between systems.
For each product event, such as product.deleted or product-variant.updated, you need to:
- Create a workflow that updates or deletes the corresponding data in Strapi using the Strapi Module's service.
- Create a subscriber that listens for the event and triggers the workflow.
You can find all workflows and subscribers for product events in the Strapi Integration Repository.
Next Steps#
You've successfully integrated Medusa with Strapi to manage content related to products, variants, and options. You can expand this integration by adding more features, such as:
- Managing the content of other entities, like categories or collections. The process is similar to what you've done for products:
- Create a content type in Strapi for the entity.
- Create Medusa workflows and subscribers to handle the creation, update, and deletion of the entity.
- Display the Strapi data in your Next.js Starter Storefront.
- Enable internationalization in Strapi to support multiple languages:
- You only need to manage the localized content in Strapi. Only the default locale will be synced with Medusa.
- You can display the localized content in your Next.js Starter Storefront based on the customer's locale.
- Add custom fields to the Strapi content types that are relevant to the storefront, such as SEO metadata or promotional banners.
Learn More about Medusa#
If you're new to Medusa, check out the main documentation, where you'll get a more in-depth understanding of all the concepts you've used in this guide and more.
To learn more about the commerce features that Medusa provides, check out Medusa's Commerce Modules.
Troubleshooting#
If you encounter issues during your development, check out the troubleshooting guides.
Getting Help#
If you encounter issues not covered in the troubleshooting guides:
- Visit the Medusa GitHub repository to report issues or ask questions.
- Join the Medusa Discord community for real-time support from community members.