How to Build Magento Data Migration Plugin
In this tutorial, you'll learn how to build a plugin that migrates data, such as products, from Magento to Medusa.
Magento is known for its customization capabilities. However, its monolithic architecture imposes limitations on business requirements, often forcing development teams to implement hacky workarounds. Over time, these customizations become challenging to maintain, especially as the business scales, leading to increased technical debt and slower feature delivery.
Medusa's modular architecture allows you to build a custom digital commerce platform that meets your business requirements without the limitations of a monolithic system. By migrating from Magento to Medusa, you can take advantage of Medusa's modern technology stack to build a scalable and flexible commerce platform that grows with your business.
By following this tutorial, you'll create a Medusa plugin that migrates data from a Magento server to a Medusa application in minimal time. You can re-use this plugin across multiple Medusa applications, allowing you to adopt Medusa across your projects.
Summary#
This tutorial will teach you how to:
- Install and set up a Medusa application project.
- Install and set up a Medusa plugin.
- Implement a Magento Module in the plugin to connect to Magento's APIs and retrieve products.
- This guide will only focus on migrating product data from Magento to Medusa. You can extend the implementation to migrate other data, such as customers, orders, and more.
- Trigger data migration from Magento to Medusa in a scheduled job.
You can follow this tutorial whether you're new to Medusa or an advanced Medusa developer.
Step 1: Install a Medusa Application#
You'll first install a Medusa application that exposes core commerce features through REST APIs. You'll later install the Magento plugin in this application to test it out.
Start by installing the Medusa application on your machine with the following command:
You'll be asked for the project's name. You can also optionally choose to install the Next.js Starter Storefront.
Afterward, the installation process will start, which will install the Medusa application as a monorepository in a directory with your project's name. The backend is installed in the apps/backend directory. If you chose to install the Next.js Starter Storefront, it'll be in the apps/storefront directory.
Once the installation finishes successfully, the Medusa Admin dashboard will open with a form to create a new user. Enter the user's credentials and submit the form. Afterward, you can log in with the new user and explore the dashboard.
apps/backend directory of your Medusa project.Step 2: Install a Medusa Plugin Project#
A plugin is a package of reusable Medusa customizations that you can install in any Medusa application. You can add in the plugin API Routes, Workflows, and other customizations, as you'll see in this guide. Afterward, you can test it out locally in a Medusa application, then publish it to npm to install and use it in any Medusa application.
A Medusa plugin is set up in a different project, giving you the flexibility in building and publishing it, while providing you with the tools to test it out locally in a Medusa application.
To create a new Medusa plugin project, run the following command in a directory different than that of the Medusa application:
Where medusa-plugin-magento is the name of the plugin's directory and the name set in the plugin's package.json. So, if you wish to publish it to NPM later under a different name, you can change it here in the command or later in package.json.
Once the installation process is done, a new directory named medusa-plugin-magento will be created with the plugin project files.

Step 3: Set up Plugin in Medusa Application#
Before you start your development, you'll set up the plugin in the Medusa application you installed in the first step. This will allow you to test the plugin during your development process.
In the plugin's directory, run the following command to publish the plugin to the local package registry:
This command uses Yalc under the hood to publish the plugin to a local package registry. The plugin is published locally under the name you specified in package.json.
Next, you'll install the plugin in the Medusa application from the local registry.
Run the following command in the apps/backend directory to install the plugin:
This command installs the plugin in the Medusa application from the local package registry.
Next, register the plugin in the medusa-config.ts file of the Medusa application:
You add the plugin to the array of plugins. Later, you'll pass options useful to retrieve data from Magento.
Finally, to ensure your plugin's changes are constantly published to the local registry, simplifying your testing process, keep the following command running in the plugin project during development:
Step 4: Implement Magento Module#
To connect to external applications in Medusa, you create a custom module. A module is a reusable package with functionalities related to a single feature or domain. Medusa integrates the module into your application without implications or side effects on your setup.
In this step, you'll create a Magento Module in the Magento plugin that connects to a Magento server's REST APIs and retrieves data, such as products.
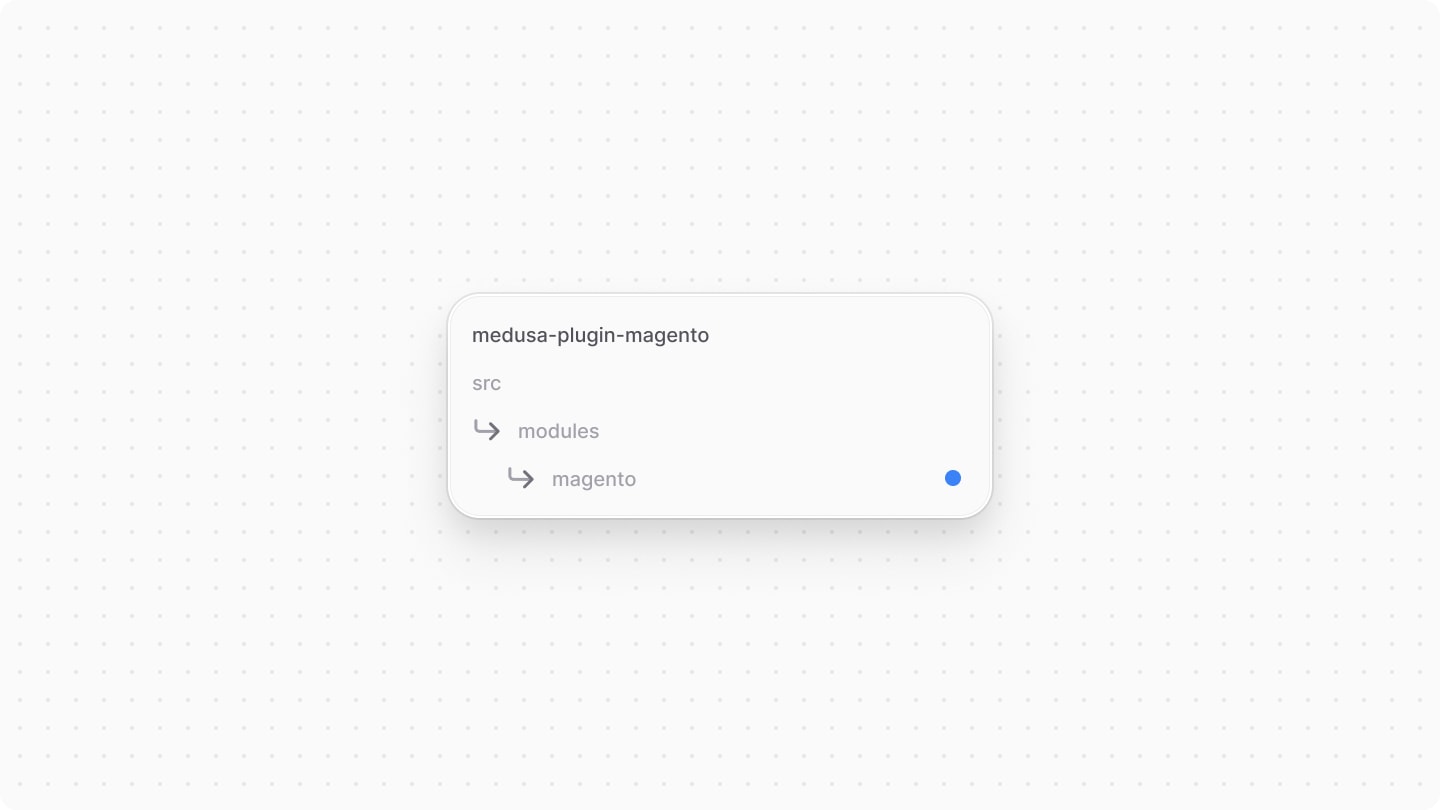
Create Module Directory#
A module is created under the src/modules directory of your plugin. So, create the directory src/modules/magento.
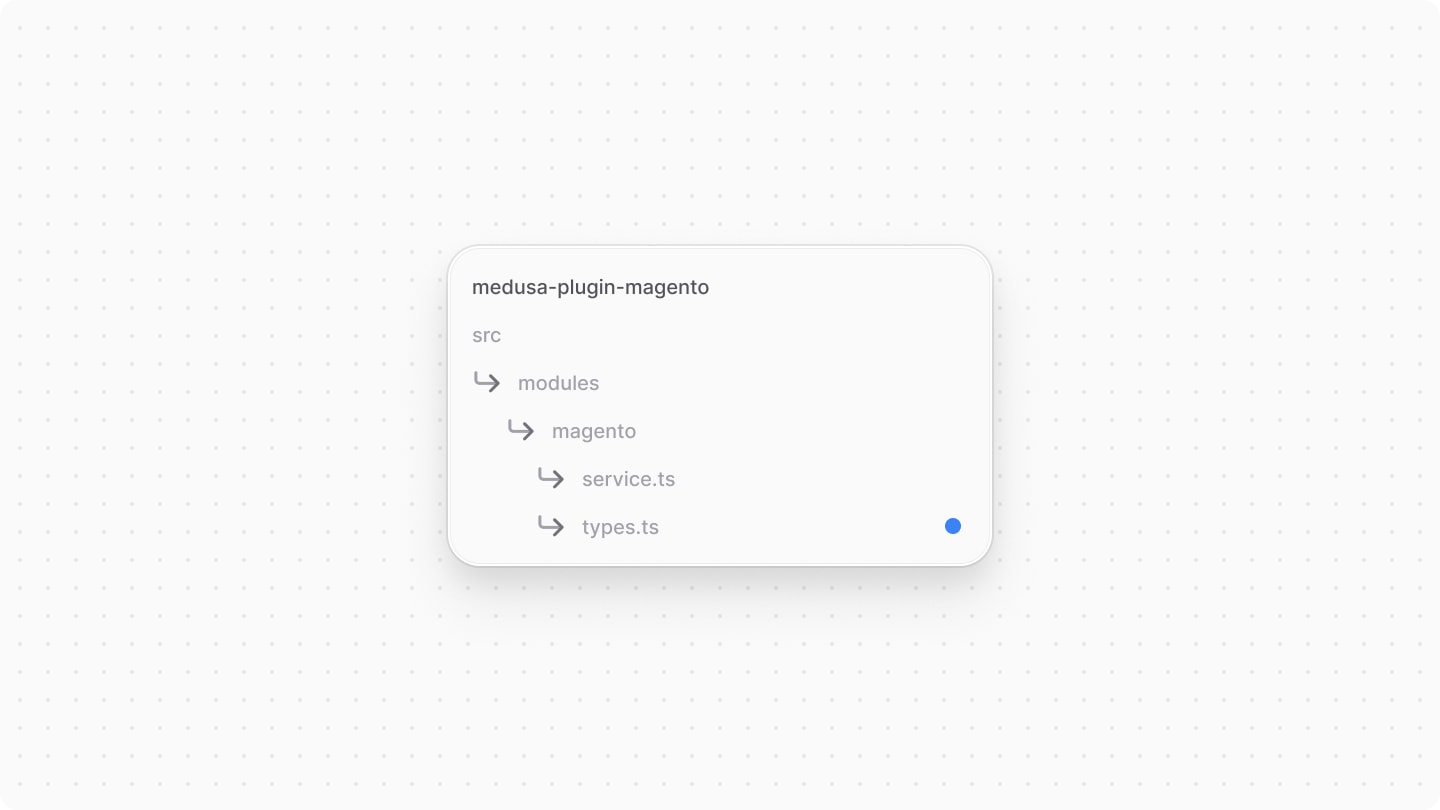
Create Module's Service#
You define a module's functionalities in a service. A service is a TypeScript or JavaScript class that the module exports. In the service's methods, you can connect to external systems or the database, which is useful if your module defines tables in the database.
In this section, you'll create the Magento Module's service that connects to Magento's REST APIs and retrieves data.
Start by creating the file src/modules/magento/service.ts in the plugin with the following content:

1type Options = {2 baseUrl: string3 storeCode?: string4 username: string5 password: string6 migrationOptions?: {7 imageBaseUrl?: string8 }9}10 11export default class MagentoModuleService {12 private options: Options13 14 constructor({}, options: Options) {15 this.options = {16 ...options,17 storeCode: options.storeCode || "default",18 }19 }20}
You create a MagentoModuleService that has an options property to store the module's options. These options include:
baseUrl: The base URL of the Magento server.storeCode: The store code of the Magento store, which isdefaultby default.username: The username of a Magento admin user to authenticate with the Magento server.password: The password of the Magento admin user.migrationOptions: Additional options useful for migrating data, such as the base URL to use for product images.
The service's constructor accepts as a first parameter the Module Container, which allows you to access resources available for the module. As a second parameter, it accepts the module's options.
Add Authentication Logic#
To authenticate with the Magento server, you'll add a method to the service that retrieves an access token from Magento using the username and password in the options. This access token is used in subsequent requests to the Magento server.
First, add the following property to the MagentoModuleService class:
You add an accessToken property to store the access token and its expiration date. The access token Magento returns expires after four hours, so you store the expiration date to know when to refresh the token.
Next, add the following authenticate method to the MagentoModuleService class:
1import { MedusaError } from "@medusajs/framework/utils"2 3export default class MagentoModuleService {4 // ...5 async authenticate() {6 const response = await fetch(`${this.options.baseUrl}/rest/${this.options.storeCode}/V1/integration/admin/token`, {7 method: "POST",8 headers: {9 "Content-Type": "application/json",10 },11 body: JSON.stringify({ username: this.options.username, password: this.options.password }),12 })13 14 const token = await response.text()15 16 if (!response.ok) {17 throw new MedusaError(MedusaError.Types.UNAUTHORIZED, `Failed to authenticate with Magento: ${token}`)18 }19 20 this.accessToken = {21 token: token.replaceAll("\"", ""),22 expiresAt: new Date(Date.now() + 4 * 60 * 60 * 1000), // 4 hours in milliseconds23 }24 }25}
You create an authenticate method that sends a POST request to the Magento server's /rest/{storeCode}/V1/integration/admin/token endpoint, passing the username and password in the request body.
If the request is successful, you store the access token and its expiration date in the accessToken property. If the request fails, you throw a MedusaError with the error message returned by Magento.
Lastly, add an isAccessTokenExpired method that checks if the access token has expired:
In the isAccessTokenExpired method, you return a boolean indicating whether the access token has expired. You'll use this in later methods to check if you need to refresh the access token.
Retrieve Products from Magento#
Next, you'll add a method that retrieves products from Magento. Due to limitations in Magento's API that makes it difficult to differentiate between simple products that don't belong to a configurable product and those that do, you'll only retrieve configurable products and their children. You'll also retrieve the configurable attributes of the product, such as color and size.
First, you'll add some types to represent a Magento product and its attributes. Create the file src/modules/magento/types.ts in the plugin with the following content:
1export type MagentoProduct = {2 id: number3 sku: string4 name: string5 price: number6 status: number7 // not handling other types8 type_id: "simple" | "configurable"9 created_at: string10 updated_at: string11 extension_attributes: {12 category_links: {13 category_id: string14 }[]15 configurable_product_links?: number[] 16 configurable_product_options?: {17 id: number18 attribute_id: string19 label: string20 position: number21 values: {22 value_index: number23 }[]24 }[]25 }26 media_gallery_entries: {27 id: number28 media_type: string29 label: string30 position: number31 disabled: boolean32 types: string[]33 file: string34 }[]35 custom_attributes: {36 attribute_code: string37 value: string38 }[]39 // added by module40 children?: MagentoProduct[]41}42 43export type MagentoAttribute = {44 attribute_code: string45 attribute_id: number46 default_frontend_label: string47 options: {48 label: string49 value: string50 }[]51}52 53export type MagentoPagination = {54 search_criteria: {55 filter_groups: [],56 page_size: number57 current_page: number58 }59 total_count: number60}61 62export type MagentoPaginatedResponse<TData> = {63 items: TData[]64} & MagentoPagination
You define the following types:
MagentoProduct: Represents a product in Magento.MagentoAttribute: Represents an attribute in Magento.MagentoPagination: Represents the pagination information returned by Magento's API.MagentoPaginatedResponse: Represents a paginated response from Magento's API for a specific item type, such as products.
Next, add the getProducts method to the MagentoModuleService class:
1export default class MagentoModuleService {2 // ...3 async getProducts(options?: {4 currentPage?: number5 pageSize?: number6 }): Promise<{7 products: MagentoProduct[]8 attributes: MagentoAttribute[]9 pagination: MagentoPagination10 }> {11 const { currentPage = 1, pageSize = 100 } = options || {}12 const getAccessToken = await this.isAccessTokenExpired()13 if (getAccessToken) {14 await this.authenticate()15 }16 17 // TODO prepare query params18 }19}
The getProducts method receives an optional options object with the currentPage and pageSize properties. So far, you check if the access token has expired and, if so, retrieve a new one using the authenticate method.
Next, you'll prepare the query parameters to pass in the request that retrieves products. Replace the TODO with the following:
1const searchQuery = new URLSearchParams()2// pass pagination parameters3searchQuery.append(4 "searchCriteria[currentPage]", 5 currentPage?.toString() || "1"6)7searchQuery.append(8 "searchCriteria[pageSize]", 9 pageSize?.toString() || "100"10)11 12// retrieve only configurable products13searchQuery.append(14 "searchCriteria[filter_groups][1][filters][0][field]", 15 "type_id"16)17searchQuery.append(18 "searchCriteria[filter_groups][1][filters][0][value]", 19 "configurable"20)21searchQuery.append(22 "searchCriteria[filter_groups][1][filters][0][condition_type]", 23 "in"24)25 26// TODO send request to retrieve products
You create a searchQuery object to store the query parameters to pass in the request. Then, you add the pagination parameters and the filter to retrieve only configurable products.
Next, you'll send the request to retrieve products from Magento. Replace the TODO with the following:
1const { items: products, ...pagination }: MagentoPaginatedResponse<MagentoProduct> = await fetch(2 `${this.options.baseUrl}/rest/${this.options.storeCode}/V1/products?${searchQuery}`, 3 {4 headers: {5 "Authorization": `Bearer ${this.accessToken.token}`,6 },7 }8).then((res) => res.json())9.catch((err) => {10 console.log(err)11 throw new MedusaError(12 MedusaError.Types.INVALID_DATA, 13 `Failed to get products from Magento: ${err.message}`14 )15})16 17// TODO prepare products
You send a GET request to the Magento server's /rest/{storeCode}/V1/products endpoint, passing the query parameters in the URL. You also pass the access token in the Authorization header.
Next, you'll prepare the retrieved products by retrieving their children, configurable attributes, and modifying their image URLs. Replace the TODO with the following:
1const attributeIds: string[] = []2 3await promiseAll(4 products.map(async (product) => {5 // retrieve its children6 product.children = await fetch(7 `${this.options.baseUrl}/rest/${this.options.storeCode}/V1/configurable-products/${product.sku}/children`,8 {9 headers: {10 "Authorization": `Bearer ${this.accessToken.token}`,11 },12 }13 ).then((res) => res.json())14 .catch((err) => {15 throw new MedusaError(16 MedusaError.Types.INVALID_DATA, 17 `Failed to get product children from Magento: ${err.message}`18 )19 })20 21 product.media_gallery_entries = product.media_gallery_entries.map(22 (entry) => ({23 ...entry,24 file: `${this.options.migrationOptions?.imageBaseUrl}${entry.file}`,25 }26 ))27 28 attributeIds.push(...(29 product.extension_attributes.configurable_product_options?.map(30 (option) => option.attribute_id) || []31 )32 )33 })34)35 36// TODO retrieve attributes
You loop over the retrieved products and retrieve their children using the /rest/{storeCode}/V1/configurable-products/{sku}/children endpoint. You also modify the image URLs to use the base URL in the migration options, if provided.
In addition, you store the IDs of the configurable products' attributes in the attributeIds array. You'll add a method that retrieves these attributes.
Add the new method getAttributes to the MagentoModuleService class:
1export default class MagentoModuleService {2 // ...3 async getAttributes({4 ids,5 }: {6 ids: string[]7 }): Promise<MagentoAttribute[]> {8 const getAccessToken = await this.isAccessTokenExpired()9 if (getAccessToken) {10 await this.authenticate()11 }12 13 // filter by attribute IDs14 const searchQuery = new URLSearchParams()15 searchQuery.append(16 "searchCriteria[filter_groups][0][filters][0][field]", 17 "attribute_id"18 )19 searchQuery.append(20 "searchCriteria[filter_groups][0][filters][0][value]", 21 ids.join(",")22 )23 searchQuery.append(24 "searchCriteria[filter_groups][0][filters][0][condition_type]", 25 "in"26 )27 28 const { 29 items: attributes,30 }: MagentoPaginatedResponse<MagentoAttribute> = await fetch(31 `${this.options.baseUrl}/rest/${this.options.storeCode}/V1/products/attributes?${searchQuery}`, 32 {33 headers: {34 "Authorization": `Bearer ${this.accessToken.token}`,35 },36 }37 ).then((res) => res.json())38 .catch((err) => {39 throw new MedusaError(40 MedusaError.Types.INVALID_DATA, 41 `Failed to get attributes from Magento: ${err.message}`42 )43 })44 45 return attributes46 }47}
The getAttributes method receives an object with the ids property, which is an array of attribute IDs. You check if the access token has expired and, if so, retrieve a new one using the authenticate method.
Next, you prepare the query parameters to pass in the request to retrieve attributes. You send a GET request to the Magento server's /rest/{storeCode}/V1/products/attributes endpoint, passing the query parameters in the URL. You also pass the access token in the Authorization header.
Finally, you return the retrieved attributes.
Now, go back to the getProducts method and replace the TODO with the following:
You retrieve the configurable products' attributes using the getAttributes method and return the products, attributes, and pagination information.
You'll use this method in a later step to retrieve products from Magento.
Export Module Definition#
The final piece to a module is its definition, which you export in an index.ts file at its root directory. This definition tells Medusa the name of the module and its service.
So, create the file src/modules/magento/index.ts with the following content:
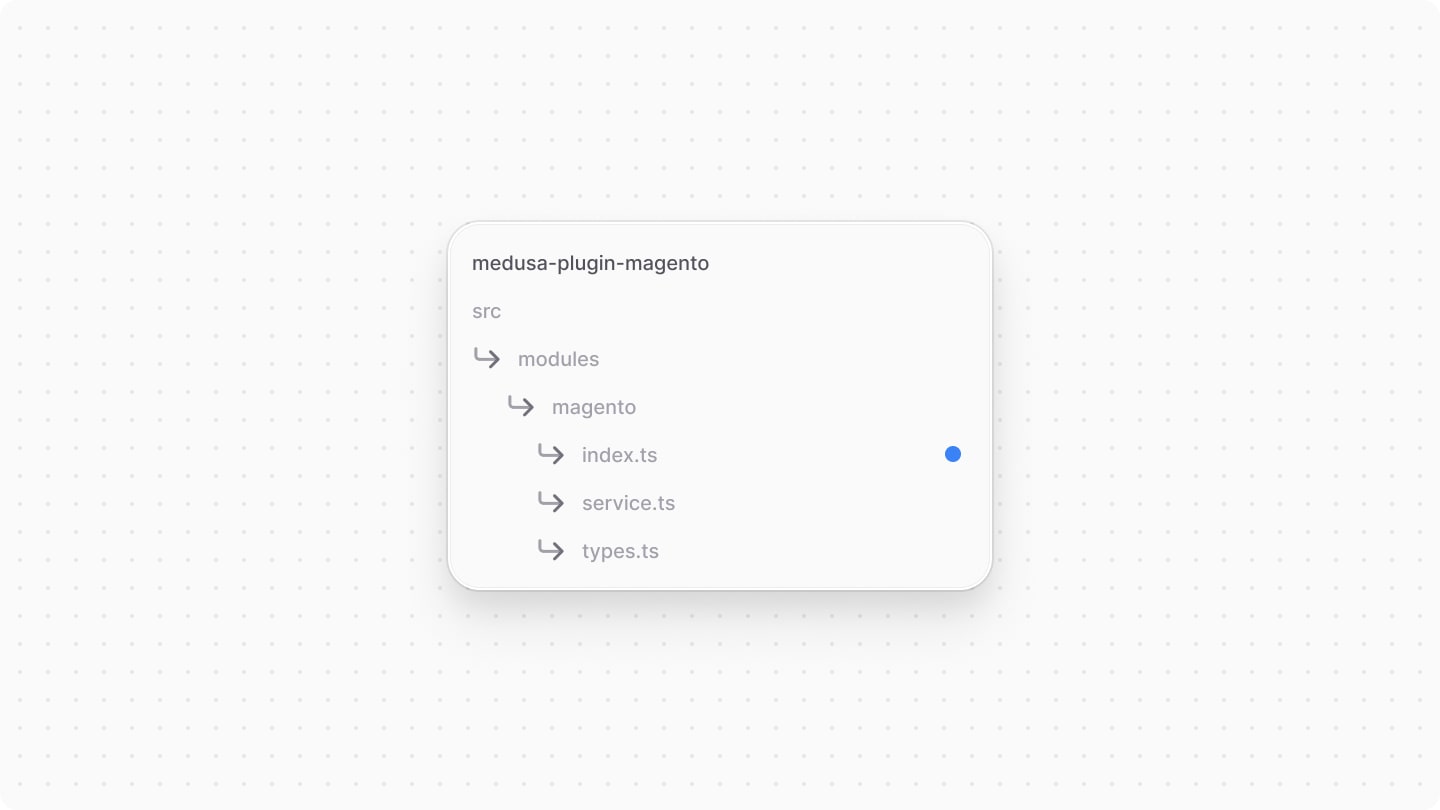
You use the Module function from the Modules SDK to create the module's definition. It accepts two parameters:
- The module's name, which is
magento. - An object with a required property
serviceindicating the module's service.
You'll later use the module's service to retrieve products from Magento.
Pass Options to Plugin#
As mentioned earlier when you registered the plugin in the Medusa Application's medusa-config.ts file, you can pass options to the plugin. These options are then passed to the modules in the plugin.
So, add the following options to the plugin's registration in the medusa-config.ts file of the Medusa application:
1module.exports = defineConfig({2 // ...3 plugins: [4 {5 resolve: "medusa-plugin-magento",6 options: {7 baseUrl: process.env.MAGENTO_BASE_URL,8 username: process.env.MAGENTO_USERNAME,9 password: process.env.MAGENTO_PASSWORD,10 migrationOptions: {11 imageBaseUrl: process.env.MAGENTO_IMAGE_BASE_URL,12 },13 },14 },15 ],16})
You pass the options that you defined in the MagentoModuleService. Make sure to also set their environment variables in the .env file:
Where:
MAGENTO_BASE_URL: The base URL of the Magento server. It can also be a local URL, such ashttp://localhost:8080.MAGENTO_USERNAME: The username of a Magento admin user to authenticate with the Magento server.MAGENTO_PASSWORD: The password of the Magento admin user.MAGENTO_IMAGE_BASE_URL: The base URL to use for product images. Magento stores product images in thepub/media/catalog/productdirectory, so you can reference them directly or use a CDN URL. If the URLs of product images in the Medusa server already have a different base URL, you can omit this option.
You can now use the Magento Module to migrate data, which you'll do in the next steps.
Step 5: Build Product Migration Workflow#
In this section, you'll add the feature to migrate products from Magento to Medusa. To implement this feature, you'll use a workflow.
A workflow is a series of queries and actions, called steps, that complete a task. You construct a workflow like you construct a function, but it's a special function that allows you to track its executions' progress, define roll-back logic, and configure other advanced features. Then, you execute the workflow from other customizations, such as in an API route or a scheduled job.
By implementing the migration feature in a workflow, you ensure that the data remains consistent and that the migration process can be rolled back if an error occurs.
Workflow Steps#
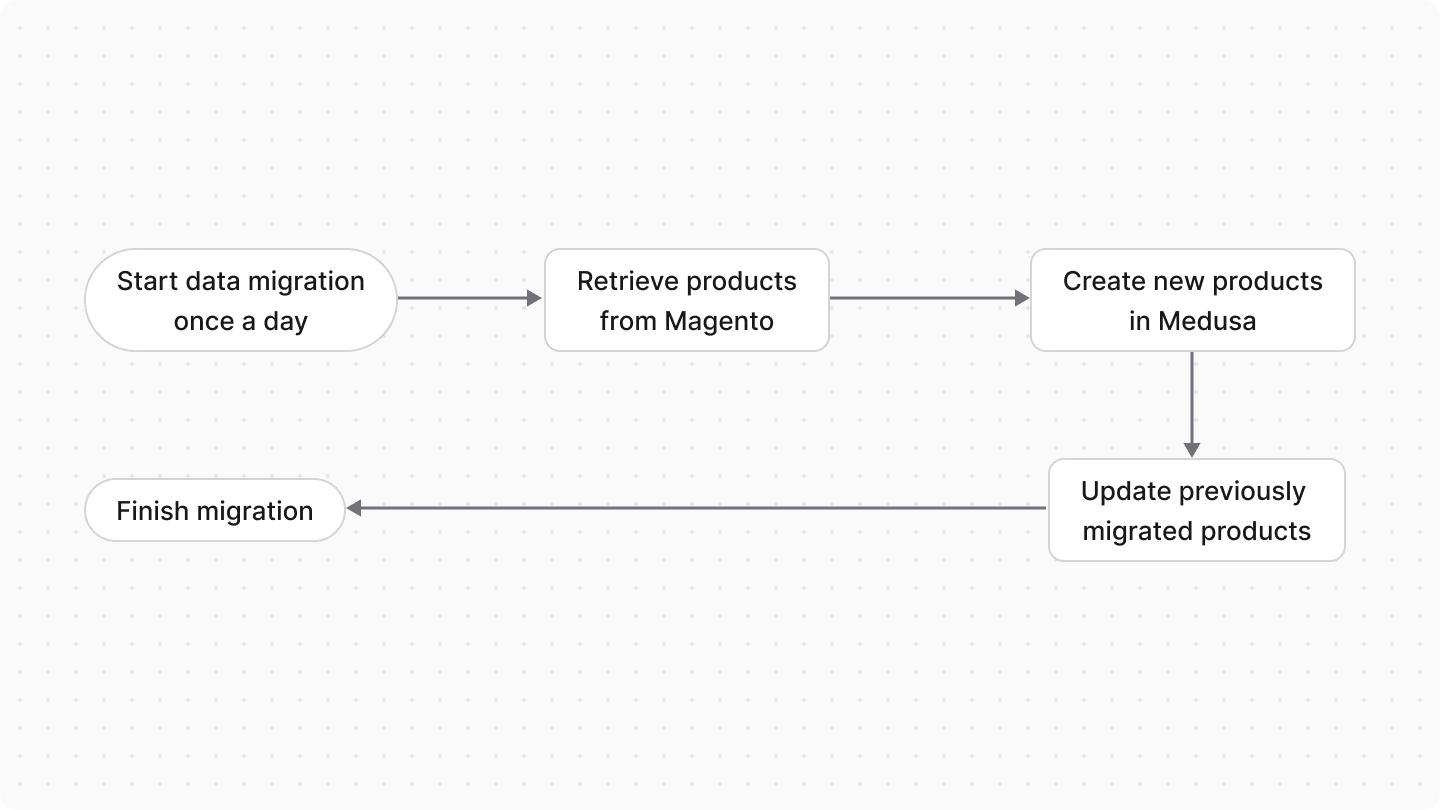
The workflow you'll create will have the following steps:
View step details
You only need to implement the getMagentoProductsStep step, which retrieves the products from Magento. The other steps and workflows are provided by Medusa's @medusajs/medusa/core-flows package.
getMagentoProductsStep#
The first step of the workflow retrieves and returns the products from Magento.
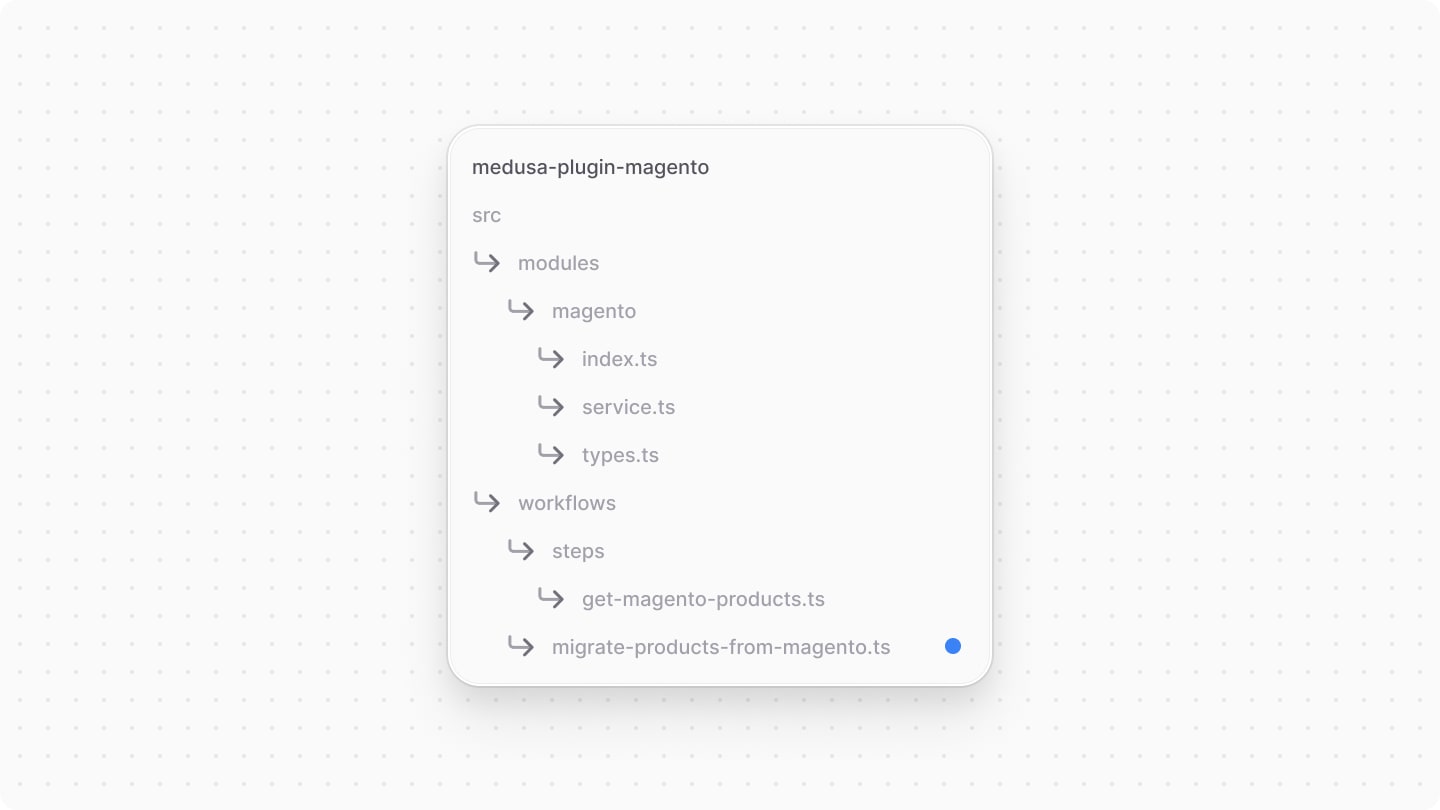
In your plugin, create the file src/workflows/steps/get-magento-products.ts with the following content:
npm run dev or yarn dev command to generate the necessary type definitions, as explained in the Automatically Generated Types guide.
1import { createStep, StepResponse } from "@medusajs/framework/workflows-sdk"2import { MAGENTO_MODULE } from "../../modules/magento"3import MagentoModuleService from "../../modules/magento/service"4 5type GetMagentoProductsInput = {6 currentPage: number7 pageSize: number8}9 10export const getMagentoProductsStep = createStep(11 "get-magento-products",12 async ({ currentPage, pageSize }: GetMagentoProductsInput, { container }) => {13 const magentoModuleService: MagentoModuleService = 14 container.resolve(MAGENTO_MODULE)15 16 const response = await magentoModuleService.getProducts({17 currentPage,18 pageSize,19 })20 21 return new StepResponse(response)22 }23)
You create a step using createStep from the Workflows SDK. It accepts two parameters:
- The step's name, which is
get-magento-products. - An async function that executes the step's logic. The function receives two parameters:
- The input data for the step, which in this case is the pagination parameters.
- An object holding the workflow's context, including the Medusa Container that allows you to resolve Framework and commerce tools.
In the step function, you resolve the Magento Module's service from the container, then use its getProducts method to retrieve the products from Magento.
Steps that return data must return them in a StepResponse instance. The StepResponse constructor accepts as a parameter the data to return.
Create migrateProductsFromMagentoWorkflow#
You'll now create the workflow that migrates products from Magento using the step you created and steps from Medusa's @medusajs/medusa/core-flows package.
In your plugin, create the file src/workflows/migrate-products-from-magento.ts with the following content:
1import { 2 createWorkflow, transform, WorkflowResponse,3} from "@medusajs/framework/workflows-sdk"4import { 5 CreateProductWorkflowInputDTO, UpsertProductDTO,6} from "@medusajs/framework/types"7import { 8 createProductsWorkflow, 9 updateProductsWorkflow, 10 useQueryGraphStep,11} from "@medusajs/medusa/core-flows"12import { getMagentoProductsStep } from "./steps/get-magento-products"13 14type MigrateProductsFromMagentoWorkflowInput = {15 currentPage: number16 pageSize: number17}18 19export const migrateProductsFromMagentoWorkflowId = 20 "migrate-products-from-magento"21 22export const migrateProductsFromMagentoWorkflow = createWorkflow(23 {24 name: migrateProductsFromMagentoWorkflowId,25 retentionTime: 10000,26 store: true,27 },28 (input: MigrateProductsFromMagentoWorkflowInput) => {29 const { pagination, products, attributes } = getMagentoProductsStep(30 input31 )32 // TODO prepare data to create and update products33 }34)
You create a workflow using createWorkflow from the Workflows SDK. It accepts two parameters:
- An object with the workflow's configuration, including the name and whether to store the workflow's executions. You enable storing the workflow execution so that you can view it later in the Medusa Admin dashboard.
- A workflow constructor function, which holds the workflow's implementation. The function receives the input data for the workflow, which is the pagination parameters.
In the workflow constructor function, you use the getMagentoProductsStep step to retrieve the products from Magento, passing it the pagination parameters from the workflow's input.
Next, you'll retrieve the Medusa store details and shipping profiles. These are necessary to prepare the data of the products to create or update.
Replace the TODO in the workflow function with the following:
1const { data: stores } = useQueryGraphStep({2 entity: "store",3 fields: ["supported_currencies.*", "default_sales_channel_id"],4 pagination: {5 take: 1,6 skip: 0,7 },8})9 10const { data: shippingProfiles } = useQueryGraphStep({11 entity: "shipping_profile",12 fields: ["id"],13 pagination: {14 take: 1,15 skip: 0,16 },17}).config({ name: "get-shipping-profiles" })18 19// TODO retrieve existing products
You use the useQueryGraphStep step to retrieve the store details and shipping profiles. useQueryGraphStep is a Medusa step that wraps Query, allowing you to use it in a workflow. Query is a tool that retrieves data across modules.
When retrieving the store details, you specifically retrieve its supported currencies and default sales channel ID. You'll associate the products with the store's default sales channel, and set their variant prices in the supported currencies. You'll also associate the products with a shipping profile.
Next, you'll retrieve products that were previously migrated from Magento to determine which products to create or update. Replace the TODO with the following:
1const externalIdFilters = transform({2 products,3}, (data) => {4 return data.products.map((product) => product.id.toString())5})6 7const { data: existingProducts } = useQueryGraphStep({8 entity: "product",9 fields: ["id", "external_id", "variants.id", "variants.metadata"],10 filters: {11 external_id: externalIdFilters,12 },13}).config({ name: "get-existing-products" })14 15// TODO prepare products to create or update
Since the Medusa application creates an internal representation of the workflow's constructor function, you can't manipulate data directly, as variables have no value while creating the internal representation.
Instead, you can manipulate data in a workflow's constructor function using transform from the Workflows SDK. transform is a function that accepts two parameters:
- The data to transform, which in this case is the Magento products.
- A function that transforms the data. The function receives the data passed in the first parameter and returns the transformed data.
In the transformation function, you return the IDs of the Magento products. Then, you use the useQueryGraphStep to retrieve products in the Medusa application that have an external_id property matching the IDs of the Magento products. You'll use this property to store the IDs of the products in Magento.
Next, you'll prepare the data to create and update the products. Replace the TODO in the workflow function with the following:
1const { 2 productsToCreate,3 productsToUpdate,4} = transform({5 products,6 attributes,7 stores,8 shippingProfiles,9 existingProducts,10}, (data) => {11 const productsToCreate = new Map<string, CreateProductWorkflowInputDTO>()12 const productsToUpdate = new Map<string, UpsertProductDTO>()13 14 data.products.forEach((magentoProduct) => {15 const productData: CreateProductWorkflowInputDTO | UpsertProductDTO = {16 title: magentoProduct.name,17 description: magentoProduct.custom_attributes.find(18 (attr) => attr.attribute_code === "description"19 )?.value,20 status: magentoProduct.status === 1 ? "published" : "draft",21 handle: magentoProduct.custom_attributes.find(22 (attr) => attr.attribute_code === "url_key"23 )?.value,24 external_id: magentoProduct.id.toString(),25 thumbnail: magentoProduct.media_gallery_entries.find(26 (entry) => entry.types.includes("thumbnail")27 )?.file,28 sales_channels: [{29 id: data.stores[0].default_sales_channel_id,30 }],31 shipping_profile_id: data.shippingProfiles[0].id,32 }33 const existingProduct = data.existingProducts.find((p) => p.external_id === productData.external_id)34 35 if (existingProduct) {36 productData.id = existingProduct.id37 }38 39 productData.options = magentoProduct.extension_attributes.configurable_product_options?.map((option) => {40 const attribute = data.attributes.find((attr) => attr.attribute_id === parseInt(option.attribute_id))41 return {42 title: option.label,43 values: attribute?.options.filter((opt) => {44 return option.values.find((v) => v.value_index === parseInt(opt.value))45 }).map((opt) => opt.label) || [],46 }47 }) || []48 49 productData.variants = magentoProduct.children?.map((child) => {50 const childOptions: Record<string, string> = {}51 52 child.custom_attributes.forEach((attr) => {53 const attrData = data.attributes.find((a) => a.attribute_code === attr.attribute_code)54 if (!attrData) {55 return56 }57 58 childOptions[attrData.default_frontend_label] = attrData.options.find((opt) => opt.value === attr.value)?.label || ""59 })60 61 const variantExternalId = child.id.toString()62 const existingVariant = existingProduct.variants.find((v) => v.metadata.external_id === variantExternalId)63 64 return {65 title: child.name,66 sku: child.sku,67 options: childOptions,68 prices: data.stores[0].supported_currencies.map(({ currency_code }) => {69 return {70 amount: child.price,71 currency_code,72 }73 }),74 metadata: {75 external_id: variantExternalId,76 },77 id: existingVariant?.id,78 }79 })80 81 productData.images = magentoProduct.media_gallery_entries.filter((entry) => !entry.types.includes("thumbnail")).map((entry) => {82 return {83 url: entry.file,84 metadata: {85 external_id: entry.id.toString(),86 },87 }88 })89 90 if (productData.id) {91 productsToUpdate.set(existingProduct.id, productData as UpsertProductDTO)92 } else {93 productsToCreate.set(productData.external_id!, productData)94 }95 })96 97 return {98 productsToCreate: Array.from(productsToCreate.values()),99 productsToUpdate: Array.from(productsToUpdate.values()),100 }101})102 103// TODO create and update products
You use transform again to prepare the data to create and update the products in the Medusa application. For each Magento product, you map its equivalent Medusa product's data:
- You set the product's general details, such as the title, description, status, handle, external ID, and thumbnail using the Magento product's data and custom attributes.
- You associate the product with the default sales channel and shipping profile retrieved previously.
- You map the Magento product's configurable product options to Medusa product options. In Medusa, a product's option has a label, such as "Color", and values, such as "Red". To map the option values, you use the attributes retrieved from Magento.
- You map the Magento product's children to Medusa product variants. For the variant options, you pass an object whose keys is the option's label, such as "Color", and values is the option's value, such as "Red". For the prices, you set the variant's price based on the Magento child's price for every supported currency in the Medusa store. Also, you set the Magento child product's ID in the Medusa variant's
metadata.external_idproperty. - You map the Magento product's media gallery entries to Medusa product images. You filter out the thumbnail image and set the URL and the Magento image's ID in the Medusa image's
metadata.external_idproperty.
In addition, you use the existing products retrieved in the previous step to determine whether a product should be created or updated. If there's an existing product whose external_id matches the ID of the magento product, you set the existing product's ID in the id property of the product to be updated. You also do the same for its variants.
Finally, you return the products to create and update.
The last steps of the workflow is to create and update the products. Replace the TODO in the workflow function with the following:
You use the createProductsWorkflow and updateProductsWorkflow workflows from Medusa's @medusajs/medusa/core-flows package to create and update the products in the Medusa application.
Workflows must return an instance of WorkflowResponse, passing as a parameter the data to return to the workflow's executor. This workflow returns the pagination parameters, allowing you to paginate the product migration process.
You can now use this workflow to migrate products from Magento to Medusa. You'll learn how to use it in the next steps.
Step 6: Schedule Product Migration#
There are many ways to execute tasks asynchronously in Medusa, such as scheduling a job or handling emitted events.
In this guide, you'll learn how to schedule the product migration at a specified interval using a scheduled job. A scheduled job is an asynchronous function that the Medusa application runs at the interval you specify during the Medusa application's runtime.
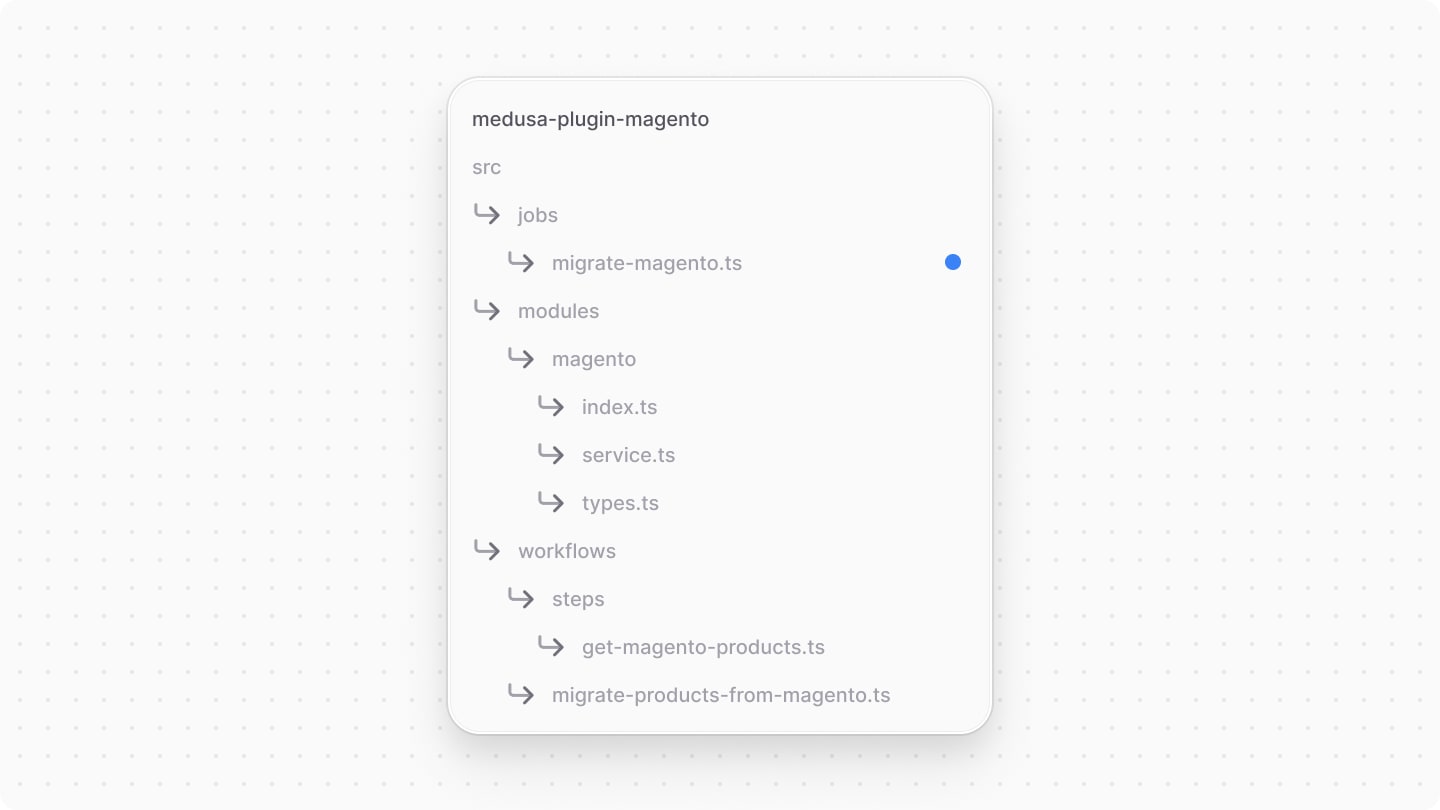
To create a scheduled job, in your plugin, create the file src/jobs/migrate-magento.ts with the following content:
1import { MedusaContainer } from "@medusajs/framework/types"2import { migrateProductsFromMagentoWorkflow } from "../workflows"3 4export default async function migrateMagentoJob(5 container: MedusaContainer6) {7 const logger = container.resolve("logger")8 logger.info("Migrating products from Magento...")9 10 let currentPage = 011 const pageSize = 10012 let totalCount = 013 14 do {15 currentPage++16 17 const { 18 result: pagination,19 } = await migrateProductsFromMagentoWorkflow(container).run({20 input: {21 currentPage,22 pageSize,23 },24 })25 26 totalCount = pagination.total_count27 } while (currentPage * pageSize < totalCount)28 29 logger.info("Finished migrating products from Magento")30}31 32export const config = {33 name: "migrate-magento-job",34 schedule: "0 0 * * *",35}
A scheduled job file must export:
- An asynchronous function that executes the job's logic. The function receives the Medusa container as a parameter.
- An object with the job's configuration, including the name and the schedule. The schedule is a cron job pattern as a string.
In the job function, you resolve the logger from the container to log messages. Then, you paginate the product migration process by running the migrateProductsFromMagentoWorkflow workflow at each page until you've migrated all products. You use the pagination result returned by the workflow to determine whether there are more products to migrate.
Based on the job's configurations, the Medusa application will run the job at midnight every day.
Test it Out#
To test out this scheduled job, first, change the configuration to run the job every minute:
Then, make sure to run the plugin:develop command in the plugin if you haven't already:
This ensures that the plugin's latest changes are reflected in the Medusa application.
Finally, start the Medusa application that the plugin is installed in:
After a minute, you'll see a message in the terminal indicating that the migration started:
Once the migration is done, you'll see the following message:
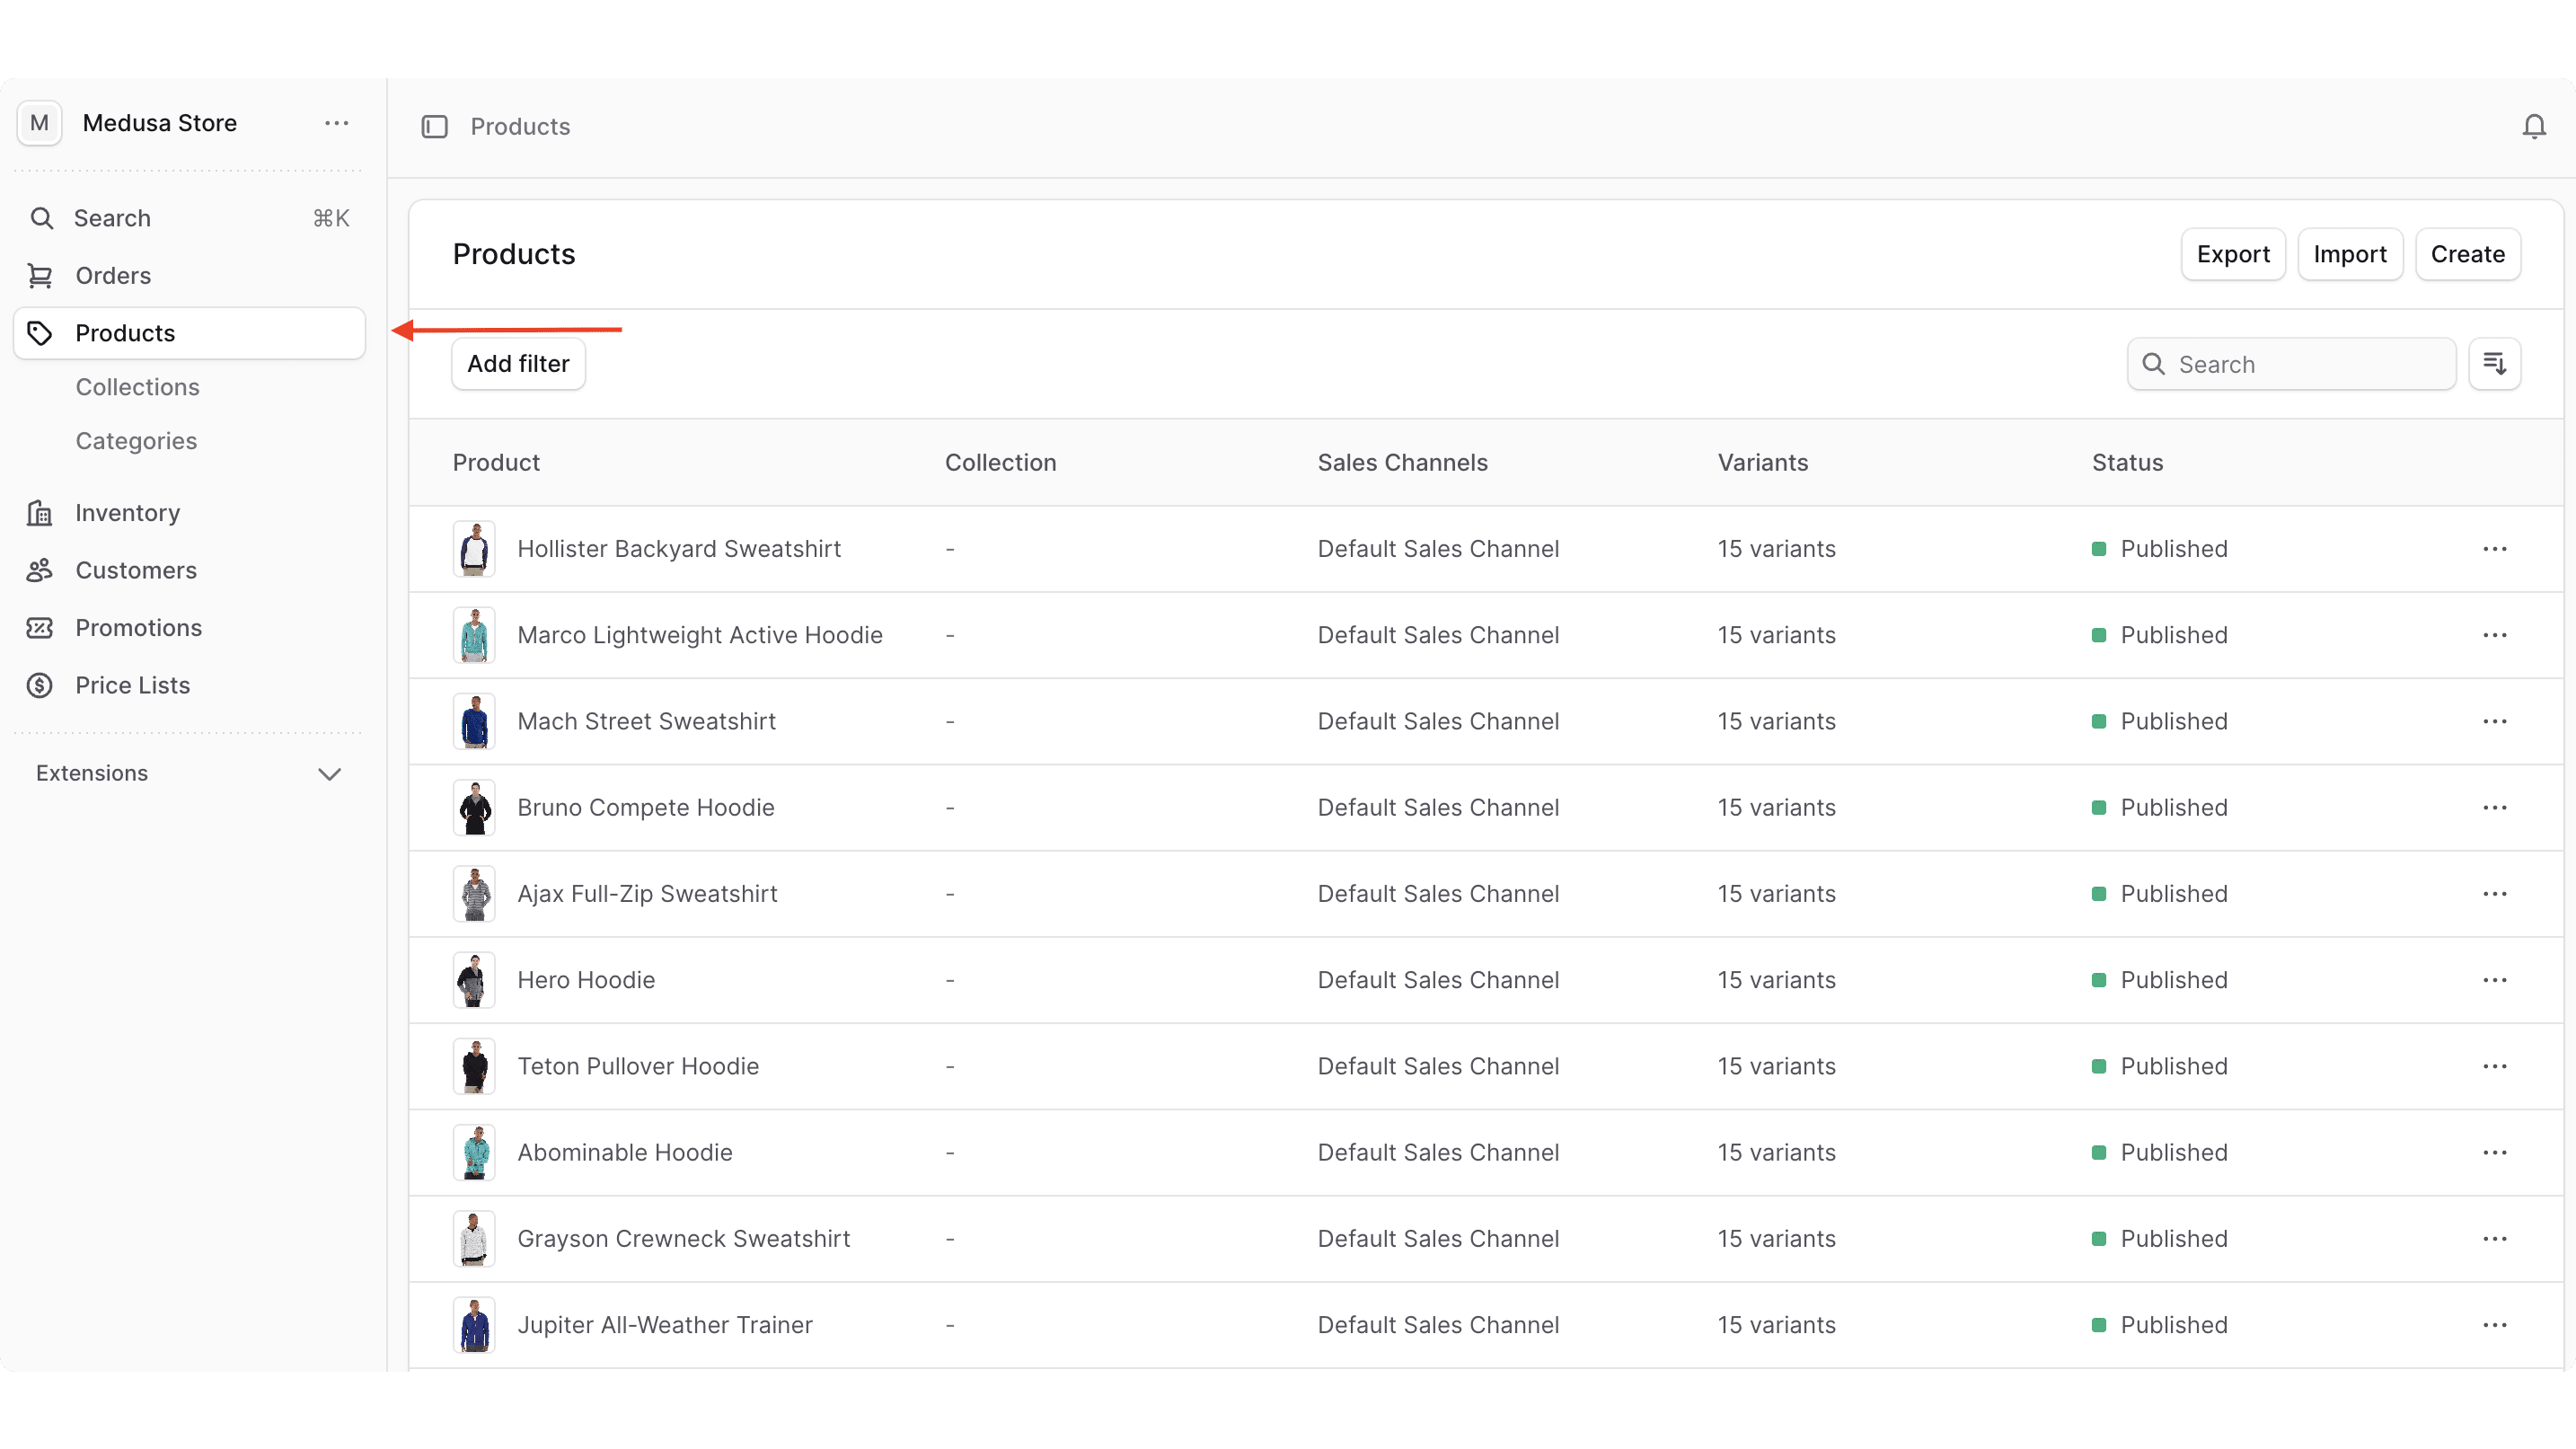
To confirm that the products were migrated, open the Medusa Admin dashboard at http://localhost:9000/app and log in. Then, click on Products in the sidebar. You'll see your magento products in the list of products.
Next Steps#
You've now implemented the logic to migrate products from Magento to Medusa. You can re-use the plugin across Medusa applications. You can also expand on the plugin to:
- Migrate other entities, such as orders, customers, and categories. Migrating other entities follows the same pattern as migrating products, using workflows and scheduled jobs. You only need to format the data to be migrated as needed.
- Allow triggering migrations from the Medusa Admin dashboard using Admin Customizations. This feature is available in the Example Repository.
If you're new to Medusa, check out the main documentation, where you'll get a more in-depth learning of all the concepts you've used in this guide and more.
To learn more about the commerce features that Medusa provides, check out Medusa's Commerce Modules.