Implement Custom Line Item Pricing in Medusa
In this guide, you'll learn how to add line items with custom prices to a cart in Medusa.
When you install a Medusa application, you get a fully-fledged commerce platform with a Framework for customization. The Medusa application's commerce features are built around Commerce Modules which are available out-of-the-box. These features include managing carts and adding line items to them.
By default, you can add product variants to the cart, where the price of its associated line item is based on the product variant's price. However, you can build customizations to add line items with custom prices to the cart. This is useful when integrating an Enterprise Resource Planning (ERP), Product Information Management (PIM), or other third-party services that provide real-time prices for your products.
To showcase how to add line items with custom prices to the cart, this guide uses GoldAPI.io as an example of a third-party system that you can integrate for real-time prices. You can follow the same approach for other third-party integrations that provide custom pricing.
You can follow this guide whether you're new to Medusa or an advanced Medusa developer.
Summary#
This guide will teach you how to:
- Install and set up Medusa.
- Integrate the third-party service GoldAPI.io that retrieves real-time prices for metals like Gold and Silver.
- Add an API route to add a product variant that has metals, such as a gold ring, to the cart with the real-time price retrieved from the third-party service.

Step 1: Install a Medusa Application#
Start by installing the Medusa application on your machine with the following command:
You'll first be asked for the project's name. You can also optionally choose to install the Next.js Starter Storefront.
Afterwards, the installation process will start, which will install the Medusa application as a monorepository in a directory with your project's name. The backend is installed in the apps/backend directory. If you chose to install the Next.js Starter Storefront, it'll be in the apps/storefront directory.
Once the installation finishes successfully, the Medusa Admin dashboard will open with a form to create a new user. Enter the user's credentials and submit the form. Afterwards, you can log in with the new user and explore the dashboard.
apps/backend directory of your Medusa project.Step 2: Integrate GoldAPI.io#
To integrate third-party services into Medusa, you create a custom module. A module is a reusable package with functionalities related to a single feature or domain. Medusa integrates the module into your application without implications or side effects on your setup.
In this step, you'll create a Metal Price Module that uses the GoldAPI.io service to retrieve real-time prices for metals like Gold and Silver. You'll use this module later to retrieve the real-time price of a product variant based on the metals in it, and add it to the cart with that custom price.
Create Module Directory#
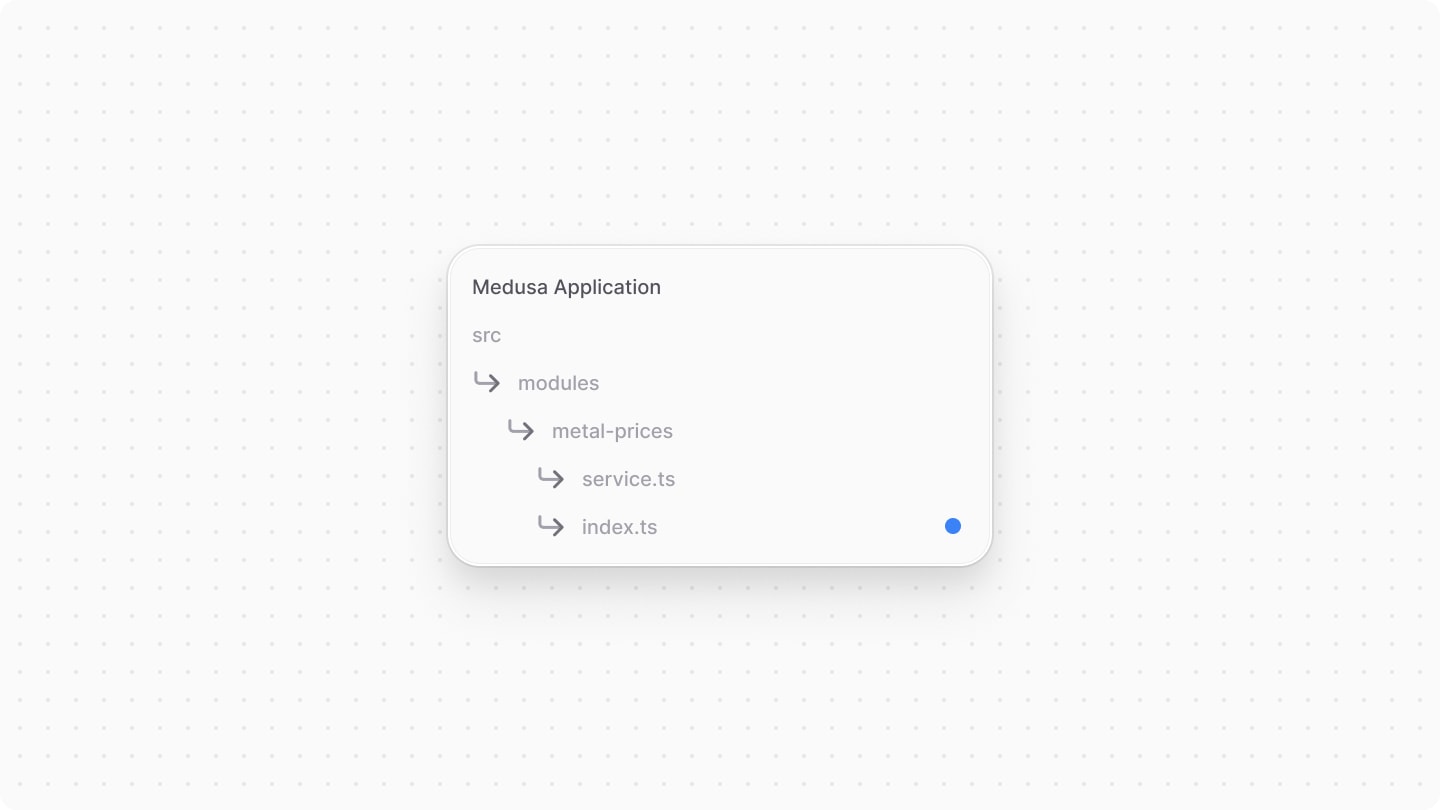
A module is created under the src/modules directory of your Medusa application. So, create the directory src/modules/metal-prices.

Create Module's Service#
You define a module's functionalities in a service. A service is a TypeScript or JavaScript class that the module exports. In the service's methods, you can connect to the database, which is useful if your module defines tables in the database, or connect to a third-party service.
In this section, you'll create the Metal Prices Module's service that connects to the GoldAPI.io service to retrieve real-time prices for metals.
Start by creating the file src/modules/metal-prices/service.ts with the following content:

A module can accept options that are passed to its service. You define an Options type that indicates the options the module accepts. It accepts two options:
accessToken: The access token for the GoldAPI.io service.sandbox: A boolean that indicates whether to simulate sending requests to the GoldAPI.io service. This is useful when running in a test environment.
The service's constructor receives the module's options as a second parameter. You store the options in the service's options_ property.
Add Method to Retrieve Metal Prices
Next, you'll add the method to retrieve the metal prices from the third-party service.
First, add the following types at the beginning of src/modules/metal-prices/service.ts:
The MetalSymbols enum defines the symbols for metals like Gold, Silver, Platinum, and Palladium. The PriceResponse type defines the structure of the response from the GoldAPI.io's endpoint.
Next, add the method getMetalPrices to the MetalPricesModuleService class:
1import { MedusaError } from "@medusajs/framework/utils"2 3// ...4 5export default class MetalPricesModuleService {6 // ...7 async getMetalPrice(8 symbol: MetalSymbols, 9 currency: string10 ): Promise<PriceResponse> {11 const upperCaseSymbol = symbol.toUpperCase()12 const upperCaseCurrency = currency.toUpperCase()13 14 return fetch(`https://www.goldapi.io/api/${upperCaseSymbol}/${upperCaseCurrency}`, {15 headers: {16 "x-access-token": this.options_.accessToken,17 "Content-Type": "application/json",18 },19 redirect: "follow",20 }).then((response) => response.json())21 .then((response) => {22 if (response.error) {23 throw new MedusaError(24 MedusaError.Types.INVALID_DATA,25 response.error26 )27 }28 29 return response30 })31 }32}
The getMetalPrice method accepts the metal symbol and currency as parameters. You send a request to GoldAPI.io's /api/{symbol}/{currency} endpoint to retrieve the metal's price, also passing the access token in the request's headers.
If the response contains an error, you throw a MedusaError with the error message. Otherwise, you return the response, which is of type PriceResponse.
Add Helper Methods
You'll also add two helper methods to the MetalPricesModuleService. The first one is getMetalSymbols that returns the metal symbols as an array of strings:
The second is getMetalSymbol that receives a name like gold and returns the corresponding metal symbol:
1export default class MetalPricesModuleService {2 // ...3 async getMetalSymbol(name: string): Promise<MetalSymbols | undefined> {4 const formattedName = name.charAt(0).toUpperCase() + name.slice(1).toLowerCase()5 return MetalSymbols[formattedName as keyof typeof MetalSymbols]6 }7}
You'll use these methods in later steps.
Export Module Definition#
The final piece to a module is its definition, which you export in an index.ts file at its root directory. This definition tells Medusa the name of the module and its service.
So, create the file src/modules/metal-prices/index.ts with the following content:
You use the Module function from the Modules SDK to create the module's definition. It accepts two parameters:
- The module's name, which is
metal-prices. - An object with a required property
serviceindicating the module's service.
Add Module to Medusa's Configurations#
Once you finish building the module, add it to Medusa's configurations to start using it.
In medusa-config.ts, add a modules property and pass an array with your custom module:
Each object in the modules array has a resolve property, whose value is either a path to the module's directory, or an npm package’s name.
The object also has an options property that accepts the module's options. You set the accessToken and sandbox options based on environment variables.
You'll find the access token at the top of your GoldAPI.io dashboard.
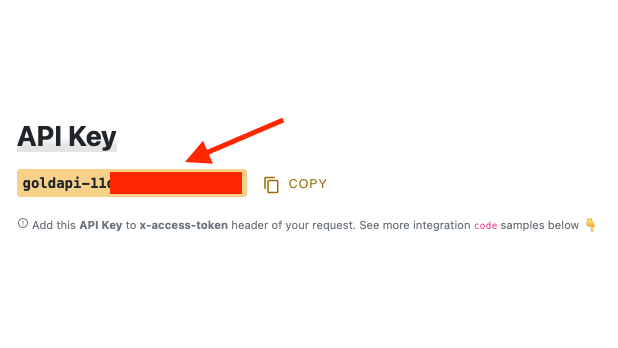
Set the access token as an environment variable in .env:
You'll start using the module in the next steps.
Step 3: Add Custom Item to Cart Workflow#
In this section, you'll implement the logic to retrieve the real-time price of a variant based on the metals in it, then add the variant to the cart with the custom price. You'll implement this logic in a workflow.
A workflow is a series of queries and actions, called steps, that complete a task. You construct a workflow like you construct a function, but it's a special function that allows you to track its executions' progress, define roll-back logic, and configure other advanced features. Then, you execute the workflow from other customizations, such as in an endpoint.
The workflow you'll implement in this section has the following steps:
View step details
You'll only implement the getVariantMetalPricesStep. Medusa provides the other steps out-of-the-box.
getVariantMetalPricesStep#
The getVariantMetalPricesStep will retrieve the real-time metal price of a variant received as an input.
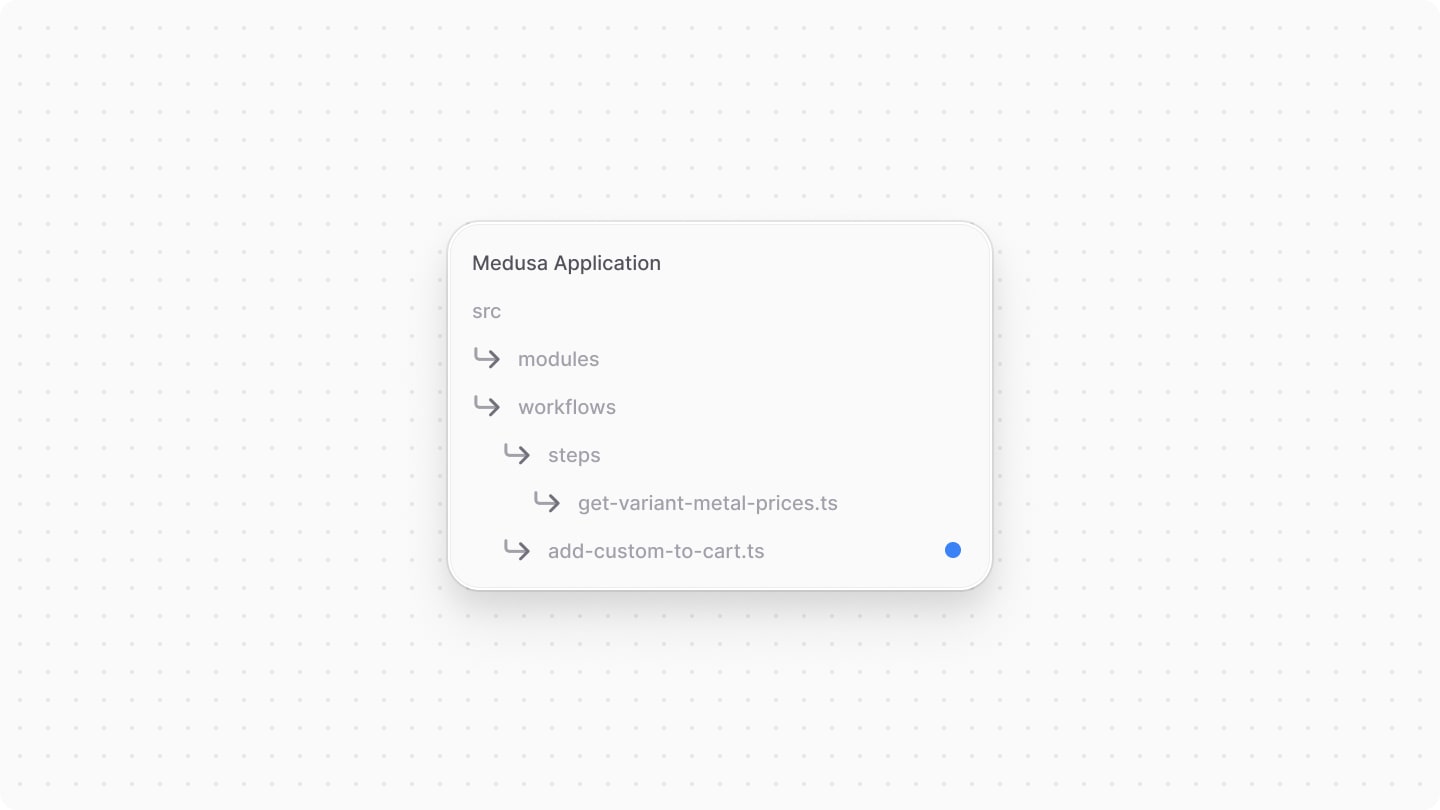
To create the step, create the file src/workflows/steps/get-variant-metal-prices.ts with the following content:

1import { createStep } from "@medusajs/framework/workflows-sdk"2import { ProductVariantDTO } from "@medusajs/framework/types"3import { METAL_PRICES_MODULE } from "../../modules/metal-prices"4import MetalPricesModuleService from "../../modules/metal-prices/service"5 6export type GetVariantMetalPricesStepInput = {7 variant: ProductVariantDTO & {8 calculated_price?: {9 calculated_amount: number10 }11 }12 currencyCode: string13 quantity?: number14}15 16export const getVariantMetalPricesStep = createStep(17 "get-variant-metal-prices",18 async ({19 variant,20 currencyCode,21 quantity = 1,22 }: GetVariantMetalPricesStepInput, { container }) => {23 const metalPricesModuleService: MetalPricesModuleService = 24 container.resolve(METAL_PRICES_MODULE)25 26 // TODO 27 }28)
You create a step with createStep from the Workflows SDK. It accepts two parameters:
- The step's unique name, which is
get-variant-metal-prices. - An async function that receives two parameters:
- An input object with the variant, currency code, and quantity. The variant has a
calculated_priceproperty that holds the variant's fixed price in the Medusa application. This is useful when you want to add a fixed price to the real-time custom price, such as handling fees. - The Medusa container, which is a registry of Framework and commerce tools that you can access in the step.
- An input object with the variant, currency code, and quantity. The variant has a
In the step function, so far you only resolve the Metal Prices Module's service from the Medusa container.
Next, you'll validate that the specified variant can have its price calculated. Add the following import at the top of the file:
And replace the TODO in the step function with the following:
1const variantMetal = variant.options.find(2 (option) => option.option?.title === "Metal"3)?.value4const metalSymbol = await metalPricesModuleService5 .getMetalSymbol(variantMetal || "")6 7if (!metalSymbol) {8 throw new MedusaError(9 MedusaError.Types.INVALID_DATA,10 "Variant doesn't have metal. Make sure the variant's SKU matches a metal symbol."11 )12}13 14if (!variant.weight) {15 throw new MedusaError(16 MedusaError.Types.INVALID_DATA,17 "Variant doesn't have weight. Make sure the variant has weight to calculate its price."18 )19}20 21// TODO retrieve custom price
In the code above, you first retrieve the metal option's value from the variant's options, assuming that a variant has metals if it has a Metal option. Then, you retrieve the metal symbol of the option's value using the getMetalSymbol method of the Metal Prices Module's service.
If the variant doesn't have a metal in its options, the option's value is not valid, or the variant doesn't have a weight, you throw an error. The weight is necessary to calculate the price based on the metal's price per weight.
Next, you'll retrieve the real-time price of the metal using the third-party service. Replace the TODO with the following:
1let price = variant.calculated_price?.calculated_amount || 02const weight = variant.weight3const { price: metalPrice } = await metalPricesModuleService.getMetalPrice(4 metalSymbol as MetalSymbols, currencyCode5)6price += (metalPrice * weight * quantity)7 8return new StepResponse(price)
In the code above, you first set the price to the variant's fixed price, if it has one. Then, you retrieve the metal's price using the getMetalPrice method of the Metal Prices Module's service.
Finally, you calculate the price by multiplying the metal's price by the variant's weight and the quantity to add to the cart, then add the fixed price to it.
Every step must return a StepResponse instance. The StepResponse constructor accepts the step's output as a parameter, which in this case is the variant's price.
Create addCustomToCartWorkflow#
Now that you have the getVariantMetalPricesStep, you can create the workflow that adds the item with custom pricing to the cart.
Create the file src/workflows/add-custom-to-cart.ts with the following content:
1import { createWorkflow } from "@medusajs/framework/workflows-sdk"2import { useQueryGraphStep } from "@medusajs/medusa/core-flows"3import { QueryContext } from "@medusajs/framework/utils"4 5type AddCustomToCartWorkflowInput = {6 cart_id: string7 item: {8 variant_id: string9 quantity: number10 metadata?: Record<string, unknown> | null11 }12}13 14export const addCustomToCartWorkflow = createWorkflow(15 "add-custom-to-cart",16 ({ cart_id, item }: AddCustomToCartWorkflowInput) => {17 const { data: carts } = useQueryGraphStep({18 entity: "cart",19 filters: { id: cart_id },20 fields: ["id", "currency_code"],21 options: {22 throwIfKeyNotFound: true,23 },24 })25 26 const { data: variants } = useQueryGraphStep({27 entity: "variant",28 fields: [29 "*",30 "options.*",31 "options.option.*",32 "calculated_price.*",33 ],34 filters: {35 id: item.variant_id,36 },37 options: {38 throwIfKeyNotFound: true,39 },40 context: {41 calculated_price: QueryContext({42 currency_code: carts[0].currency_code,43 }),44 },45 }).config({ name: "retrieve-variant" })46 47 // TODO add more steps48 }49)
You create a workflow with createWorkflow from the Workflows SDK. It accepts two parameters:
- The workflow's unique name, which is
add-custom-to-cart. - A function that receives an input object with the cart's ID and the item to add to the cart. The item has the variant's ID, quantity, and optional metadata.
In the function, you first retrieve the cart's details using the useQueryGraphStep helper step. This step uses Query which is a Modules SDK tool that retrieves data across modules. You use it to retrieve the cart's ID and currency code.
You also retrieve the variant's details using the useQueryGraphStep helper step. You pass the variant's ID to the step's filters and specify the fields to retrieve. To retrieve the variant's price based on the cart's context, you pass the cart's currency code to the calculated_price context.
Next, you'll retrieve the variant's real-time price using the getVariantMetalPricesStep you created earlier. First, add the following import:
Then, replace the TODO in the workflow with the following:
You execute the getVariantMetalPricesStep passing it the variant's details, the cart's currency code, and the quantity of the item to add to the cart. The step returns the variant's custom price.
Next, you'll add the item with the custom price to the cart. First, add the following imports at the top of the file:
Then, replace the TODO in the workflow with the following:
1const itemToAdd = transform({2 item,3 price,4}, (data) => {5 return [{6 ...data.item,7 unit_price: data.price,8 }]9})10 11acquireLockStep({12 key: cart_id,13 timeout: 2,14 ttl: 10,15})16 17addToCartWorkflow.runAsStep({18 input: {19 items: itemToAdd,20 cart_id,21 },22})23 24// TODO retrieve and return cart
You prepare the item to add to the cart using transform from the Workflows SDK. It allows you to manipulate and create variables in a workflow.
After that, you use Medusa's acquireLockStep to acquire a lock on the cart, and addToCartWorkflow to add the item with the custom price to the cart.
transform for variable manipulation. Learn more about these constraints in this documentation.Lastly, you'll retrieve the cart's details again and return them. Add the following import at the beginning of the file:
And replace the last TODO in the workflow with the following:
In the code above, you retrieve the updated cart's details using the useQueryGraphStep helper step. Then, you release the lock on the cart with the releaseLockStep.
To return data from the workflow, you create and return a WorkflowResponse instance. It accepts as a parameter the data to return, which is the updated cart.
In the next step, you'll use the workflow in a custom route to add an item with a custom price to the cart.
Step 4: Create Add Custom Item to Cart API Route#
Now that you've implemented the logic to add an item with a custom price to the cart, you'll expose this functionality in an API route.
An API Route is an endpoint that exposes commerce features to external applications and clients, such as storefronts. You'll create an API route at the path /store/carts/:id/line-items-metals that executes the workflow from the previous step to add a product variant with custom price to the cart.
Create API Route#
An API route is created in a route.ts file under a sub-directory of the src/api directory.
The path of the API route is the file's path relative to src/api. So, to create the /store/carts/:id/line-items-metals API route, create the file src/api/store/carts/[id]/line-items-metals/route.ts with the following content:

1import { MedusaRequest, MedusaResponse } from "@medusajs/framework"2import { HttpTypes } from "@medusajs/framework/types"3import { addCustomToCartWorkflow } from "../../../../../workflows/add-custom-to-cart"4 5export const POST = async (6 req: MedusaRequest<HttpTypes.StoreAddCartLineItem>, 7 res: MedusaResponse8) => {9 const { id } = req.params10 const item = req.validatedBody11 12 const { result } = await addCustomToCartWorkflow(req.scope)13 .run({14 input: {15 cart_id: id,16 item,17 },18 })19 20 res.status(200).json({ cart: result.cart })21}
Since you export a POST function in this file, you're exposing a POST API route at /store/carts/:id/line-items-metals. The route handler function accepts two parameters:
- A request object with details and context on the request, such as path and body parameters.
- A response object to manipulate and send the response.
In the function, you retrieve the cart's ID from the path parameter, and the item's details from the request body. This API route will accept the same request body parameters as Medusa's Add Item to Cart API Route.
Then, you execute the addCustomToCartWorkflow by invoking it, passing it the Medusa container, which is available in the request's scope property, then executing its run method. You pass the workflow's input object with the cart's ID and the item to add to the cart.
Finally, you return a response with the updated cart's details.
Add Request Body Validation Middleware#
To ensure that the request body contains the required parameters, you'll add a middleware that validates the incoming request's body based on a defined schema.
A middleware is a function executed before the API route when a request is sent to it. You define middlewares in Medusa in the src/api/middlewares.ts directory.
To add a validation middleware to the custom API route, create the file src/api/middlewares.ts with the following content:

1import { 2 defineMiddlewares,3 validateAndTransformBody,4} from "@medusajs/framework/http"5import { 6 StoreAddCartLineItem,7} from "@medusajs/medusa/api/store/carts/validators"8 9export default defineMiddlewares({10 routes: [11 {12 matcher: "/store/carts/:id/line-items-metals",13 method: "POST",14 middlewares: [15 validateAndTransformBody(16 StoreAddCartLineItem17 ),18 ],19 },20 ],21})
In this file, you export the middlewares definition using defineMiddlewares from the Medusa Framework. This function accepts an object having a routes property, which is an array of middleware configurations to apply on routes.
You pass in the routes array an object having the following properties:
matcher: The route to apply the middleware on.method: The HTTP method to apply the middleware on for the specified API route.middlewares: An array of the middlewares to apply. You apply thevalidateAndTransformBodymiddleware, which validates the request body based on theStoreAddCartLineItemschema. This validation schema is the same schema used for Medusa's Add Item to Cart API Route.
Any request sent to the /store/carts/:id/line-items-metals API route will now fail if it doesn't have the required parameters.
Prepare to Test API Route#
Before you test the API route, you'll prepare and retrieve the necessary data to add a product variant with a custom price to the cart.
Create Product with Metal Variant
You'll first create a product that has a Metal option, and variant(s) with values for this option.
Start the Medusa application with the following command:
Then, open the Medusa Admin dashboard at localhost:9000/app and log in with the email and password you created when you installed the Medusa application in the first step.
Once you log in, click on Products in the sidebar, then click the Create button at the top right.

Then, in the Create Product form:
- Enter a name for the product, and optionally enter other details like description.
- Enable the "Yes, this is a product with variants" toggle.
- Under Product Options, enter "Metal" for the title, and enter "Gold" for the values.
Once you're done, click the Continue button.

You can skip the next two steps by clicking the Continue button again, then the Publish button.
Once you're done, the product's page will open. You'll now add weight to the product's Gold variant. To do that:
- Scroll to the Variants section and find the Gold variant.
- Click on the three-dots icon at its right.
- Choose "Edit" from the dropdown.

In the side window that opens, find the Weight field, enter the weight, and click the Save button.

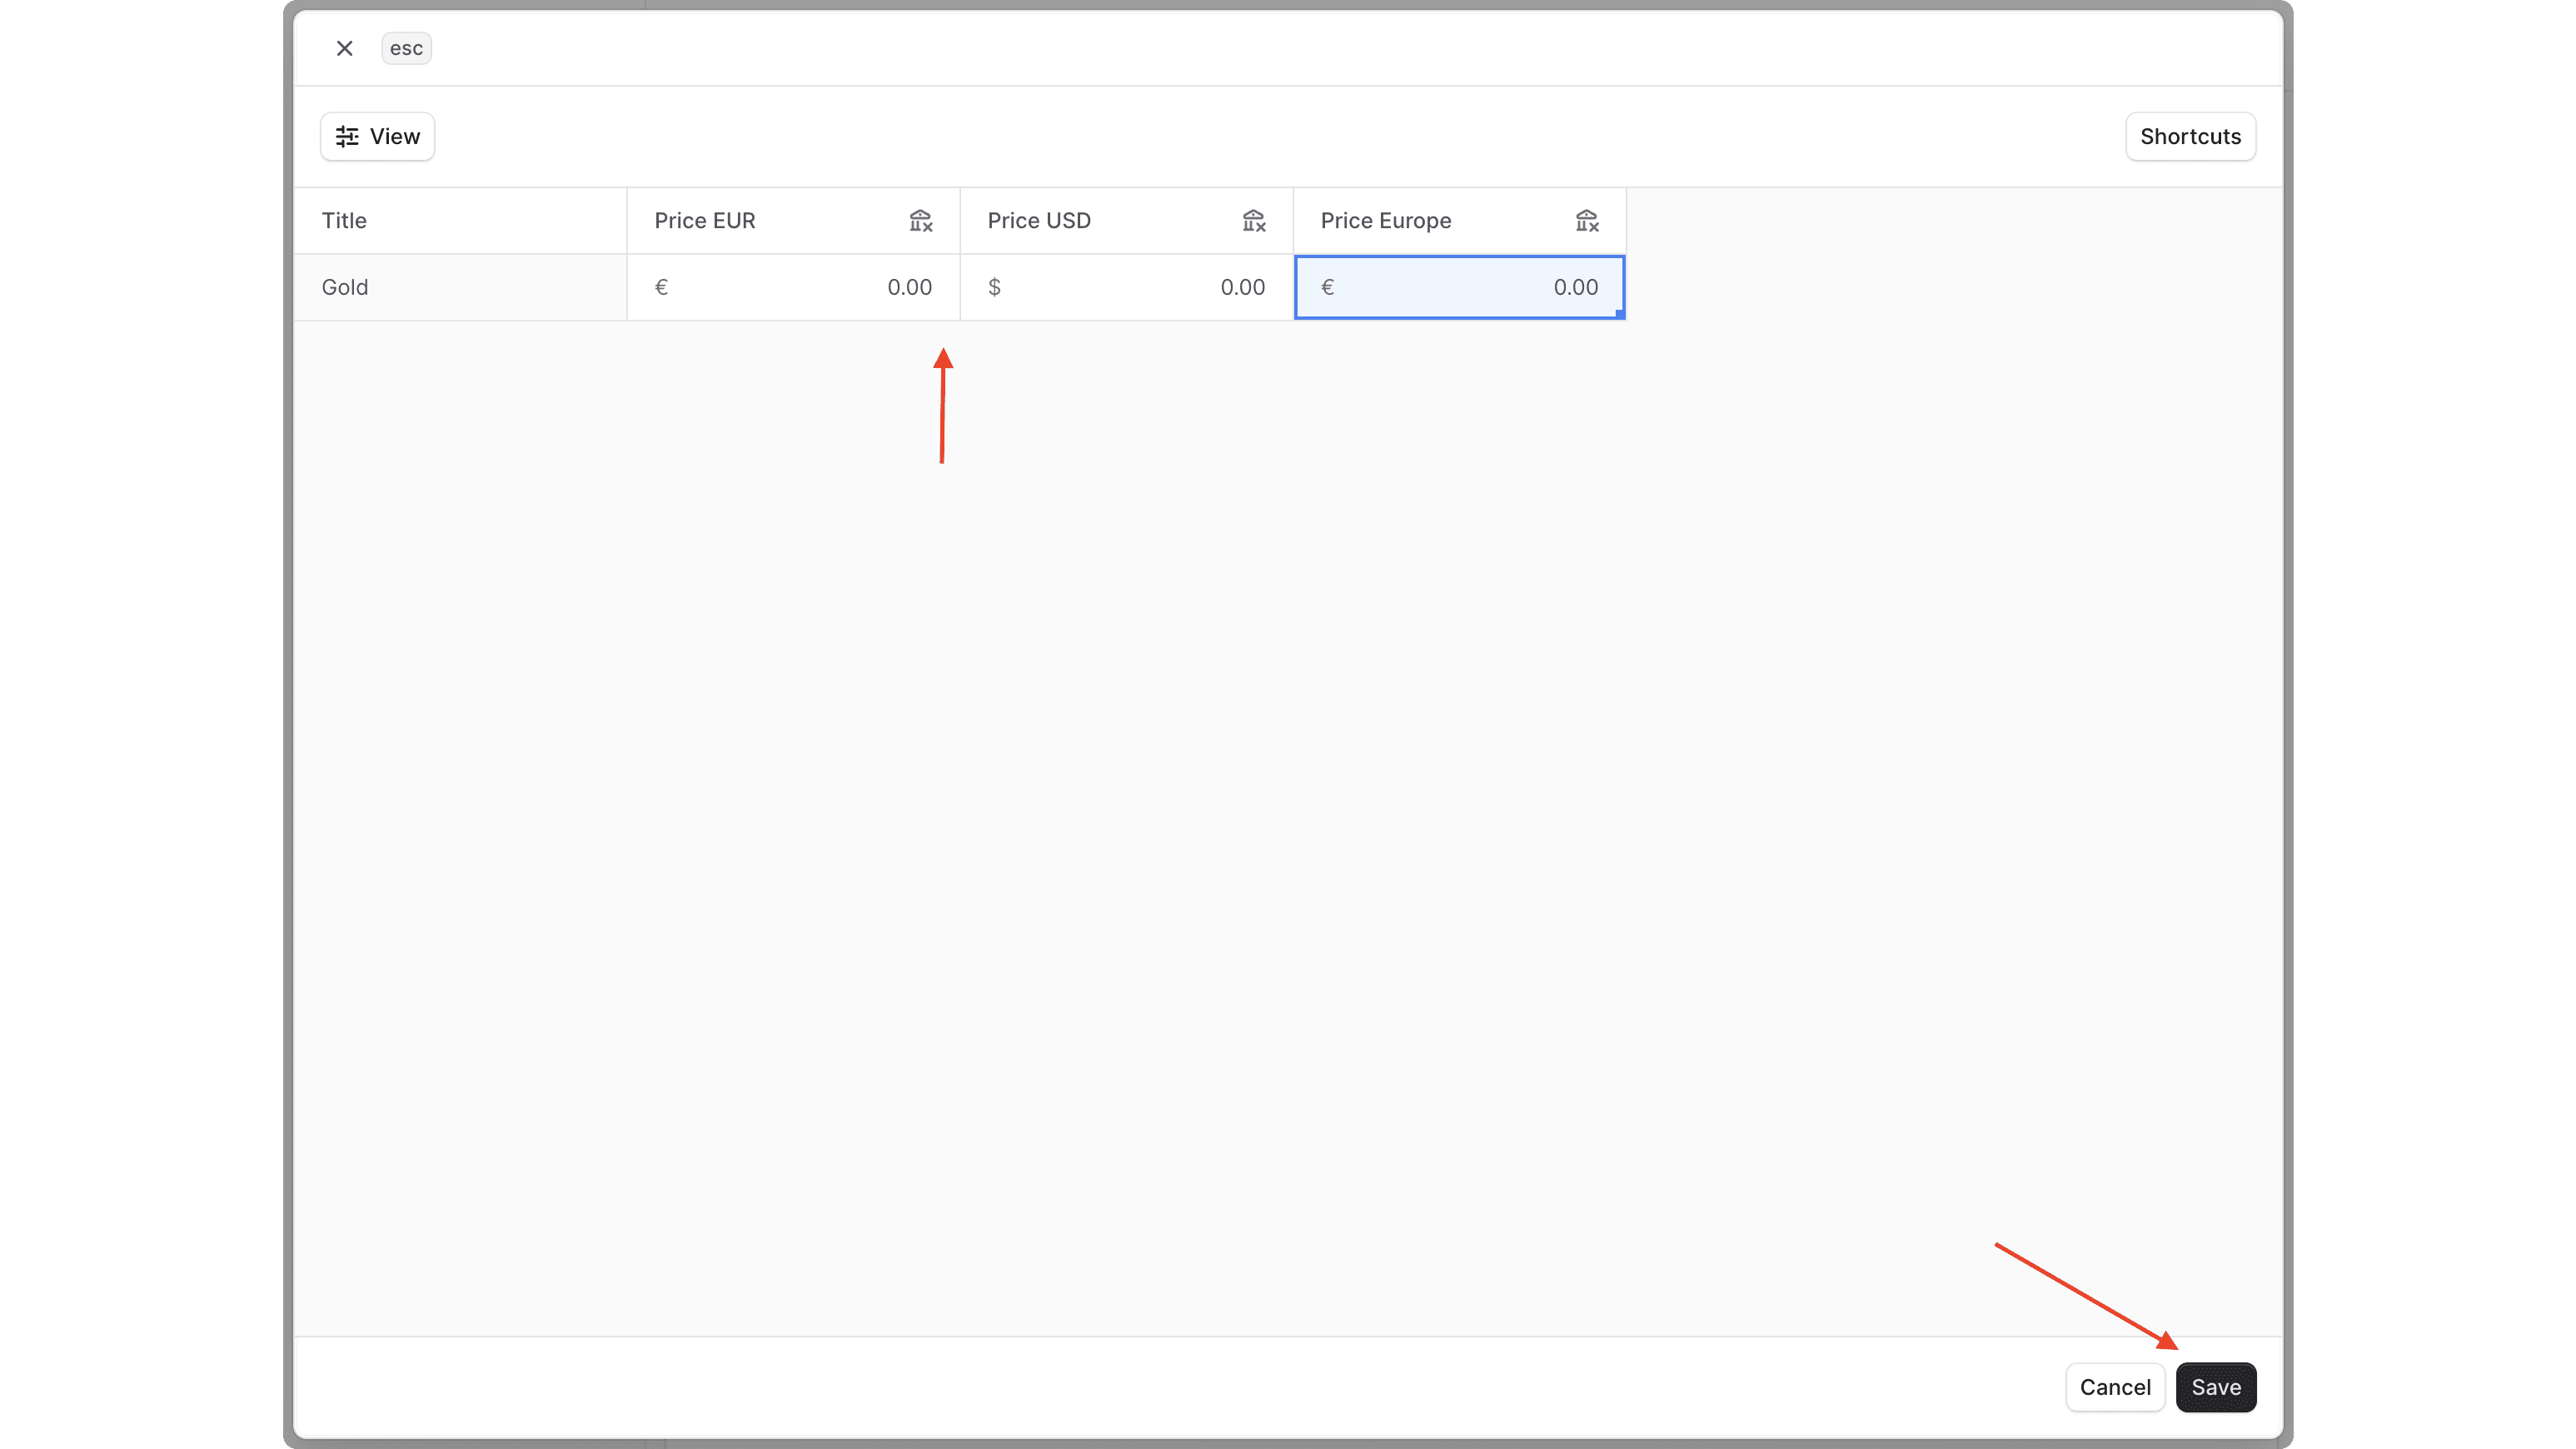
Finally, you need to set fixed prices for the variant, even if they're just 0. To do that:
- Click on the three-dots icon at the top right of the Variants section.
- Choose "Edit Prices" from the dropdown.

For each cell in the table, either enter a fixed price for the specified currency or leave it as 0. Once you're done, click the Save button.
You'll use this variant to add it to the cart later. You can find its ID by clicking on the variant, opening its details page. Then, on the details page, click on the icon at the right of the JSON section, and copy the ID from the JSON data.

Retrieve Publishable API Key
All requests sent to API routes starting with /store must have a publishable API key in the header. This ensures the request's operations are scoped to the publishable API key's associated sales channels. For example, products that aren't available in a cart's sales channel can't be added to it.
To retrieve the publishable API key, on the Medusa Admin:
- Click on Settings in the sidebar at the bottom left.
- Click on Publishable API Keys from the sidebar, then click on a publishable API key in the list.

- Click on the publishable API key to copy it.

You'll use this key when you test the API route.
Test API Route#
To test out the API route, you need to create a cart. A cart must be associated with a region. So, to retrieve the ID of a region in your store, send a GET request to the /store/regions API route:
Make sure to replace {api_key} with the publishable API key you copied earlier.
This will return a list of regions. Copy the ID of one of the regions.
Then, send a POST request to the /store/carts API route to create a cart:
Make sure to replace {api_key} with the publishable API key you copied earlier, and {region_id} with the ID of a region from the previous request.
This will return the created cart. Copy the ID of the cart to use it next.
Finally, to add the Gold variant to the cart with a custom price, send a POST request to the /store/carts/:id/line-items-metals API route:
Make sure to replace:
{api_key}with the publishable API key you copied earlier.{cart_id}with the ID of the cart you created.{variant_id}with the ID of the Gold variant you created.
This will return the cart's details, where you can see in its items array the item with the custom price:
The price will be the result of the calculation you've implemented earlier, which is the fixed price of the variant plus the real-time price of the metal, multiplied by the weight of the variant and the quantity added to the cart.
This price will be reflected in the cart's total price, and you can proceed to checkout with the custom-priced item.
Next Steps#
You've now implemented custom item pricing in Medusa. You can also customize the storefront to use the new API route to add custom-priced items to the cart.
If you're new to Medusa, check out the main documentation, where you'll get a more in-depth learning of all the concepts you've used in this guide and more.
To learn more about the commerce features that Medusa provides, check out Medusa's Commerce Modules.