S3
In this document, you’ll learn how to install the S3 plugin on your Medusa backend and use it for storage.
Overview
To upload and manage file assets in Medusa, you need a file service plugin responsible for hosting the files. Without a file service plugin, you will face issues while working with Medusa, such as when uploading images for products.
Medusa provides three different options to handle your file storage. This document focuses on using S3 to store images and files uploaded to the Medusa backend.
Prerequisites
Medusa Backend
A Medusa backend is required to be set up before following along with this document. You can follow the quickstart guide to get started in minutes.
Required Accounts
You need to create an AWS account to follow along with this documentation.
Create S3 Bucket
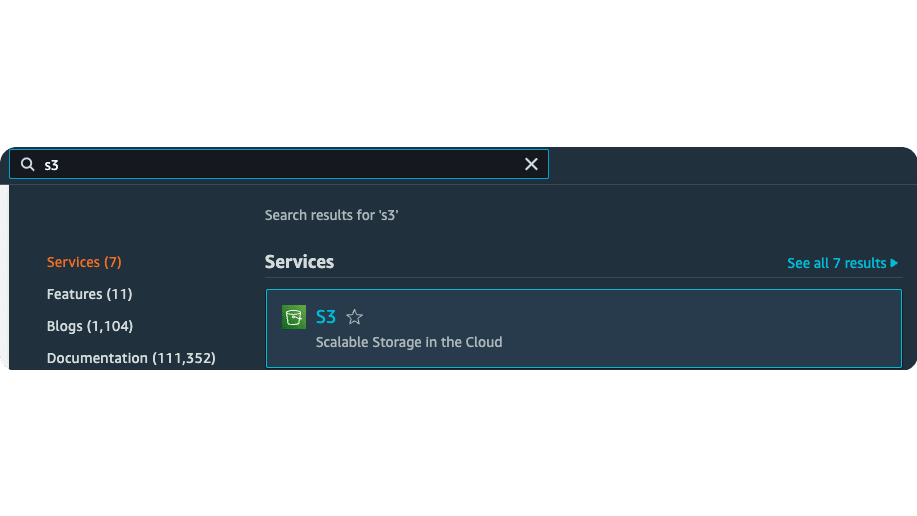
On your AWS Console, search for S3 in the search box at the top. Then, choose the first result you see which should be S3 under the Services category.
Then, on the new page that opens, click on Create Bucket button at the top right of the Buckets table.

The Create Bucket form will open. In the General Configuration section enter a name for the bucket and choose a region for the bucket. Both of the values of these fields are important as you’ll use them throughout the documentation.

Next, in the Object Ownership section, choose ACLs enabled. Then, two radio buttons will show below it. Choose Bucket owner preferred.

Then, in the “Block Public Access settings for this bucket” section, uncheck the “Block all public access” checkbox. This shows a warning message at the bottom of the section with another checkbox. Check the checkbox to ensure you understand that objects in the bucket are publicly accessible.

You can leave the rest of the fields in the form as is and scroll down to the end of the page. Then, click on the Create Bucket button.
Manage Bucket Policies
On the page of the bucket you just created, click on the Permissions tab. Then, scroll down until you find the Bucket policy section. Click on Edit in that section.
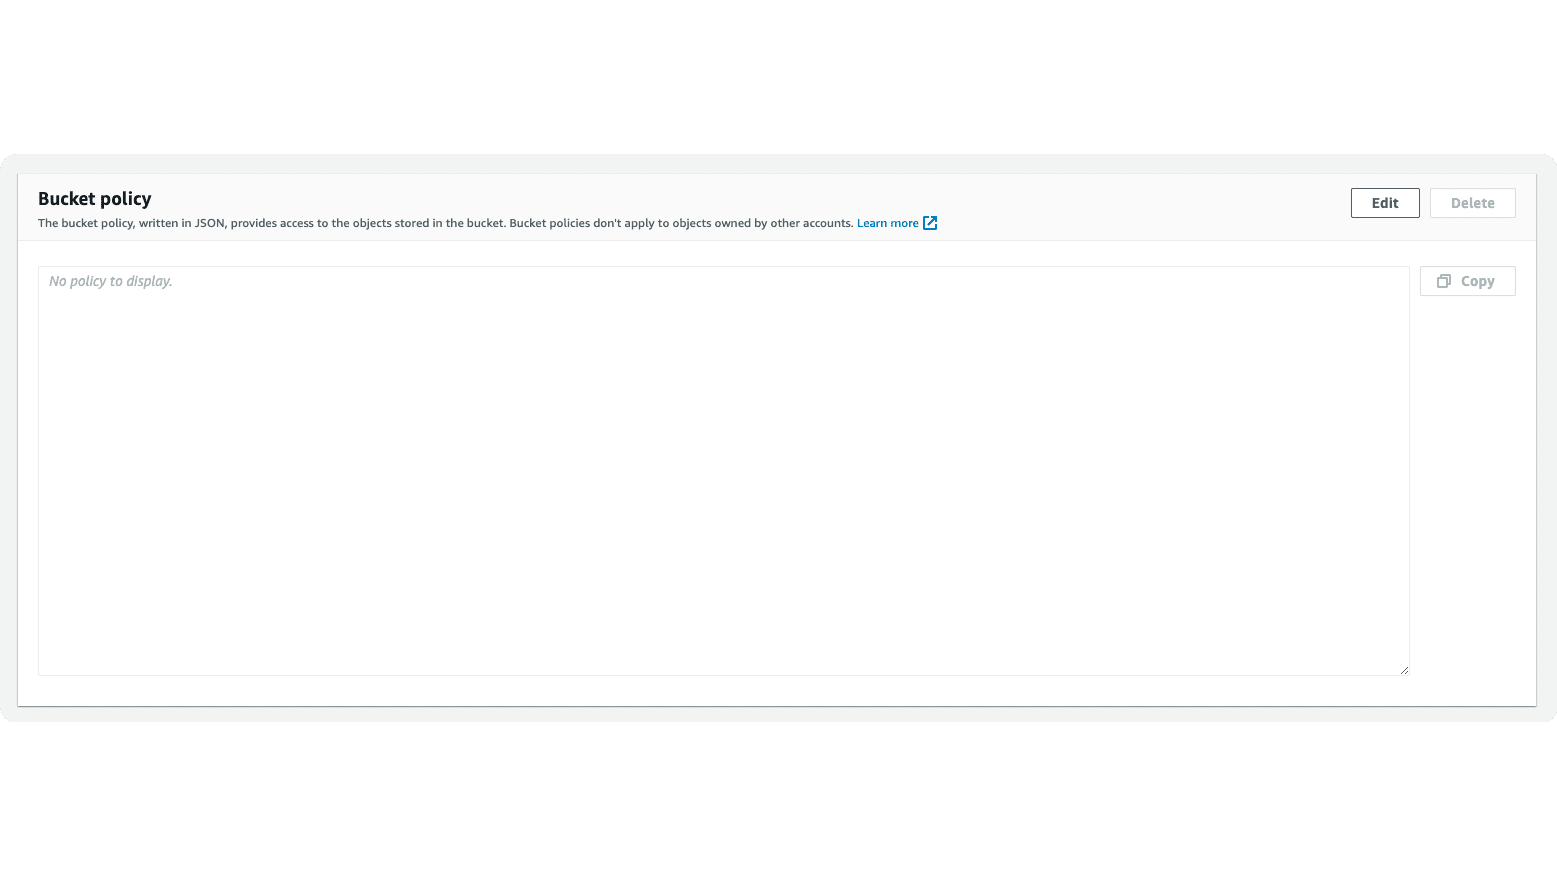
In the Edit Bucket Policy page, enter the following in the field:
Make sure to replace <YOUR_BUCKET_NAME> with the name of the bucket you created.
Once you’re done, scroll down and click on the Save changes button.
User Permissions
Your user must have the AmazonS3FullAccess policy attached to it. You can refer to this guide to learn how to add a policy if necessary.
Obtain Access Keys
You must obtain access keys for your user as you’ll use them to integrate the S3 plugin in Medusa with your bucket. To obtain the Access Key ID and the Secret Access Key, check out this guide.
Install the S3 Plugin
In the directory of your Medusa backend, run the following command to install the S3 Plugin:
Then, in medusa-config.js, add to the plugins array the following new item:
const plugins = [
  // ...
  {
    resolve: `medusa-file-s3`,
    options: {
        s3_url: process.env.S3_URL,
        bucket: process.env.S3_BUCKET,
        region: process.env.S3_REGION,
        access_key_id: process.env.S3_ACCESS_KEY_ID,
        secret_access_key: process.env.S3_SECRET_ACCESS_KEY,
        cache_control: process.env.S3_CACHE_CONTROL,
        // optional
        download_file_duration:
          process.env.S3_DOWNLOAD_FILE_DURATION,
        prefix: process.env.S3_PREFIX,
    },
  },
]
Where:
s3_url(required) is a string indicating the URL to your bucket. It’s in the formhttps://<BUCKET_NAME>.s3.<REGION>.amazonaws.com, where<BUCKET_NAME>is the name of the bucket and the<REGION>is the region the bucket is created in. If you’re not sure which region, on your bucket’s page on S3 click on Properties. You can then find the region under AWS Region. Make sure to only copy the code (for example,us-east-1).bucket(required) is a string indicating the name of the bucket you created.region(required) is a string indicating the region code of your bucket. For example,us-east-1.access_key_id(required) is a string indicating the Access Key ID that you created for your user.secret_access_key(required) is a string indicating the Secret Access Key that you created for your user.cache_control(default:max-age=31536000) is a string indicating the value for caching the objects in a web browser or CDN network. For example: cache object for 10 hours,max-age=36000download_file_duration(optional) is a string indicating the expiry duration for a download URL. For example, you can set the value to3600if you want the download URL to expire in 1 hour.prefix(optional) is a string indicating a prefix to apply on stored file names.
Make sure to also set these values in your environment variables as well:
If you have multiple storage plugins configured, the last plugin declared in the medusa-config.js file will be used.
Add AWS Configurations
You can pass additional AWS configurations, such as customUserAgent, in the plugin's options under the property aws_config_object. This property is an object that accepts AWS Configurations as its properties.
For example:
Make sure to define S3_CUSTOM_AGENT in your environment variables first.
Test the S3 Plugin
Run your Medusa backend with the following command:
Then, you can either test the plugin using the REST APIs or using the Medusa Admin.
On the Medusa Admin, create a new product and, in the Images section, upload an image then click Save. If the integration was successful, the product image will be uploaded successfully.

You can also check that the image was uploaded on the S3 bucket’s page.

Next.js Starter Template Configuration
If you’re using a Next.js Starter Template, you need to add an additional configuration that adds the S3 bucket domain name into the configured images’ domain names. This is because all URLs of product images will be from the S3 bucket.
If this configuration is not added, you’ll receive the error "next/image Un-configured Host”.
In next.config.js add the following option in the exported object:
Where:
<BUCKET_NAME>is the name of the S3 bucket you’re using<REGION>is the region of the S3 bucket (for example,eu-west-1). If your S3 URL doesn't use region in it, you may omit it to be instead<BUCKET_NAME>.s3.amazonaws.com.
Troubleshooting
Error: AccessControlListNotSupported: The bucket does not allow ACLs
See Also
- Check out more plugins you can add to your store
- Deploy the Medusa backend
- Install the Next.js Starter Template